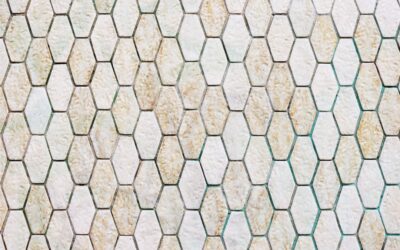
Most homeowners spend weeks choosing a backsplash tile and then pick the backsplash grout in five minutes at the checkout counter. That single decision shapes how the entire wall reads, how easily it cleans, and how long it stays sealed against splatter and steam. Switch the grout color from bright white to soft warm gray and a basic 3 by 6-inch subway tile suddenly looks expensive. Choose the wrong grout type and you will be scrubbing tomato stains and dish soap film for the next decade. Grout is structural, decorative, and load-bearing, all at once.
What Grout Actually Does
Grout fills the gap between tiles, locks each tile into the field, and creates a continuous waterproof barrier behind the wall. It absorbs minor seasonal movement, hides imperfections in tile edges, and finishes the install. Without grout, even waterproof tiles allow steam and grease to migrate into the wallboard within months.
Behind a kitchen stove and around a sink, grout takes a beating from oil, vinegar, salt, and citrus that ordinary wall paint never sees. The grout you choose has to handle all of it without staining, eroding, or breaking down.
Sanded vs Unsanded Grout
The first decision is whether your tile joint takes sanded or unsanded grout. The rule is simple.
- Unsanded: joints 1/16 to 1/8 inch wide. Smooth, easy to work, ideal for glass, polished marble, and metal tiles that sand could scratch.
- Sanded: joints 1/8 to 1/2 inch wide. Sand particles add structure and prevent cracking in wider joints. Used for most ceramic, porcelain, and natural stone backsplashes.
For zellige and handmade tiles where the joint varies, use sanded grout. For modern stacked subway tile with hairline joints, use unsanded.
Cement vs Epoxy Grout
The second decision is the binder. Cement-based grout has been the default for 100 years and works fine for most kitchens. Epoxy is the upgrade that solves cement’s biggest weaknesses.
Cement grout dries porous, absorbs spills, requires sealing, and stains over time. A quality cement grout like Mapei Ultracolor Plus FA or Custom Building Products Polyblend costs $15 to $25 per 10-pound bag and covers about 40 sq ft of subway tile.
Epoxy grout is non-porous, stain-proof, and never needs sealing. The two leaders are Mapei Kerapoxy and Laticrete SpectraLock Pro Premium. Plan on $80 to $120 per kit covering roughly 50 sq ft. Working time runs about 45 minutes, which makes installation harder for DIYers, but the result lasts 25 years without color change.
Choosing Grout Color
Three approaches dominate professional design.
- Tone on tone: Grout matches the tile color to make joints disappear. White tile with white grout looks seamless but stains faster.
- Soft contrast: One or two shades darker than the tile. A warm gray grout against white subway tile reads classic without screaming for attention.
- High contrast: Dark grout against light tile, like black grout with white subway. Bold, traditional, and easier to keep looking clean.
Avoid bright white grout behind a stove or sink. Within a year it will be permanently stained gray-brown despite your best cleaning efforts. Choose a warm beige or gray instead, which hides natural buildup gracefully.
Popular Grout Color Pairings
- White subway + Mapei Avalanche: clean, bright, classic.
- White subway + Mapei Bone or Pewter: warmer and more forgiving.
- White subway + Custom Charcoal: bold, high-contrast Brooklyn look.
- Marble hexagon + Mapei Frost or Silver Shadow: blends with veining.
- Zellige in pale blue + Mapei Light Almond: soft, beachy contrast.
- Slate or dark stone + Mapei Chocolate: rich, dramatic.
Joint Width and Tile Layout
Joint width is dictated by tile type and aesthetic. Subway tile traditionally uses a 1/16-inch joint with butt-set tiles, but rectified porcelain handles a 1/8-inch joint cleanly. Handmade zellige requires 1/8 to 3/16-inch joints because the tile edges are intentionally irregular.
Vertical stack patterns and herringbone layouts look best with thin contrasting grout that defines each tile. Brick-set or offset patterns work with either thin or moderate joints depending on tile size.
How to Apply Backsplash Grout
- Wait 24 hours after tile installation for thinset to cure.
- Clean joints of any debris and dust with a vacuum and damp sponge.
- Mix grout to the consistency of creamy peanut butter, letting it slake for 5 to 10 minutes.
- Apply with a rubber float held at a 45-degree angle, pressing grout deep into the joints.
- Hold the float at a 90-degree angle and scrape off excess on the diagonal.
- Wait 15 to 30 minutes for the grout to firm up.
- Wipe diagonally with a damp grout sponge, rinsing the sponge frequently and changing water every 30 sq ft.
- After the haze appears 1 to 2 hours later, buff off with a clean dry microfiber.
Total time for an average 30 sq ft backsplash runs about 3 to 4 hours.
Sealing Cement Grout
Cement grout needs sealing 48 to 72 hours after installation. Use a quality penetrating sealer like Aqua Mix Sealer’s Choice Gold, Miracle 511 Impregnator, or StoneTech Heavy Duty Sealer. Apply with a small foam brush or applicator bottle directly into the grout lines, avoiding the tile face.
Wait 5 to 10 minutes, then wipe excess off the tile with a clean cloth. Apply two coats for kitchen backsplashes. Reseal every 12 to 18 months in heavy-use kitchens. Epoxy grout skips this step entirely.
Cleaning and Maintenance
For routine cleaning, mix 1 tablespoon of pH-neutral dish soap into a quart of warm water and wipe the backsplash weekly. Avoid bleach, ammonia, and acidic cleaners that erode cement grout over time.
For stained grout, a paste of baking soda and hydrogen peroxide brushed into the joints with a toothbrush, left 10 minutes, then rinsed, brightens most stains without harsh chemicals. For deep stains, oxygen bleach products like OxiClean work better than chlorine bleach.
Common Grout Mistakes
- Choosing pure white grout behind a cooktop and watching it stain within months.
- Skipping the sealer on cement grout and dealing with permanent absorption stains.
- Mixing grout too wet, which causes pinholes and uneven color.
- Wiping too soon and pulling grout out of the joints.
- Using the wrong sponge pressure and creating low or scalloped joints.
When to Re-Grout an Old Backsplash
If grout has cracked, fallen out in places, or stained permanently despite cleaning, scrape it out with an oscillating multi-tool fitted with a carbide grout-removal blade and re-grout fresh. A typical 30 sq ft backsplash can be re-grouted in a Saturday afternoon for $40 to $80 in materials, and the result looks like a brand-new install.
Final Thoughts
The grout you choose has as much visual impact as the tile itself, plus all the responsibility of holding up to a working kitchen. Match the type to the joint, the color to the room’s tone, and the sealer to the binder, and the backsplash will look as good in year ten as it did the day it went in.