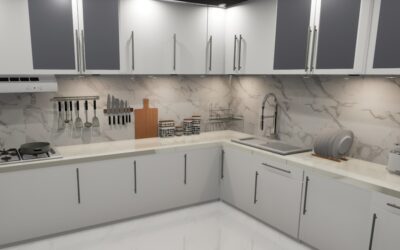
An outdoor kitchen backsplash has a completely different job description than the one inside your house. Indoors, a backsplash mostly catches sauce splatter and looks pretty. Outside, it has to shrug off freeze-thaw cycles, direct UV exposure, wind-driven rain, grill grease baked on at 500 degrees, and in coastal areas, salt spray. I’ve built outdoor kitchens across enough climate zones to tell you that most backsplash failures I get called to fix weren’t caused by bad installation. They were caused by someone picking an indoor material because it looked nice at the tile store. This guide covers what actually survives outside, what it costs, and the installation details that matter more outdoors than in.
Part of our Kitchen Remodeling guide — explore the full guide →
- The Three Forces That Kill Outdoor Backsplashes
- Porcelain Tile: The Default Answer
- Natural Stone: Beautiful, With Homework
- Brick and Concrete: The Workhorses
- Metal: Stainless and Copper Behind the Grill
- What to Avoid Outdoors
- Cost Comparison at a Glance
- Installation Details That Matter More Outside
- Design Choices That Age Well Outdoors
- Climate Notes: Not Every Yard Is the Same Test
The Three Forces That Kill Outdoor Backsplashes
Understanding the failure modes makes outdoor kitchen backsplash material selection obvious.
- Freeze-thaw. Any material that absorbs water will crack when that water freezes and expands. This is why ceramic wall tile, with absorption rates of 3 to 10 percent, spalls and pops off in climates that see frost. Outdoor-rated materials need absorption under 0.5 percent or need to be fully vitrified.
- UV degradation. Sunlight fades dyed materials, yellows many epoxies and resins, and breaks down some sealers within a season. Glass tile with painted backing and resin-based agglomerate “stone” are the usual victims.
- Thermal shock and grease. The zone behind a built-in grill cycles from ambient to very hot in minutes and collects aerosolized grease. Porous surfaces stain permanently; some laminates and PVC panels warp or off-gas.
Porcelain Tile: The Default Answer
If I could only recommend one material, it’s porcelain. True porcelain tile is fired to under 0.5 percent water absorption, which makes it inherently frost-proof, colorfast, and non-staining. It handles heat behind grills without complaint, cleans with degreaser and a scrub brush, and comes in every look imaginable, including convincing wood, marble, and concrete visuals. Cost runs $4 to $15 per square foot for material and $12 to $30 per square foot installed.
Two spec notes matter. First, confirm the tile is porcelain (ANSI A137.1) and not just “porcelain-look” ceramic; the box or spec sheet will state absorption. Second, use the right setting materials: a polymer-modified thinset rated for exterior use (ANSI A118.4 or better) and epoxy or high-performance cement grout. Standard mastic adhesive has no business outdoors, ever. It re-emulsifies with moisture and the tiles slide off the wall, usually in year two.
Natural Stone: Beautiful, With Homework
Granite, slate, and quartzite are dense enough for exterior walls in any climate and look spectacular as a backsplash, especially as a full-height slab behind a grill. Granite slab runs $40 to $100 per square foot installed; stacked-stone ledger panels run $8 to $20 per square foot material and $20 to $40 installed. Ledger panels are the popular pick because they hide imperfect masonry behind them and their texture disguises grease staining.
The homework: seal any stone with an outdoor-rated penetrating sealer annually, and skip the soft, porous stones entirely. Marble etches from grill-cleaning chemicals and acidic marinades, limestone and travertine absorb water and spall in freeze climates, and honed dark stones show grease halos behind cooking zones. Dense granite and quartzite are the safe end of the stone aisle.
Brick and Concrete: The Workhorses
Thin brick veneer gives a permanent, heatproof, zero-drama backsplash for $10 to $25 per square foot installed, and it pairs naturally with masonry-built outdoor kitchens. Its texture hides everything; its only downside is that grease soaks into unsealed brick, so hit it with a masonry sealer after installation. Poured or panel concrete and stucco finishes are similarly indestructible, and stucco is the budget champion at $8 to $15 per square foot, though it wants repainting or resealing every five to seven years and is the hardest surface here to scrub grease from.
Metal: Stainless and Copper Behind the Grill
Stainless steel sheet is the pro-kitchen answer for the direct grill zone: completely non-combustible, unaffected by heat, and wipeable in seconds. Use 304-grade minimum, or 316 within a couple miles of saltwater, because lower grades tea-stain outdoors. Expect $20 to $45 per square foot fabricated and installed. Copper builds a living patina outside and is equally weatherproof, at $30 to $60 per square foot. Both dent and both show scratches, so I usually spec metal as a 30-to-42-inch-wide panel behind the grill flanked by tile or stone, which also solves the clearance-to-combustibles question many grill manuals raise.
What to Avoid Outdoors
- Standard ceramic wall tile in any freeze climate — it will spall.
- Glass tile with painted or foil backing — UV and moisture attack the backing and the color blotches. Some through-body glass is exterior-rated; verify in writing.
- Peel-and-stick tile of any kind — adhesives fail with temperature swings, usually within one summer.
- Laminate and PVC wall panels — warping, fading, and heat limits.
- Grout without polymer or epoxy fortification — freeze-thaw grinds cheap grout to powder.
Cost Comparison at a Glance
| Material | Installed $/sq ft | Freeze-thaw | Behind-grill heat | Maintenance |
|---|---|---|---|---|
| Porcelain tile | $12–$30 | Excellent | Excellent | Very low |
| Granite/quartzite slab | $40–$100 | Excellent | Excellent | Annual seal |
| Stone ledger panel | $20–$40 | Excellent | Excellent | Annual seal |
| Thin brick veneer | $10–$25 | Excellent | Excellent | Seal for grease |
| Stainless steel (304/316) | $20–$45 | Excellent | Best | Wipe down |
| Stucco | $8–$15 | Good | Good | Recoat 5–7 yrs |
Installation Details That Matter More Outside
- Substrate is everything. Tile and stone go over cement backer board or masonry, never over exterior-grade plywood alone or drywall of any kind. On framed outdoor kitchen islands, I want cement board with a liquid-applied waterproofing membrane behind any splash zone near a sink.
- Use movement joints. Outdoor temperature swings move materials far more than indoors. Leave a caulked (not grouted) soft joint where the backsplash meets the countertop and at every change of plane and every 8 to 12 feet of run, filled with a color-matched exterior sealant.
- Slope and drainage. Any ledge or cap above the backsplash needs a slight outward slope so water sheds instead of sitting on grout lines.
- Check grill clearances. Built-in grill manuals specify clearance to combustibles behind and beside the unit. Masonry, tile over cement board, and metal all satisfy this; wood framing hiding two inches behind a thin panel may not. This is a real fire issue, not fine print.
- Seal on a schedule. Stone, brick, and cement grout get resealed annually in grill zones. Put it on the same calendar reminder as winterizing the water line.
Design Choices That Age Well Outdoors
An outdoor kitchen backsplash also has to look good through pollen season and August dust, so mid-tone colors and textured surfaces are your friends: they hide pollen, dust, water spots, and the inevitable grease shadow behind the burners. High-gloss dark tile looks incredible on install day and shows every water spot by the weekend. Larger tiles mean fewer grout lines to maintain, so I lean toward 12×24 porcelain or ledger stone over mosaic sheets outside. Run the backsplash at least 6 to 8 inches high along prep zones and full height (18 to 36 inches) behind cooking zones, and cap an exposed top edge with bullnose, a metal edge profile, or the counter stone itself so water can’t get behind the assembly.
Climate Notes: Not Every Yard Is the Same Test
Where you build changes how hard each rule applies. In the Sun Belt, freeze-thaw drops off the list but UV moves to the top: south- and west-facing backsplashes fade dyed grout and cook sealers, so favor through-body porcelain and light-to-mid tones that hide chalking. In the Upper Midwest and Northeast, absorption is everything; verify frost ratings in writing and grout with epoxy, because one saturated autumn followed by a hard freeze will find any shortcut by spring. Coastal builds add salt to the exam, which mostly punishes metal: specify 316 stainless within a couple miles of the shore, rinse panels monthly, and expect copper to patina at double speed. Desert Southwest installs deal with thermal shock, a 60-degree surface swing between a summer afternoon and midnight, so movement joints earn their keep there more than anywhere. None of this changes the material rankings; it changes which spec line you refuse to compromise on.
If you’re deciding right now, here’s my honest shortcut: porcelain tile over cement board with epoxy grout for most of the run, a stainless panel directly behind the grill if you cook hard, and stone ledger panel if the kitchen is masonry-built and you want texture. Any of those combinations will outlive the grill itself. Spend the money you save on the setting materials and waterproofing, because outdoors, the stuff behind the backsplash decides whether it lasts three years or thirty.