The backsplash is the design moment of any kitchen or bathroom — a vertical canvas where you can take creative risks that would be impractical on floors or countertops. The right backsplash tile ideas can transform a plain kitchen into a designer showpiece, tie together disparate design elements, or serve as the singular focal point that defines a room’s personality.
- Subway Tile Variations
- Herringbone & Chevron Patterns
- Zellige & Moroccan Tile
- Penny Round & Mosaic Backsplash
- Stacked & Vertical Formats
- Mixed Materials & Open Shelving Integration
- Full-Height Backsplash
- Peel-and-Stick Options
- Behind the Stove: Special Considerations
- Cost Comparison by Style
- Frequently Asked Questions
This guide covers every major backsplash style from the timeless to the trending — subway tile variations, herringbone patterns, handmade zellige, penny rounds, stacked designs, mixed materials, full-height installations, and budget-friendly peel-and-stick options. Each style includes practical information about cost, installation complexity, and the kitchen or bathroom settings where it works best.
Subway Tile Variations
Subway tile has been a backsplash staple for over a century — and it is not going anywhere. The classic 3×6 white subway tile remains the single most popular backsplash choice in North America because it is affordable, timeless, and complements virtually any kitchen or bathroom style. But the subway tile category has expanded far beyond the standard white rectangle.
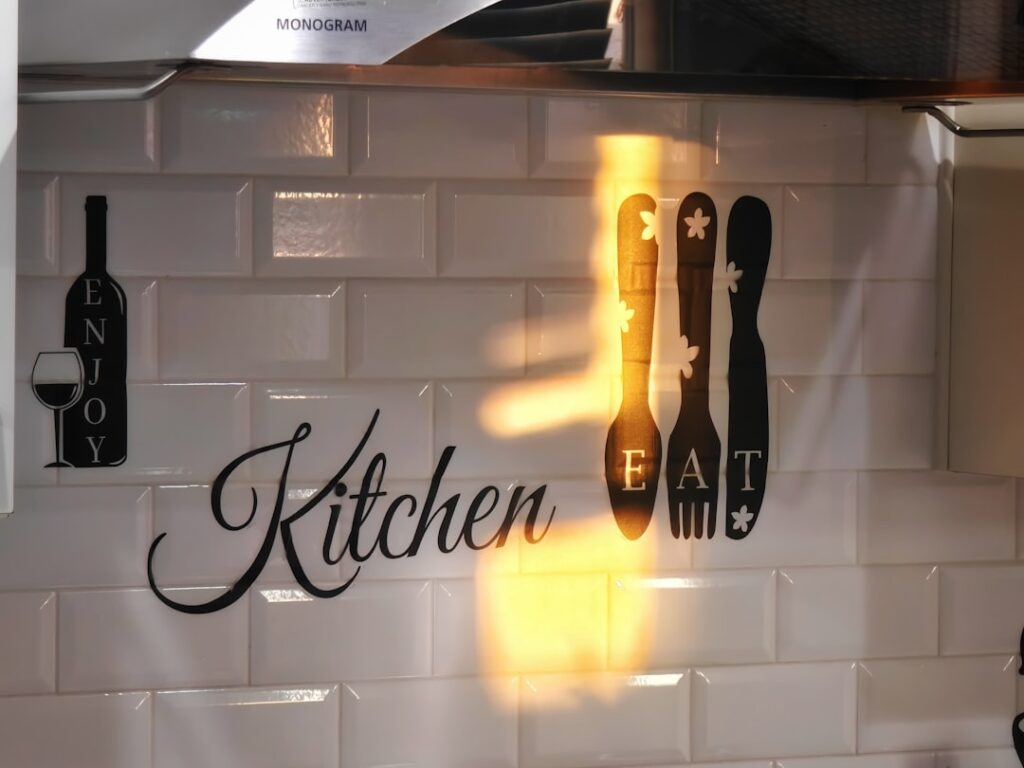
Classic 3×6 running bond. The traditional layout with a half-offset pattern. White with white grout creates a clean, seamless look. White tile with dark grout (charcoal, black) defines each tile individually for a more graphic, industrial aesthetic. This is the safest choice for maximizing resale value.
Elongated subway (4×12, 4×16). Longer subway tiles feel more contemporary and create a horizontal emphasis that makes kitchens feel wider. The reduced number of grout lines creates a cleaner, more streamlined appearance. This proportion is currently the fastest-growing subway format in 2026.
Handmade-look subway. Tiles with slightly irregular edges, undulating surfaces, and subtle color variations that mimic handmade production. This imperfect aesthetic adds warmth and character — particularly popular in farmhouse, cottage, and Mediterranean kitchens. Brands like Clé, Fireclay, and Bedrosians offer excellent handmade-look options.
Colored subway tile. Moving beyond white, colored subway tiles in sage green, navy blue, dusty pink, and warm terra-cotta are defining kitchen design in 2026. A colored subway backsplash pairs beautifully with white cabinetry, creating a focal point without overwhelming the space.
Beveled subway. The beveled edge catches light and creates shadow lines that add dimensional interest to the classic shape. Beveled subway tile is particularly effective in kitchens with limited natural light, as the faceted edges create subtle visual movement.
For a complete deep dive, see our subway tile design guide.
Herringbone & Chevron Patterns
Herringbone and chevron patterns transform ordinary rectangular tiles into dynamic, eye-catching backsplashes. Both create a V-shaped zigzag, but they differ in execution.
Herringbone uses standard rectangular tiles (subway tiles work perfectly) laid at 45-degree angles so the short end of each tile meets the long side of the next. The result is a classic zigzag pattern with staggered edges. Herringbone works with any rectangular tile you already like — it is the pattern, not the tile, that creates the visual impact.
Chevron uses tiles that are cut at an angle (parallelogram shape) so the zigzag forms clean, pointed V shapes without staggered edges. Chevron creates a more refined, directional pattern but requires specially shaped tiles — you cannot create a true chevron with standard rectangular tiles.
Design tips for herringbone backsplash:
- Vertical herringbone draws the eye upward and adds height to the kitchen
- Horizontal herringbone emphasizes width and creates movement along the counter
- White or light gray herringbone with minimal grout contrast is subtle and elegant
- Bold contrast (dark tile, light grout) makes the pattern the star
- Herringbone is more labor-intensive to install than running bond, adding 20% to 30% to installation cost
Zellige & Moroccan Tile
Zellige tile has become one of the most sought-after backsplash materials in contemporary kitchen and bathroom design. Originating from Morocco, zellige is a handmade clay tile characterized by its glossy, irregular glaze, slightly uneven edges, and rich color depth that varies from tile to tile.
What makes zellige special: No two zellige tiles are identical. The handmade production process creates subtle variations in color, thickness, and surface texture that give zellige installations an organic, artisanal quality impossible to replicate with machine-made tiles. The glazing process produces colors with unusual depth — a zellige green is not a flat green but a complex, shifting surface that catches light differently at every angle.
Authentic vs porcelain zellige-look: Authentic zellige tile (from brands like Clé, Zia Tile, and imported Moroccan producers) costs $15 to $35 per square foot and requires careful installation due to the irregular thickness. Porcelain zellige-look tiles replicate the appearance at $5 to $12 per square foot with the consistent thickness and easy installation of standard porcelain. Both look beautiful — the choice depends on budget and whether the tactile imperfection of authentic zellige matters to you.
Popular zellige colors for 2026: Weathered white, sage green, terracotta, ocean blue, and warm blush. The weathered white (a soft, off-white with slight golden undertones) is the most versatile and the current designer favorite.
Moroccan patterned tile: Beyond plain zellige, Moroccan encaustic tiles feature geometric patterns in bold colors. These are statement tiles — a single wall of Moroccan pattern tile can define an entire kitchen’s aesthetic. Use patterned tile as a feature panel behind the stove with simpler tile on the surrounding walls to avoid visual overload.
Penny Round & Mosaic Backsplash
Mosaic tiles — including penny rounds, hexagons, and artistic blends — create intricate backsplash designs with maximum visual texture. Most mosaics come pre-mounted on mesh sheets for easier installation.
Penny round tiles. The classic circle shape in 3/4-inch to 1-inch diameter creates a playful, textured surface. White penny rounds are vintage-inspired; matte black is dramatic and modern; mixed metallic finishes (copper, gold, silver) create a sophisticated shimmer. Penny round backsplashes work beautifully in both kitchens and bathrooms.
Hexagonal mosaics. Small hex tiles (1 to 2 inches) create a honeycomb pattern that adds geometric interest without the boldness of a patterned tile. Marble hex mosaics in white Carrara or Calacatta bring luxury to the backsplash at a relatively modest cost. Mixed-finish hex mosaics (matte and glossy in the same sheet) add subtle dimension.
Designer mosaic blends. Pre-designed mosaic sheets that combine multiple tile shapes, colors, and materials (glass, stone, metal, ceramic) in artistic patterns. These are the simplest way to achieve a complex, professional-looking backsplash design. Prices range from $8 to $50+ per square foot depending on materials and complexity.
Glass mosaic tile. Glass tiles catch and reflect light, making them excellent for dark kitchens or small bathrooms that need visual brightness. Glass mosaics in blue, green, and iridescent finishes create a luminous quality that no other material can match. Note that glass tile requires specific thin-set adhesive (white or glass-specific) because the adhesive color shows through translucent glass tiles.
Stacked & Vertical Formats
The stacked pattern (also called straight stack or grid pattern) aligns tile edges in a precise grid without any offset. This modern layout creates a clean, architectural quality that contrasts with the more casual running bond pattern.
Vertical stacked subway. Turning standard subway tiles vertical and stacking them in a straight grid is one of the strongest backsplash trends of 2026. The vertical orientation draws the eye upward, adds height to the kitchen, and creates a distinctly modern look with a familiar tile shape. This layout is especially effective with elongated tiles (4×12 or 4×16).
Skinny stacked tiles. Ultra-thin tiles (1×6, 2×8, or 1×12) stacked vertically create a linear, reeded texture reminiscent of fluted panels. This look pairs well with contemporary and minimalist kitchens. Available in ceramic, porcelain, and glass.
Stacked large format. Large tiles (6×12, 8×24) in a stacked pattern create a bold, graphic wall with minimal grout lines. The precision required for a stacked layout means that grout line width must be absolutely consistent — any variation is immediately visible. Use tile spacers carefully and hire an experienced installer.
Mixed Materials & Open Shelving Integration
Modern kitchen design increasingly combines backsplash tile with open shelving, creating a layered look that is both functional and decorative.
Tile behind open shelves. Running tile from counter to ceiling behind open shelving creates a cohesive backdrop that unifies the wall. The tile is visible between and around the shelves, providing color and texture that frames displayed items. This approach requires careful planning — tile the entire wall first, then mount shelves over the completed backsplash.
Tile to ceiling with upper cabinets. Extending backsplash tile all the way to the ceiling (rather than stopping at the bottom of upper cabinets) creates a dramatic, floor-to-ceiling effect. This works especially well with simple tiles (subway, stacked) where the extended coverage adds impact without overwhelming the space.
Mixed material combinations:
- Tile backsplash with a natural stone accent panel behind the range
- Subway tile surrounding a decorative mosaic feature panel
- Two-tone backsplash: one tile on the lower portion, a different tile above
- Tile combined with metal (stainless steel or copper) behind the stove
Full-Height Backsplash
A full-height backsplash extends from the countertop to the ceiling on one or more walls. This treatment has moved from high-end custom kitchens into mainstream design as homeowners recognize its transformative impact.
Why go full-height: A counter-to-ceiling backsplash creates a dramatic visual statement, protects the wall entirely (particularly useful behind ranges), and makes the kitchen feel taller and more finished. It eliminates the visual interruption where tile stops and painted drywall begins.
Best tiles for full-height installation: Simple, repeating patterns (subway, stacked, herringbone) work best for full-height backsplash because the extended coverage does not overwhelm the space. Avoid busy patterns for full-height treatment — a bold Moroccan tile that looks stunning in a 4-square-foot area behind the stove can be exhausting across 40 square feet of wall.
Cost impact: Full-height backsplash typically triples the square footage compared to a standard 4-inch or 18-inch backsplash. A standard backsplash for a 10-foot kitchen wall might cover 15 square feet; full-height coverage on the same wall covers 40+ square feet. Plan your budget accordingly.
For more kitchen backsplash inspiration, see our kitchen backsplash ideas guide.
Peel-and-Stick Options
Peel-and-stick backsplash tiles have improved dramatically in recent years and are now a viable option for renters, budget-conscious homeowners, and anyone who wants to change their backsplash without a permanent commitment.
Modern peel-and-stick quality: The best peel-and-stick tiles (from brands like Tic Tac Tiles, Art3d, and Smart Tiles) use thick, dimensional gel or composite materials that look and feel surprisingly close to real tile. They are heat-resistant (safe behind stoves), waterproof, and removable without wall damage — ideal for rental properties.
Limitations: Peel-and-stick tile does not have the depth, texture, or material quality of real tile. It is clearly not real tile upon close inspection or touch. The adhesive can fail in high-humidity environments (behind stovetops with boiling water, in steamy bathrooms) unless the tiles are rated for those conditions. Maximum lifespan is 5 to 10 years compared to 20+ years for real tile.
Cost: Peel-and-stick backsplash tile costs $5 to $15 per square foot — less than most real tile when you factor in the savings from no thin-set, no grout, and no professional installation. A full kitchen backsplash can be completed in an afternoon for $100 to $300.
Behind the Stove: Special Considerations
The area directly behind the stove (range) is the most demanding backsplash location. It faces cooking grease, splattering oil, steam, and direct heat from burners. Design choices for this area must balance aesthetics with practicality.
Heat resistance. Porcelain and ceramic tiles are naturally heat-resistant and safe behind any stove. Natural stone is also heat-safe. Glass tile is heat-resistant but can crack from thermal shock — do not place glass tile directly behind a commercial-style range with high-BTU burners. Peel-and-stick tiles should maintain at least 6 inches of clearance from gas burner flames.
Grease cleaning. Smooth, glazed surfaces clean more easily than textured or matte surfaces. Behind the stove, glossy or semi-glossy tile finishes are practical because grease wipes away easily. Avoid deeply textured, unglazed, or natural stone tiles directly behind the stove — they trap grease in surface pores and are difficult to clean.
Grout considerations. Standard sanded grout behind the stove will stain from cooking oil over time, even with regular sealing. Use epoxy grout for the behind-stove area — it is non-porous, stain-proof, and much easier to clean than cement-based grout. Alternatively, use large tiles with minimal grout lines to reduce the grout maintenance area.
For full tile backsplash project planning, visit our tile backsplash installation guide.
Cost Comparison by Style
| Backsplash Style | Material Cost (per sq ft) | Installation Cost (per sq ft) | Total (15 sq ft backsplash) |
|---|---|---|---|
| Classic subway (ceramic) | $2 – $6 | $8 – $15 | $150 – $315 |
| Elongated subway (porcelain) | $4 – $10 | $8 – $15 | $180 – $375 |
| Herringbone layout | $3 – $8 (tile) + pattern surcharge | $12 – $20 | $225 – $420 |
| Authentic zellige | $15 – $35 | $15 – $25 | $450 – $900 |
| Porcelain zellige-look | $5 – $12 | $8 – $15 | $195 – $405 |
| Penny round mosaic | $6 – $15 | $10 – $18 | $240 – $495 |
| Glass mosaic | $8 – $25 | $12 – $20 | $300 – $675 |
| Peel-and-stick | $5 – $15 | $0 (DIY) | $75 – $225 |
Frequently Asked Questions
What is the most timeless backsplash tile?
White subway tile in a running bond (offset) pattern is the most timeless backsplash choice. It has been popular for over 100 years and complements every kitchen style from traditional to modern. For a slightly updated but equally timeless look, choose an elongated subway (4×12) in white or soft gray.
How high should a kitchen backsplash be?
A standard kitchen backsplash extends from the countertop to the bottom of the upper cabinets — typically 18 inches. Behind the stove, the backsplash often extends higher to meet a range hood. Full-height backsplashes (counter to ceiling) are a growing trend that adds drama and complete wall protection.
Can I install a tile backsplash myself?
Yes, a backsplash is one of the most DIY-friendly tile projects. The vertical surface is easier to tile than a floor, the area is relatively small, and simple patterns like running bond subway tile require minimal cutting. Budget a full weekend for a first-time DIYer. Herringbone and mosaic patterns are more difficult and may warrant professional installation.
Is peel-and-stick backsplash worth it?
Peel-and-stick backsplash is worth it for renters, temporary solutions, and budget renovations under $300. It is not a substitute for real tile in a permanent home renovation — it lacks the depth, durability, and resale value of real tile. Modern peel-and-stick products look good but not great, and they typically need replacement within 5 to 10 years.
What backsplash goes with white cabinets?
Nearly any backsplash works with white cabinets — which is one reason white cabinetry is so popular. Top pairings include white subway tile for a clean look, sage or blue subway for a pop of color, marble-look porcelain for luxury, herringbone for pattern interest, and zellige for artisanal warmth. White cabinets are a neutral canvas that allows the backsplash to be the design statement.
Should the backsplash match the countertop?
The backsplash does not need to match the countertop, but they should coordinate. Common approaches include choosing a backsplash that picks up a secondary color in the countertop, using a contrasting but complementary material (marble-look backsplash with quartz counter), or matching the backsplash to the cabinetry rather than the countertop. Avoid matching everything exactly — some contrast creates visual interest.
Prefer to explore on your own?
See how new flooring looks in your actual room in seconds — free, no signup.
Try the free Floor Studio →