The most expensive flooring failures almost never start with the flooring; they start with the subfloor underneath it. That is where self level flooring compound earns its keep. This pourable cement-based underlayment flows across a rough or dipped substrate and settles into a flat, smooth plane that tile, vinyl, laminate, or epoxy can bond to with confidence. Used correctly, it turns a wavy slab into a dead-flat canvas. Used carelessly, it sets in 20 minutes into a lumpy mess that costs more to grind out than it did to pour. Knowing the workflow is the whole job.
What Self-Leveling Compound Actually Is
Self-leveling compound, sometimes called SLU or self-leveling underlayment, is a polymer-modified cement that mixes to a thin, almost pourable consistency. Gravity does most of the work: the slurry seeks its own level and fills low spots, then cures to a hard, smooth surface in a matter of hours. It is not a finished floor on its own in most cases, and it is not a structural slab. Think of it as the bridge between an imperfect substrate and the finish flooring that goes on top.
Products come in two broad families. Standard self-levelers handle thicknesses from about 1/8 inch up to 1 inch in a single pour, while deep-pour formulations handle greater depths. Matching the product to your depth is the first decision, because over- or under-pouring the wrong formula leads to cracking or slow cure.
When You Need It
Not every floor needs leveling, so check first. Lay a long straightedge or level across the room and look for gaps. Most tile and rigid plank manufacturers want the substrate flat to within 3/16 inch over 10 feet, and many call for 1/8 inch over 6 feet for large-format tile.
- Dipped or wavy concrete slabs that won’t pass the straightedge test.
- Old subfloors with high and low spots after removing previous flooring.
- Over radiant heat tubing to encase the lines and create a smooth surface.
- Transitions where two rooms meet at slightly different heights.
The Pros and Cons
The upside is a genuinely flat floor, which prevents hollow spots under tile, lippage at plank edges, and the telegraphing of subfloor imperfections through thin vinyl. It cures fast, letting you keep a project moving, and it can encase radiant heat lines cleanly. The downside is the unforgiving working time. Once mixed, a standard product gives you roughly 10 to 20 minutes before it starts to set, so there is no leisurely cleanup mid-pour. Prep mistakes, especially skipping primer, cause the layer to delaminate or develop pinholes. And on a large or deep area the material cost adds up quickly.
Step-by-Step: Pouring a Self-Level Floor
Speed and preparation matter more than skill here. Have everything staged before you open a single bag.
- Clean and repair: remove all dust, oil, paint, and loose material. Patch large cracks and fill any holes so the slurry doesn’t drain away.
- Set the perimeter: seal gaps, cracks, and the base of walls with caulk or foam backer rod so the liquid can’t escape into other rooms or down expansion joints.
- Prime: roll on the manufacturer’s primer and let it tack up. Priming controls the substrate’s absorption, stops pinholes, and is the single step most failures skip. Concrete usually needs a diluted first coat, then a second.
- Mix: add powder to clean water in the exact ratio, mixing with a drill and paddle for the specified time, typically two minutes, to a lump-free slurry. Mix only what you can place in the working window.
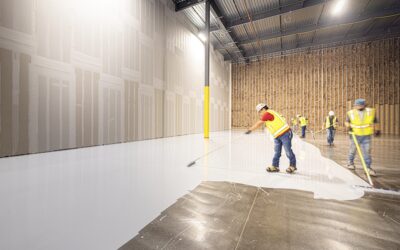
- Pour and spread: pour in ribbons and let it flow. Help it along with a gauge rake set to your target depth, then break surface tension with a spiked roller to release trapped air.
- Cure: keep foot traffic off for the stated time, often 4 to 16 hours before walking and longer before installing finish flooring. Maintain room temperature near 50 to 80 degrees F for a clean cure.
Going Over Concrete Versus Wood
On concrete, the main tasks are profiling the surface so the primer grips and confirming the slab is dry; pouring over a damp or moisture-emitting slab traps water and invites failure of the finish floor later. Over a wood subfloor the rules tighten: the deck must be rigid with minimal deflection, mechanically fastened, and almost always covered with a metal lath or a primer rated for wood, because self-leveler is heavy and brittle and will crack over a flexing surface. Always confirm the specific product is approved for wood before pouring.
Common Mistakes and How to Avoid Them
Most self-leveling failures trace back to a handful of avoidable errors, and knowing them in advance is half the battle.
- Skipping or rushing the primer: the number-one cause of pinholes and delamination. Let the primer tack to the manufacturer’s window before pouring.
- Wrong water ratio: too much water weakens the cured layer and causes shrinkage cracks and dusting; too little leaves it thick and lumpy. Measure precisely rather than eyeballing.
- Mixing too much at once: with a working time of only minutes, an oversized batch sets in the bucket. Mix only what you can place immediately.
- Ignoring depth limits: pouring past the rated thickness, or feathering a standard product to a thin edge, leads to cracking. Use a deep-pour formula when you need depth.
- Pouring over a dirty or unsound substrate: dust, oil, and loose material ruin the bond. Vacuum thoroughly and repair the base first.
How Much It Costs and Drying Times
Budget for self-leveling by the bag and by the depth. Coverage shrinks fast as thickness grows, so a floor that needs a 1/2-inch average pour uses far more material than one needing a skim of 1/8 inch, and deep-pour formulas cost more per bag. Factor in primer, which is a separate purchase, plus the rental of a paddle mixer if you do not own a heavy-duty drill. As for timing, most standard products are walkable in roughly 4 to 6 hours, but you usually must wait longer before installing finish flooring, often 16 to 24 hours for tile and sometimes several days before moisture-sensitive finishes like wood or vinyl, depending on the product, the depth, and the room conditions. Cooler temperatures and higher humidity extend these times, so read the data sheet and do not rush the finish floor on top.
Pro Tips That Save the Job
Work with a helper. One person mixes continuously while the other pours and spreads, keeping a wet edge so successive batches blend instead of forming cold seams. Wear spiked shoes to walk across the wet surface, and stage your bags, water, drill, and rake within arm’s reach before mixing. Finally, respect the depth limits printed on the bag. The most common DIY mistake is trying to feather a thick product to a thin edge or pour past its rated depth, both of which crack. Get the prep and the priming right, move fast once you mix, and self-leveling compound delivers the flat foundation every quality floor depends on.
Prefer to explore on your own?
See how new flooring looks in your actual room in seconds — free, no signup.
Try the free Floor Studio →