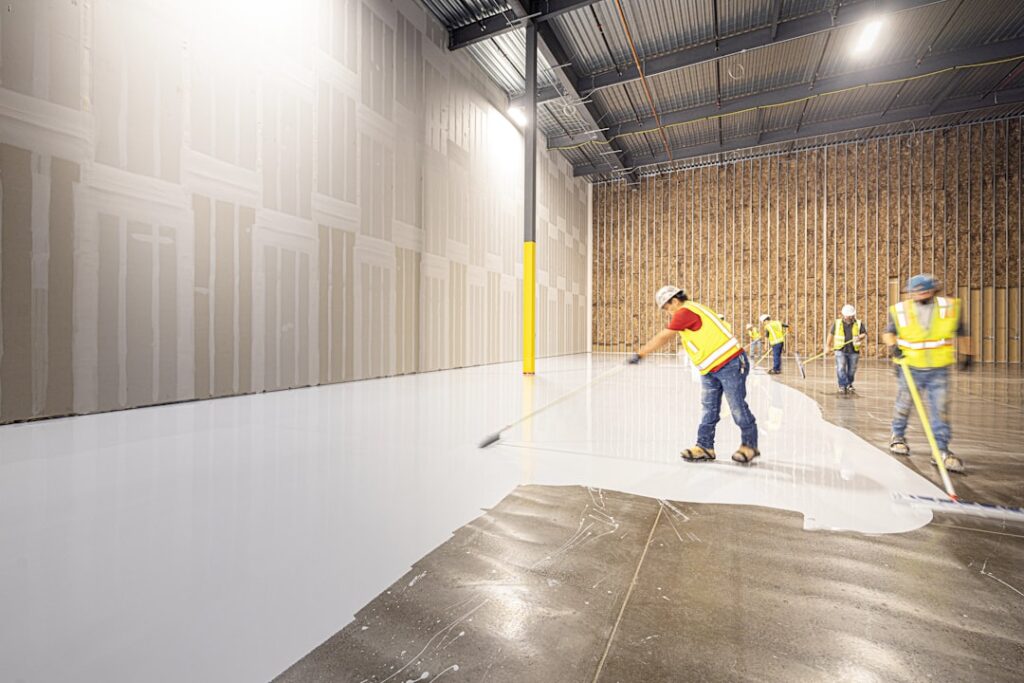
Self-leveling underlayment gives you roughly 10 to 20 minutes of working time from the moment water hits the powder. That is not enough time to run to the hardware store for a forgotten bucket or discover your drill cannot turn a mixing paddle. Having the right self leveling concrete tools staged before you open the first bag is what separates a glass-flat floor from a rippled, half-cured mess. This guide walks through every tool on a professional pour list, what each one actually does, and where you can safely save money on a one-time DIY job.
Why Self Leveling Concrete Tools Matter So Much
Despite the name, self-leveling compound does not level itself perfectly. It flows and seeks a flat plane, but it still needs help spreading to a consistent depth, releasing trapped air, and blending between batches. The tools do three jobs: prepare the substrate so the pour bonds, mix each batch to the exact consistency, and place the material at an even thickness before it starts to set.
Poor mixing is the most common cause of failure. Under-mixed material leaves lumps and weak spots; over-watered material bleeds, cracks, and dusts. Good tools make consistent batches almost automatic, which matters because a typical 200 sq ft room at 1/4 inch depth takes about 8 to 10 bags of 50 lb product, mixed and poured back-to-back.
Surface Preparation Tools
Most self-leveler failures start before the first bag is mixed. The substrate must be clean, sound, and primed.
- Floor scraper ($25 to $60) — a long-handled scraper removes old adhesive, paint drips, and drywall mud.
- Angle grinder with diamond cup wheel ($80 to $200, or rent for about $50 per day) — knocks down high spots and removes coatings on concrete. Attach a dust shroud and connect a HEPA vacuum.
- Shop vacuum — the floor must be dust-free for the primer to bond.
- Long straightedge or 6 ft level — finds high and low spots so you can estimate pour depth.
- Foam backer rod, weatherstripping, or sill seal — used to dam doorways and seal gaps at walls so the liquid compound does not escape.
- Silicone caulk or quick-set patch — seals cracks, holes, and plumbing penetrations. Self-leveler will find every opening.
Primer Application Tools
Nearly every manufacturer requires a primer, which controls absorption on concrete and improves adhesion on plywood. Apply it with a 3/8-inch nap roller on an extension pole, or a soft push broom for very porous slabs. A paint tray or a 5-gallon bucket with a roller grid works fine. Primers typically cost $40 to $70 per gallon and cover 200 to 400 sq ft depending on porosity. Let the primer dry to a clear film, usually 1 to 3 hours, before pouring.
Over wood subfloors, you will also need a staple gun or cap stapler to fasten galvanized metal lath or plastic reinforcing mesh, which many manufacturers require to prevent cracking over flexing plywood.
Mixing Tools: The Heart of the Job
Mixing is where you should not cut corners. Self-leveler must be mixed with measured water to a smooth, lump-free slurry, usually for about 2 to 3 minutes.
- Heavy-duty mixing drill — a 1/2-inch corded drill with at least 7 to 9 amps and a low speed around 400 to 650 rpm. Cordless hammer drills often stall or overheat in a full bag. Dedicated paddle mixers run $150 to $400, or rent one for $30 to $50 per day.
- Mixing paddle ($15 to $40) — choose a spiral or “egg-beater” style paddle designed for self-leveling compounds. It pulls material up from the bottom without whipping in excess air. Standard mortar paddles work but introduce more bubbles.
- Two or three 5-gallon buckets — one for mixing, one for fresh water, and ideally a second mixing bucket so a helper can start the next batch while the first is poured. Larger 7 to 8 gallon mixing tubs speed up big pours.
- Measuring container — a marked bucket or graduated pitcher so every batch uses the exact water ratio on the bag, often around 4.5 to 5 quarts per 50 lb bag.
Pro tip: mark the water line on the inside of a bucket with a permanent marker before you begin. Measuring once and filling to the line is faster and more consistent than measuring each batch under time pressure.
Spreading and Placing Tools
Once poured, the material has to be pushed to the edges and brought to a uniform depth quickly.
Gauge Rake
A gauge rake ($40 to $120) is a wide squeegee-like blade with adjustable pins or feet that ride on the substrate. Set it to your target depth — say 1/4 inch — and it spreads the compound at that thickness as you pull. This tool is the single biggest upgrade for DIYers because it prevents the thin, feathered areas that crack and the thick puddles that take days to cure.
Smoother
A smoother or flat trowel with a long handle ($30 to $90) is used after the rake. Drag it lightly across the surface in overlapping passes to knock down rake lines, blend the seam between batches, and help the material settle. A flat 18 to 24-inch steel smoother works well for small rooms.
Spiked Roller
A spiked roller ($25 to $80) has plastic spikes about 1 inch long. Rolled across fresh self-leveler, it releases entrapped air bubbles and helps the material flow together. It is most useful on pours thicker than 1/4 inch or when mixing with a standard paddle that introduces more air.
Spiked Shoes and Personal Protection
Spiked shoes ($20 to $50) strap over your boots with long spikes that let you walk into the wet pour without leaving footprints. The spikes leave tiny holes that fill back in as the compound flows. You will need them any time the room is larger than you can reach from the edges, which is almost always.
Portland cement–based products are caustic and generate fine silica dust while mixing. Wear:
- An N95 respirator or better when opening and mixing bags
- Nitrile or rubber gloves — wet cement can cause chemical burns
- Safety glasses
- Knee pads for edge work
Measuring and Checking Tools
Before you pour, use a laser level or a 4 to 6 ft level and a tape measure to map high and low spots. Some pros snap a grid on the floor with a chalk line and mark depths at each intersection. That map tells you how many bags you need and where to start pouring — always begin in the lowest area and farthest from the exit.
A calculator and product coverage chart are tools too. Most 50 lb bags cover about 50 sq ft at 1/8 inch or roughly 25 sq ft at 1/4 inch. Buy 10 to 15 percent extra because a partial last batch is far better than running out mid-pour.
Cleanup Tools
Self-leveler that hardens in your tools is permanent. Keep a bucket of clean water and a stiff brush nearby, and rinse the paddle, rake, and smoother immediately after the final batch. Never pour rinse water down a household drain, where cement can settle and clog the line; let it settle in a bucket, pour off the clear water outside, and dispose of the solids with household trash once hardened.
Staging Your Tools for Pour Day
Where you put the tools matters almost as much as which ones you own. Set up the mixing station just outside the room, ideally on a tarp near a water source, with bags stacked within arm’s reach and opened ahead of time. Pre-measure water into several marked buckets so the mixer never waits. Lean the gauge rake and smoother against the wall at the pour’s starting point, already set to depth, and keep spiked shoes on your feet from the first batch.
On anything larger than a small bathroom, work as a two-person team: one person mixes nonstop while the other pours, rakes, and smooths. Each new batch should hit the floor while the leading edge of the previous one is still wet, usually within 5 to 10 minutes. Letting an edge skin over creates a visible cold joint and a ridge you will have to grind later. Close windows, shut off HVAC fans, and block direct sunlight, since drafts and heat shorten working time and cause surface crusting. Most products want room and substrate temperatures between 50 and 85°F during the pour and for the first 24 hours afterward.
Budget Tool Kit vs. Pro Setup
For a one-room DIY project, a minimal kit looks like this: rented mixing drill ($40), spiral paddle ($25), three buckets ($15), gauge rake ($60), smoother ($35), spiked shoes ($30), primer roller ($15), and safety gear ($30). That is about $250 in tools, plus $30 to $55 per bag of compound and $50 or so in primer.
Professionals who pour weekly invest in dual-paddle mixers, pump systems, and wider rakes, but those are overkill for a single bathroom or kitchen. The most important purchases for homeowners are a drill powerful enough not to stall, a proper gauge rake, and spiked shoes. Get those three right and a helper to keep batches coming, and even a first-time DIYer can produce a flat, durable underlayment ready for tile, vinyl plank, or engineered wood within 24 hours.