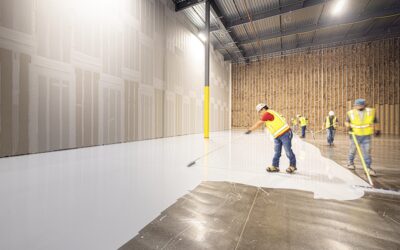
Most self-leveling failures have nothing to do with the leveler itself. They trace back to a skipped or botched primer coat. A quality primer for self leveling concrete seals the slab’s pores, keeps the compound from losing its water too fast, and creates the mechanical and chemical bond that stops the new layer from cracking, pinholing, or popping loose months later. If you plan to pour an underlayment before installing tile, vinyl plank, or engineered wood, the primer step deserves as much attention as the pour.
- Why Primer for Self Leveling Concrete Matters
- Types of Primers and When to Use Each
- Surface Preparation Before You Prime
- How to Apply Primer Step by Step
- Coverage and Cost
- Priming Different Substrates
- Common Mistakes to Avoid
- After the Pour: What Good Priming Looks Like
- Final Tips for a Successful Job
- Frequently Asked Questions
Why Primer for Self Leveling Concrete Matters
Concrete is thirsty. A porous slab can pull water out of a freshly poured leveler within minutes, and that water is what the cement needs to hydrate and gain strength. When the slab steals it, the bottom of the pour dries into a weak, chalky layer. You get a surface that looks fine but sounds hollow when you tap it with a hammer handle, and it can shear off under the stress of foot traffic or a heavy appliance.
Primer solves three problems at once. First, it reduces absorption so the leveler cures evenly from top to bottom. Second, it improves adhesion, especially over smooth or dense substrates. Third, it limits the air that escapes from the slab’s pores as the liquid compound flows over it. That escaping air is the main cause of pinholes and small craters in the finished surface, which you would otherwise have to patch before your flooring goes down.
Manufacturers are blunt about this: nearly every self-leveling underlayment warranty is void if you skip the specified primer. Contractors treat it as non-negotiable, and so should you.
Types of Primers and When to Use Each
Not every primer suits every substrate. The right product depends on what you are pouring over and how absorbent that surface is.
Acrylic (Latex) Primers
Acrylic primers are the workhorses of residential jobs. They are water-based, low-odor, easy to roll, and usually sold as concentrates you dilute on site. Expect to pay roughly $35 to $70 per gallon of concentrate. Use them over standard porous concrete, cement backer board, gypsum-based subfloors (with the correct dilution), and many wood subfloors once they are properly fastened and lathed.
Epoxy Primers
Two-part epoxy primers are the choice for non-porous or problem substrates: old ceramic tile, terrazzo, sealed or painted concrete, and slabs with moderate moisture readings. The usual approach is to roll the epoxy and broadcast clean, dry silica sand into it while it is wet. Once cured, that sandy surface gives the leveler something to grip. Epoxy systems run $100 to $250 per kit and have short pot lives, often 20 to 40 minutes at 70°F, so mix only what you can spread quickly.
Moisture-Mitigating Primers
Some epoxy primers double as vapor retarders. If a calcium chloride test shows more than about 3 to 5 pounds per 1,000 sq ft per 24 hours, or an in-slab relative humidity probe reads above 75 to 80 percent, a standard acrylic primer will not protect your leveler or your finished floor. A moisture-mitigating system costs more, often $2 to $4 per sq ft installed, but it is far cheaper than tearing out a failed floor.
Surface Preparation Before You Prime
Primer bonds to whatever is on the surface. If that surface is dust, paint, adhesive residue, or a curing compound, your leveler bonds to a weak layer and fails with it. Preparation is where most of your labor goes.
- Remove contaminants. Scrape off old carpet pad glue, mastic, paint drips, and drywall mud. Grease or oil stains need a degreaser and thorough rinse.
- Profile the slab. Most manufacturers want a Concrete Surface Profile (CSP) of 2 to 3, similar to medium sandpaper. Achieve it with a grinder fitted with a diamond cup wheel or by shot blasting. Acid etching is no longer recommended by most makers.
- Repair cracks and holes. Fill cracks wider than 1/8 inch with a patching compound or epoxy crack filler. Treat moving joints separately; never bridge an expansion joint with leveler.
- Vacuum thoroughly. Use a shop vacuum with a HEPA filter, not a broom. Sweeping just redistributes fine dust that acts like a bond breaker.
- Check temperature. The slab and room should sit between 50°F and 90°F during priming, pouring, and the first 24 hours of cure.
A quick water-drop test tells you how absorbent the slab is. Sprinkle a few drops of water on the cleaned surface. If they soak in within a minute, the slab is very porous and will likely need two primer coats. If they bead up, the surface may be sealed and require an epoxy primer or additional grinding.
How to Apply Primer Step by Step
Application is straightforward, but details such as dilution ratio and dry time determine whether the job succeeds. Always follow the specific product data sheet. The steps below reflect common practice for acrylic primers.
- Mix the dilution. For standard porous concrete, many acrylic primers call for a 1:1 or 1:3 ratio of primer to clean water. Very absorbent surfaces may get two coats: a thinner first coat of 1:3, followed by a 1:1 coat once the first dries. Non-porous surfaces often get primer at full strength.
- Apply with a soft push broom or a 3/8-inch nap roller. Work the primer into the surface so it fills the pores. A broom is better at scrubbing product into rough concrete.
- Avoid puddles. Standing primer dries into a slick film that can actually weaken the bond. Spread any pools out immediately.
- Let it dry to a clear, tacky-free film. Acrylic primers usually dry in 1 to 3 hours at 70°F and 50 percent humidity. Cooler or damper conditions extend that time.
- Respect the recoat window. Many primers must be covered with leveler within 24 to 72 hours. If you exceed it, dust can settle and the primer can lose its effectiveness, so you may need to clean and reprime.
Treat perimeter walls, pipes, and floor drains before pouring. Foam sill-seal tape along walls stops the leveler from bonding to the vertical surfaces and allows a small movement gap. Plug openings with foam or caulk so the liquid compound does not drain into the room below.
Coverage and Cost
Primer is one of the cheapest parts of a self-leveling job, which is another reason skipping it makes little sense. A gallon of concentrate typically covers 200 to 400 sq ft after dilution on average concrete, and less on very porous surfaces.
| Item | Typical Cost | Notes |
|---|---|---|
| Acrylic primer concentrate | $35 to $70 per gallon | Covers 200 to 400 sq ft diluted |
| Epoxy primer kit | $100 to $250 | Covers 100 to 300 sq ft |
| Silica broadcast sand | $15 to $25 per 50 lb bag | Used with epoxy primers |
| Professional priming labor | $0.25 to $0.75 per sq ft | Excludes grinding and repairs |
For a 200 sq ft kitchen, you might spend $40 to $80 on primer, a few dollars on rollers and a bucket, and a few hours of your time. Compare that to a self-leveling underlayment that runs $40 to $60 per 50 lb bag, with each bag covering roughly 20 to 25 sq ft at 1/4-inch thickness. The primer protects a much larger investment in material and labor.
Priming Different Substrates
Every surface behaves differently, and the primer plan should reflect that.
- New concrete: Let it cure at least 28 days. Grind off any curing compound or laitance, which is the weak, dusty top layer that forms as concrete bleeds water.
- Old slab with adhesive residue: Cutback (black) adhesive must be scraped down to a thin, well-bonded layer, and some manufacturers require removal entirely. Test older black mastic for asbestos before sanding or grinding.
- Plywood or OSB subfloor: Screw down every 6 inches, fill gaps, staple metal lath over the surface, and prime. Many leveler systems require at least 1/2 inch of thickness over wood.
- Existing ceramic tile: Remove loose tiles, grind off glaze, then use an epoxy primer with a sand broadcast for a reliable bond.
- Gypsum underlayment: Use the manufacturer’s specified dilution, which is often more concentrated, and let the gypsum dry fully first.
Common Mistakes to Avoid
Experienced installers still see the same errors on repair calls. Knowing them in advance saves you from repeating them.
- Pouring over wet primer. Trapped moisture weakens the bond and can cause bubbling. Wait until the film is dry to the touch and clear.
- Using generic paint primer. Wall primers are not designed for cementitious bonding. Use a product labeled for self-leveling underlayments, preferably from the same manufacturer as your leveler.
- Mixing brands without checking. Many warranties require a matched system. Pairing one company’s primer with another’s leveler can void coverage.
- Skipping the second coat on thirsty slabs. If the first coat vanished into the concrete within minutes, a second coat is almost always needed.
- Priming too far ahead. Letting a primed floor sit for a week under construction dust defeats the purpose.
After the Pour: What Good Priming Looks Like
A well-primed pour flows smoothly, levels itself within the working time (often 10 to 20 minutes), and cures without craters or a crusty bottom layer. Most self-leveling compounds accept foot traffic in 2 to 4 hours. Tile can go down in about 24 hours, while moisture-sensitive coverings such as vinyl plank, laminate, and hardwood typically require a longer wait, sometimes several days depending on thickness. Test the surface before installing flooring. Tap it with a coin or hammer handle; a dull, hollow sound signals poor adhesion. A crisp sound means you are in good shape.
If you find a hollow spot, cut it out with a grinder, reprime the exposed slab, and patch with the same compound. Catching a problem now is far cheaper than discovering it after your new floor is installed.
Final Tips for a Successful Job
Read the technical data sheets for both your primer and leveler before you buy anything. Note the dilution ratio, dry time, recoat window, and minimum temperature. Stage your materials, mixing drill, paddle, and water the day before so pouring goes smoothly once the primer is ready. Have a helper on hand for rooms over 100 sq ft, since one person mixing while another spreads keeps a wet edge.
Spending an extra hour and under $100 on the right primer for self leveling concrete is the single easiest way to protect the flat, stable base your new floor depends on. Get the prep right, and the rest of the project becomes much more forgiving.
Frequently Asked Questions
Can I skip primer if my concrete is brand new?
No. New concrete often has laitance or curing compounds on top, and it can be very absorbent. Grind it to a light profile and prime it just as you would an older slab.
How long should primer dry before pouring self-leveler?
Most acrylic primers need 1 to 3 hours at around 70°F, but check the product sheet. Pour within the stated window, often 24 to 72 hours, to avoid dust contamination.
Do I need two coats of primer?
Very porous concrete usually benefits from two coats, starting with a more diluted first coat. If the first coat soaks in almost instantly, plan on a second.
Can I use epoxy primer over a damp slab?
Only if it is a moisture-mitigating epoxy rated for your measured moisture level. Standard epoxy and acrylic primers can fail when slab moisture is too high.
Can you use self-leveling concrete outdoors?
Most self-leveling underlayments are made for interior floors only and are not built to handle freeze-thaw cycles, standing water, or sun. They are also meant to be covered by a finished floor rather than left exposed to wear. For a patio, walkway, or garage apron, use a product labeled for exterior resurfacing, with the primer or bonding method its maker specifies.
Can you use PVA glue or a bonding agent instead of self-leveler primer?
Not unless the leveler maker lists that product as an approved primer. Household PVA glue can soften again when it gets wet, which is risky under a water-mixed cement pour, and generic bonding agents may not control absorption or pinholes the same way. Use the primer named on the leveler’s data sheet to keep the bond reliable and the warranty valid.