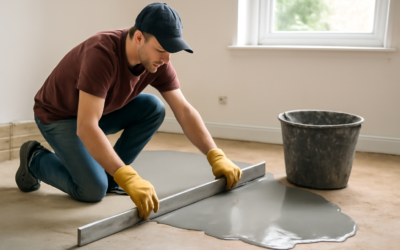
A level floor is the foundation of every successful flooring installation. Whether you are laying hardwood, tile, vinyl plank, or laminate, even small dips and humps in the subfloor will cause problems — hollow spots, cracking, squeaking, uneven seams, and premature wear. Learning how to level a floor is one of the most valuable DIY skills for any homeowner planning a flooring project.
This guide covers how to check your floor for level, the two main leveling methods (self-leveling compound for concrete and plywood shims for wood subfloors), step-by-step instructions, cost expectations, and when to call a professional instead of tackling the job yourself.
- Why a Level Floor Matters
- Checking Your Floor for Level
- Self-Leveling Compound (Concrete Subfloors)
- Plywood Shims (Wood Subfloors)
- Floor Leveling Cost
- When to DIY vs Hire a Professional
- Frequently Asked Questions
- How do I know if my floor needs leveling?
- Can I use self-leveling compound on a wood subfloor?
- How long does self-leveling compound take to dry?
- How much does floor leveling cost?
- Can I pour self-leveling compound over existing tile?
- What is the maximum depth for self-leveling compound?
- Do I need to level a floor for vinyl plank flooring?
Why a Level Floor Matters
Most flooring manufacturers specify that the subfloor must be flat to within 3/16 inch over a 10-foot span. Some products — especially rigid-core vinyl plank and large-format tile — require even tighter tolerances of 1/8 inch over 10 feet. Exceeding these tolerances voids warranties and leads to real problems.
What happens with an unlevel floor:
- Tile: Tiles crack or develop lippage (uneven edges). Grout cracks along high/low transitions.
- Vinyl plank (LVP/LVT): Click-lock joints separate, planks rock and feel hollow, edges lift.
- Hardwood: Boards squeak, gaps develop, finish wears unevenly.
- Laminate: Planks feel bouncy, click-locks fail, hollow sounds when walked on.
Taking the time to level a floor before installing new flooring prevents all of these issues and ensures your warranty remains valid. For more subfloor preparation guidance, see our subfloor guide.
Checking Your Floor for Level
Before leveling, you need to identify exactly where the high and low spots are. There are two reliable methods.
Method 1: Long straightedge
- Place a 6-foot to 10-foot straightedge (a long aluminum level or straight board) on the floor.
- Slide it across the floor in multiple directions — lengthwise, widthwise, and diagonally.
- Watch for gaps underneath the straightedge (low spots) and rocking (high spots).
- Use a tape measure to measure gap heights. Any gap greater than 3/16 inch over 10 feet (or 1/8 inch for some products) needs correction.
- Mark high and low spots with chalk or painter’s tape.
Method 2: Laser level
- Set a self-leveling laser level on a tripod in the center of the room.
- The laser projects a perfectly level line around the entire room.
- Using a measuring tape, measure from the floor to the laser line at multiple points around the room and across the floor.
- Differences in measurement reveal high spots (shorter measurement) and low spots (taller measurement).
- A laser level is faster and more accurate for large rooms and is essential for whole-room leveling.
Note: “Level” and “flat” are related but different. A floor can be perfectly flat but slightly sloped — which is acceptable for most flooring installations. What matters most is flatness — the absence of bumps and dips. A slight overall slope is tolerable as long as the surface is uniformly flat.
Self-Leveling Compound (Concrete Subfloors)
Self-leveling compound is a cement-based product that flows like thick batter and uses gravity to find level. It is the standard solution for leveling concrete subfloors and is suitable for correcting dips and unevenness up to about 1 inch deep (some products up to 1.5 inches in a single pour).
Tools and materials needed:
- Self-leveling compound (calculate coverage from the manufacturer’s spec — typically one 50 lb bag covers 40 to 50 sq ft at 1/8 inch thickness)
- Concrete primer/bonding agent
- Mixing drill with paddle attachment
- 5-gallon buckets (at least 2)
- Gauge rake or smoother
- Spike roller (optional, for releasing air bubbles)
- Foam backer rod and painter’s tape (to dam doorways and gaps)
Step-by-step self-leveling compound application:
- Prepare the surface. Sweep and vacuum the concrete thoroughly. Remove any loose material, adhesive residue, paint, or oil. The surface must be clean and porous for the compound to bond.
- Repair cracks. Fill any cracks wider than 1/4 inch with a concrete patching compound and allow it to cure before proceeding.
- Dam openings. Use foam backer rod, cardboard, or scrap wood to block doorways, floor drains, and any gaps where the liquid compound could flow out of the work area.
- Apply primer. Roll or brush a concrete primer/bonding agent over the entire area. This helps the self-leveling compound bond to the slab. Allow the primer to dry to tacky (typically 30 to 60 minutes — check the product label).
- Mix the compound. Add the powder to water (not water to powder) following the exact ratio on the bag. Mix with a drill and paddle for 2 to 3 minutes until smooth with no lumps. The consistency should resemble a thick milkshake.
- Pour immediately. Self-leveling compound begins to set within 15 to 20 minutes. Pour the mixed compound onto the floor, starting at the lowest point. Work quickly — have a helper mixing the next batch while you pour.
- Spread with a gauge rake. While the compound is self-leveling, use a gauge rake or long-handled smoother to help distribute it evenly, especially in larger areas or deeper pours.
- Roll with a spike roller (optional). Pass a spike roller over the surface to release trapped air bubbles for a smoother finish.
- Allow to cure. Most self-leveling compounds are walkable in 2 to 4 hours and ready for flooring installation in 24 hours. Some products cure faster — check the manufacturer’s specifications.
- Check flatness. Once cured, use your straightedge again to confirm the floor meets the required tolerance for your chosen flooring material.
Pro tips:
- Work in pairs — one person mixing, one person pouring. You cannot pause and restart self-leveling compound without visible seam lines.
- Temperature matters. Most products require ambient and surface temperatures between 50°F and 80°F. Cold slows curing; heat causes rapid set that prevents proper leveling.
- For deep pours (over 1 inch), some products require multiple pours with curing time between layers.
Plywood Shims (Wood Subfloors)
For wood subfloors (plywood or OSB over joists), self-leveling compound is sometimes used but plywood shims are often more practical for correcting specific low spots and mild unevenness.
For low spots (dips):
- Identify the low area with a straightedge.
- Cut thin plywood (1/8″ to 1/4″) or roofing felt paper to fit the low area.
- Screw or staple the shim material to the subfloor, building up layers gradually to create a smooth transition — do not create an abrupt edge.
- Feather the edges by using progressively thinner shims toward the transition point.
- Check with the straightedge again to confirm flatness.
For high spots (humps):
- Use a belt sander or floor sander to grind down the high area.
- Sand gradually, checking frequently with the straightedge.
- Vacuum thoroughly after sanding.
For badly uneven wood subfloors: If the entire subfloor is wavy or has significant unevenness (more than 1/2 inch variation), the best solution is often to install a new layer of 1/4″ or 3/8″ plywood over the existing subfloor, shimming as needed to create a flat surface. In severe cases, the subfloor joists may need sistering (adding new joists alongside existing ones) to correct structural issues. For more on subfloor types and preparation, see our subfloor guide.
Floor Leveling Cost
| Method | DIY Cost | Professional Cost | Best For |
|---|---|---|---|
| Self-leveling compound (per 50 lb bag) | $25 – $50 | N/A | Concrete subfloors |
| Self-leveling compound (per sq ft, installed) | $0.50 – $1.50 | $2 – $5 per sq ft | Concrete subfloors |
| Plywood shims (per sq ft) | $0.25 – $0.75 | $1 – $3 per sq ft | Wood subfloors, spot repairs |
| Full-room leveling (200 sq ft, professional) | $100 – $300 (DIY materials) | $400 – $1,000 | Major unevenness |
| Joist repair/sistering (per linear ft) | Not recommended DIY | $10 – $30 per linear ft | Structural issues |
For a typical 200 square foot room with moderate unevenness, DIY self-leveling compound costs $100 to $300 in materials. Professional leveling for the same area runs $400 to $1,000. This cost is well worth it when you consider that an unlevel floor can ruin a $2,000 to $5,000 flooring installation. For broader installation cost information, visit our flooring installation guide.
When to DIY vs Hire a Professional
| Scenario | DIY? | Why |
|---|---|---|
| Small room, minor dips (under 1/4″) | Yes | Low risk, small area, minimal compound needed |
| Spot leveling with plywood shims | Yes | Simple, requires only basic tools |
| Large room (300+ sq ft) with self-leveling compound | Maybe | Requires fast work with a helper — doable but challenging |
| Deep pours (over 1 inch) | Hire | Multiple pours, timing is critical, risk of failure is high |
| Structural subfloor issues (sagging joists) | Hire | Structural work requires engineering knowledge and permits |
| Whole-house leveling | Hire | Scale and complexity exceed typical DIY capability |
| Floor over radiant heat | Hire | Risk of damaging heating elements, specialized products needed |
The honest answer: Self-leveling compound for a small to medium room with dips under 1/2 inch is a manageable DIY project if you prepare properly, work with a helper, and practice mixing before the actual pour. Anything involving structural issues, deep pours, or large areas over 300 square feet is best left to professionals who have the equipment and experience to work within the compound’s tight working time. For tile-specific installation guidance, check our tile installation guide.
Frequently Asked Questions
How do I know if my floor needs leveling?
Place a 6-foot straightedge or level on the floor in multiple directions. If you see gaps greater than 3/16 inch underneath the straightedge, the floor needs leveling before installing new flooring. Rocking furniture, visible slopes, and bouncy spots are also signs of an unlevel floor.
Can I use self-leveling compound on a wood subfloor?
Yes, but it requires additional preparation. The wood subfloor must be structurally sound, screw-fastened (not just nailed), and primed with a product designed for wood substrates. Some self-leveling compounds are formulated specifically for wood subfloors. Always check the product label for compatibility.
How long does self-leveling compound take to dry?
Most products are walkable in 2 to 4 hours and ready for flooring installation in 24 hours. Some fast-setting formulas are ready for flooring in as little as 4 to 6 hours. Cure times vary by product, thickness of the pour, and ambient conditions (temperature and humidity).
How much does floor leveling cost?
DIY self-leveling compound costs $0.50 to $1.50 per square foot in materials. Professional floor leveling costs $2 to $5 per square foot. For a 200 sq ft room, expect to spend $100 to $300 DIY or $400 to $1,000 for professional work.
Can I pour self-leveling compound over existing tile?
Yes, as long as the tile is firmly bonded and the surface is primed. Loose tiles must be removed first. The compound will fill grout lines and create a smooth, level surface over the old tile. This is a common approach when installing new flooring over an existing tile floor.
What is the maximum depth for self-leveling compound?
Standard self-leveling compounds can be poured up to 1 inch deep in a single application. Some heavy-duty products allow up to 1.5 inches per pour. For deeper corrections, multiple pours with curing time between each are required, or alternative methods like plywood underlayment should be considered.
Do I need to level a floor for vinyl plank flooring?
Yes. Vinyl plank flooring (LVP) requires a flat subfloor — typically within 3/16 inch over 10 feet for most products. Because LVP is thin and somewhat flexible, subfloor imperfections will telegraph through the flooring and stress the click-lock joints, causing premature failure.
Prefer to explore on your own?
See how new flooring looks in your actual room in seconds — free, no signup.
Try the free Floor Studio →