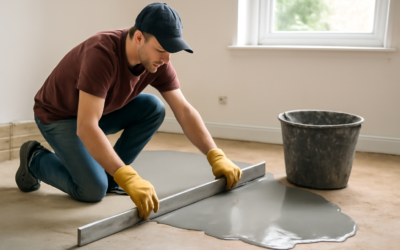
Concrete subfloor leveling is the step that determines whether your new floor lies flat and quiet or rocks, gaps, and cracks within a year. Almost every flooring manufacturer specifies a maximum variation, commonly around 3/16 inch over a 10-foot span, and a concrete slab that was poured years ago rarely meets it out of the box. Dips, high spots, and slopes all telegraph through vinyl, tile, and laminate, so leveling the slab first is not optional prep to skip when you are in a hurry. It is the foundation of the entire installation.
Why Flatness Matters So Much
Flooring is only as good as the surface under it. Rigid materials like tile crack when they bridge a low spot and flex under load. Floating floors like laminate and vinyl click together across an uneven slab and develop hollow spots, separated seams, and an unsettling bounce. Even glued-down floors telegraph every hump and hollow. Manufacturers know this, which is why installing over an out-of-spec slab frequently voids the warranty. Spending time and money to level the concrete first protects the far more expensive floor going on top.
Checking Your Slab First
Before you buy any product, find out how bad the problem actually is. Lay a long straightedge, an 8 to 10 foot level or a straight board, across the floor in several directions and slide a tape measure or shims under it to measure the gaps. Mark the high and low spots with a pencil. This tells you whether you are dealing with a few isolated dips you can patch, a general low area that needs a self-leveling pour, or a slope that requires more serious correction. Also check for moisture, since a damp slab must be addressed before leveling or the new floor will fail regardless.
Methods for Leveling Concrete
There are a few approaches depending on the severity:
- Self-leveling compound: A pourable cement-based mix that flows out to a flat plane, ideal for general unevenness and broad low areas.
- Patching compound: A trowel-applied product for filling isolated low spots, cracks, and small divots.
- Grinding: For high spots and ridges, a concrete grinder shaves the surface down rather than building the rest up.
- Feather finishing: A thin skim coat to smooth minor surface texture before resilient flooring.
Most residential jobs use a combination: grind the worst high spots, patch small holes, then pour self-leveler for an even final surface.
Using Self-Leveling Compound Step by Step
- Clean the slab completely. Remove all dust, paint, adhesive, and debris; the surface must be bare and sound.
- Apply the manufacturer’s primer. This is not optional; primer bonds the compound and prevents pinholes and delamination.
- Mix the compound to the exact water ratio using a drill and paddle, in batches you can pour before it sets, which is often just 15 to 20 minutes.
- Pour and spread quickly, using a gauge rake and a smoother to help it flow into an even layer.
- Let it cure per the label, typically walkable in a few hours and ready for flooring in 24 hours or more depending on the product.
What It Costs
Self-leveling compound runs roughly $30 to $50 per bag, with each bag covering about 15 to 30 square feet at 1/4 inch thick, so material for an average room lands in the low hundreds. Professional leveling typically costs $2 to $6 per square foot installed, depending on how much correction and product the slab needs. DIY saves the labor, but the material cost climbs fast on deep pours, and the work is time-sensitive and unforgiving once it starts flowing, so factor in your comfort level.
Common Mistakes to Avoid
Even experienced DIYers trip over the same few errors, and any one of them can ruin a pour. The most frequent is skipping or shortchanging the primer, which lets air escape from the slab and creates a rash of tiny pinholes as the compound sets, leaving a weak, dusty surface. The second is getting the water ratio wrong: too much water weakens the compound and causes cracking and a chalky top layer, while too little makes it too stiff to self-level, so you end up with trowel ridges you were trying to avoid. Mixing more than you can pour before it sets is another classic, since these products flash off fast and turn unworkable in minutes.
Temperature and timing matter more than people expect. Pouring in a cold garage below the product’s minimum temperature slows the cure and can leave the surface soft, while a hot, dry room can skin the compound before it flows out flat. Read the technical data sheet for the working temperature range and open time, and stage everything, primer, mixed water, drill and paddle, gauge rake, before you open the first bag. Once you start, you cannot stop to hunt for a tool.
Preparing the Room and Slab
Good leveling starts long before the compound comes out of the bag. Vacuum the slab thoroughly, then scrub away any grease, curing compound, or old adhesive, because self-leveler will not bond to a contaminated surface. Fill large cracks and holes with a patching compound first and let them cure, since self-leveler is designed to flow and finish, not to fill deep voids economically. Install perimeter foam or caulk any gaps where the liquid could escape into wall cavities or under door thresholds, and dam off doorways so the compound does not run into the next room. Taking an hour on this containment step saves a frustrating cleanup and an uneven edge later.
When to Call a Professional
Self-leveling compound over a small, straightforward area is a reasonable DIY project. Call a pro when the slab has major slope, structural cracks, active moisture problems, or requires deep pours over large areas, because those situations demand experience and specialized products. Getting a mix ratio wrong or skipping primer on a big job leads to a cracked, hollow-sounding surface that has to be ground out and redone. The cost of professional concrete subfloor leveling is small next to ripping up a failed floor, so know your limits before you start pouring.