Most failed floor installations trace back to one skipped step: nobody checked the subfloor for flat. A flooring straight edge is the cheap, unglamorous tool that catches the dips and humps that later turn into squeaks, gaps, and bouncing planks. It also doubles as a cutting guide for clean, dead-straight cuts on vinyl, laminate, and carpet. If you’re laying any rigid plank product, this is the one tool you cannot skip.
Why Subfloor Flatness Matters So Much
Manufacturers of LVP, laminate, and engineered wood publish a flatness spec, and most call for no more than 3/16 inch of variation over 10 feet, or 1/8 inch over 6 feet. Exceed that and click joints lever apart under foot traffic, leaving gaps and the hollow tapping sound homeowners hate. A straight edge laid across the subfloor reveals exactly where you fall outside tolerance before a single plank goes down.
Tile is even less forgiving. Large-format tiles telegraph every hump, causing lippage where one tile sits proud of its neighbor. Checking with a straight edge tells you where to grind down a high spot or apply self-leveler.
What a Straight Edge Actually Does
The tool earns its keep in two distinct jobs, and good ones handle both.
- Checking flatness: Lay it on edge across the floor and look for daylight underneath. Slide a coin or feeler gauge into any gap to measure the deviation.
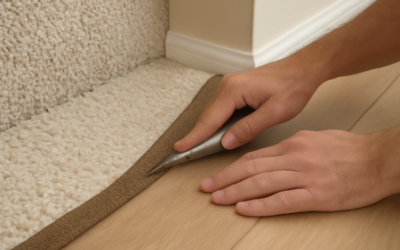
- Guiding cuts: Clamp it down as a fence and run a utility knife or circular saw along it for cuts straighter than any freehand line.
- Setting screed and leveler: Drag it across wet self-leveling compound or screed to strike off the surface flat.
- Marking long lines: Use it as a ruler for scribing baseboards or transition strips.
Types You Can Buy
Not every straight edge is built for flooring, so match the tool to the task. Aluminum box-section straight edges are the workhorse, rigid enough not to flex under their own weight across a span. A spirit-level straight edge adds a vapor bubble so you check level and flatness at once, handy for ramps and thresholds. Plasterer’s feather edges are lighter and cheaper but flex more, making them better for striking off compound than for precise flatness checks.
For cutting, a clamping straight edge with rubber feet stays put when you run a blade along it. Some carpenters simply use a long aluminum level, which works fine if it’s genuinely straight.
Choosing the Right Length
Length determines what you can measure and how. Manufacturers specify flatness over a set span, so your straight edge needs to match.
- 4 feet: Good for small rooms, closets, and spot-checking high spots.
- 6 feet: The most versatile single length, covering the common 1/8 inch over 6 feet spec.
- 8 to 10 feet: Best for open-plan spaces and verifying the 3/16 inch over 10 feet tolerance.
If you only buy one, a 6-foot box-section aluminum straight edge ($25 to $50) covers the most situations. Pros often own a 4-foot and a 10-foot to span both small and large areas.
How to Check a Subfloor Step by Step
Working methodically beats random spot checks. Start at one wall and lay the straight edge flat on the subfloor on its narrow edge. Crouch down and look for light underneath, then mark any gap with a pencil. Rotate the tool 90 degrees and repeat so you catch dips running in both directions. Move across the room in a grid, overlapping each placement.
Where you find a low spot, write the depth on the floor in pencil. High spots get marked too. This map tells you exactly where to sand, grind, or pour leveler before installation day.
Pros and Cons
The tool is simple, but it has limits worth knowing.
- Pro: Cheap insurance against a failed floor, often under $50.
- Pro: Doubles as a precise cutting guide, replacing a separate fence.
- Pro: Lasts decades if stored flat and undented.
- Con: A bent or dropped straight edge gives false readings, so handle it carefully.
- Con: Cheap flexible versions sag across long spans and read inaccurately.
- Con: A single length can’t verify every manufacturer span on its own.
Pro Tips for Accurate Results
Always store an aluminum straight edge flat or hung, never leaning where it can bow. Before trusting a new one, lay it against a known flat surface like a table saw bed and check for gaps. When using it as a cutting guide, set your blade depth so it just clears the material to avoid scoring the subfloor. And tape the bottom edge with low-tack tape when cutting vinyl, so the tool doesn’t mar a finished surface.
Straight Edge vs Other Leveling Tools
A straight edge is one tool in a flatness toolkit, and knowing where it fits saves confusion. A spirit level tells you whether a surface is level, meaning truly horizontal, which is a different question from whether it’s flat; a floor can be perfectly flat yet sloped, and that’s fine for most installations. A straight edge answers the flatness question, the one manufacturers actually specify. A laser level projects a reference line across a room and excels at checking slope and finding the highest point before pouring leveler, but it won’t catch a small localized dip the way a straightedge dragged across the surface will.
For most floor installs, you want both a straight edge for spot flatness and either a long level or a laser to understand the overall plane. The straight edge is the one you’ll reach for most, because the click-joint failures that ruin floating floors come from short-span humps and hollows, exactly what it’s built to find.
Common Mistakes to Avoid
A few errors undermine even a good tool. Don’t trust a straightedge you’ve never verified; check it against a known flat reference before relying on its readings. Avoid using a flexible aluminum ruler or a warped board as a substitute, since any bow gives you false confidence in a floor that isn’t flat. Don’t check only in one direction, because a floor can be flat along the length of the room yet wavy across its width. And resist the urge to “eyeball” flatness, since the deviations that wreck floating floors are often too subtle to see without a reference edge laid down and a light behind it.
The Bottom Line
Skipping the flatness check is the single most expensive mistake in DIY flooring. A 6-foot aluminum straight edge costs less than a few boxes of planks and prevents the callbacks, gaps, and squeaks that come from laying over an uneven base. Buy a rigid box-section model, check the floor in a grid before you start, and keep the tool straight by storing it properly. It pays for itself the first time it catches a hump you’d otherwise have buried under finished flooring.
Prefer to explore on your own?
See how new flooring looks in your actual room in seconds — free, no signup.
Try the free Floor Studio →