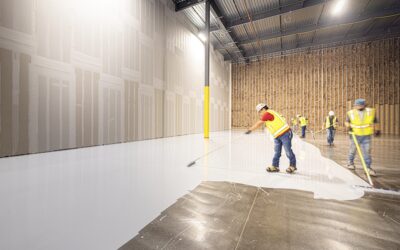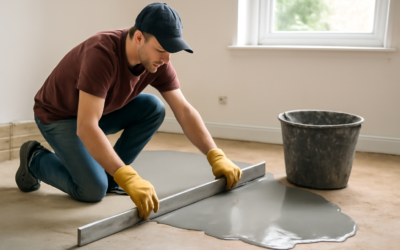
Most self-leveler failures are decided in the bucket, not on the floor. An extra quart of water, a paddle spun too fast, or a bag mixed for 30 seconds instead of 2 minutes can leave you with a dusty, cracked, or wavy surface that no flooring will hide. Knowing how to mix self leveling concrete correctly is the difference between a glass-flat substrate and a weekend of grinding. This guide walks through ratios, tools, timing, and the troubleshooting tricks contractors use to get the same result batch after batch.
- How to Mix Self Leveling Concrete: The Core Principles
- Tools and Materials You Need
- Calculating How Much to Mix
- Prepping Before You Mix
- Step-by-Step Mixing Process
- Testing Flow Before a Big Pour
- Troubleshooting Common Mixing Problems
- Mixing for Larger Floors
- Safety When Mixing
- Curing and When You Can Install Flooring
- Final Tips from the Field
How to Mix Self Leveling Concrete: The Core Principles
Self-leveling underlayment, often called SLU, is a cement-based compound with polymers and flow agents that let it spread and flatten under its own weight. Unlike standard concrete, it has no coarse aggregate and a very narrow working window. Three rules govern every good batch:
- Measure water exactly. The manufacturer’s ratio is a hard limit, not a starting point.
- Add powder to water, never water to powder.
- Mix long enough, but at the right speed, to activate the polymers without whipping in air.
Most 50-lb bags call for roughly 4.5 to 5.5 quarts of clean, cool water. Some high-flow products go up to 6 quarts. Read the bag, because the difference between brands is larger than most people assume.
Tools and Materials You Need
Gather everything before opening the first bag. Once water hits powder, you typically have 10-20 minutes of flow time.
- Self-leveling underlayment in 50-lb bags (typically $35-$60 per bag)
- Compatible primer for the substrate
- Heavy-duty 1/2-inch drill, 700-900 watts, with variable speed, or a dedicated mixing drill
- Spiral or helix-style mixing paddle sized for 5-gallon buckets
- Two or three clean 5-gallon buckets
- Graduated measuring container marked in quarts or liters
- Gauge rake or spreader set to target depth, plus a smoother
- Spiked roller and spiked shoes
- Timer, dust mask rated N95 or better, safety glasses, and gloves
A 5-gallon bucket comfortably handles one 50-lb bag. For areas larger than about 150 sq ft, use two mixers working in tandem or rent a mixing barrel so you can maintain a wet edge.
Calculating How Much to Mix
A standard 50-lb bag covers around 50 sq ft at 1/8 inch, 25 sq ft at 1/4 inch, or 12 sq ft at 1/2 inch. To estimate, multiply the room area by the average depth in inches, then divide by the product’s coverage per bag at 1 inch (roughly 0.45-0.5 cubic feet per bag).
Example: a 10 x 12 foot room averaging 3/16 inch deep needs about 120 x 0.1875 = 22.5 sq ft-inches. At roughly 6 sq ft per bag at 1 inch, that is 3.75 bags, so buy five. Always add 10-15 percent for low spots, waste, and the inevitable bucket residue.
Prepping Before You Mix
Preparation affects how the mix behaves once it leaves the bucket. Grind or scrape off paint, adhesives, and curing compounds. Vacuum thoroughly. Seal cracks and gaps at walls, floor drains, and penetrations with foam backer rod or sealant, because leveler flows into every opening and can run into the room below.
Apply primer and let it dry to the manufacturer’s spec, usually 1-4 hours. Primer reduces pinholes by stopping the substrate from sucking water out of the mix, and it improves bond. Set up dams with foam or wood strips at doorways. Keep the room between 50°F and 85°F and shut off forced-air vents and fans that blow across the floor.
Step-by-Step Mixing Process
- Measure the water. Pour the exact amount of cool, clean water into an empty bucket. Use water around 60-70°F. Warm water shortens working time; very cold water slows curing.
- Start the paddle. Lower the paddle into the water and run the drill at low speed, about 300-600 rpm.
- Add powder gradually. Pour the full bag slowly into the moving water over about 30 seconds. Dumping it in at once creates dry pockets at the bottom.
- Mix for 2 to 3 minutes. Move the paddle up, down, and around the bucket wall. Keep the paddle submerged so it pulls in as little air as possible. Scrape the sides and bottom once with a margin trowel midway through.
- Check consistency. A good batch looks like a smooth, lump-free pancake batter or melted milkshake. It should run freely off the paddle.
- Pour immediately. Do not let the mix rest in the bucket beyond a minute. Pour in a ribbon, working away from the starting wall.
- Start the next batch. The next bucket should be mixing while the first is being spread, so each pour lands against wet material.
Rinse the paddle in a separate bucket of water between batches so dried flecks do not seed lumps in the next mix. Never add extra water to a batch that has started to stiffen.
Testing Flow Before a Big Pour
Many manufacturers include a flow ring or slump test in their technical data sheet. Professionals use a small open-ended cylinder, typically 1.2 inches tall and 2.2 inches wide. Fill it with fresh mix on a flat, non-absorbent surface, lift it, and measure the diameter of the resulting pancake. Most products target a patty of about 5.5 to 6 inches.
If you do not have a flow ring, a short piece of 2-inch PVC pipe gets you close. Too small a spread means the mix is too stiff for a smooth finish; a spread well beyond spec with a watery halo at the edge means too much water. Adjust the next batch, not the current one.
Troubleshooting Common Mixing Problems
Lumps or Dry Pockets
Usually caused by adding powder too quickly or not scraping the bucket bottom. Slow the pour and extend the mix to a full 3 minutes.
Bleeding or a Watery Film
A clear or milky film on the surface means excess water. The cement and sand separate, producing a weak, dusty top layer that may need grinding. Measure water precisely every time.
Pinholes and Bubbles
High drill speed whips air into the mix, and an unprimed porous slab releases air upward. Keep the paddle below 600 rpm, prime properly, and roll the fresh pour with a spiked roller within the first 5-10 minutes.
Cracking After Cure
Over-watering, pouring too thin, rapid drying from heat or drafts, or skipping primer can all lead to shrinkage cracks. Stay within the product’s depth range and protect the floor from sun and HVAC airflow for the first 24 hours.
Visible Seams Between Batches
These appear when one batch starts to set before the next arrives. Use more mixers, shorten walking distance from bucket to floor, or switch to a product with a longer flow time.
Mixing for Larger Floors
Bucket mixing works well up to roughly 150-200 sq ft at 1/4 inch. Beyond that, a two-person team struggles to keep a wet edge. Contractors switch to a barrel-and-paddle setup, mixing two bags at a time in a 30-gallon drum with a heavy mixing drill, or to a continuous mixing pump that meters water automatically and delivers leveler through a hose. Pump rentals run $250-$500 per day plus a hose kit, which is economical on basement floors of 500 sq ft or more.
If you stay with buckets, stage water in pre-measured jugs so the mixer never has to stop and measure. Line up opened bags on a tarp next to the mixing station, and set the station as close to the room as practical. Every extra 20 feet of walking eats into flow time.
Safety When Mixing
Cement powder contains crystalline silica and is caustic when wet. Wear an N95 or P100 respirator while pouring powder, since the dust cloud is heaviest in the first 30 seconds. Use nitrile gloves and eye protection, and wash splashes off skin promptly to avoid chemical burns. Keep children and pets out of the room until the surface has set.
Curing and When You Can Install Flooring
Most self-levelers accept light foot traffic in 2-4 hours. Tile can often be set after 16-24 hours. Moisture-sensitive coverings such as vinyl, laminate, engineered wood, and glue-down carpet usually need 1-3 days, depending on thickness, temperature, and humidity. Thicker pours of 1/2 inch or more may need additional time, and some manufacturers recommend a moisture test before installing resilient flooring.
Keep the room above 50°F throughout the cure and avoid forced drying with space heaters or fans pointed at the floor, which can cause surface cracks.
Final Tips from the Field
Write the water ratio on the bucket with a marker so every helper uses the same amount. Assign clear roles: one person mixes, one pours, one spreads. Open all the bags you plan to use ahead of time, but do not add water until the previous batch is poured. And whatever the room size, do a practice batch on a sheet of plywood the first time you use a new product. Mastering how to mix self leveling concrete takes one careful practice run, and it pays off on every floor you prepare afterward.