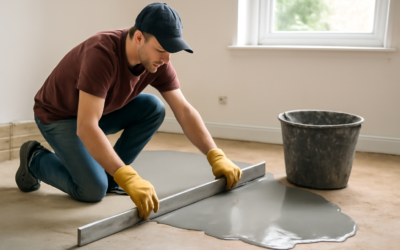
Luxury vinyl plank is forgiving about many things, but not a wavy subfloor. Using self leveling underlayment for vinyl plank flooring is the standard fix when a floor has dips or humps wider than a patch can handle. Most LVP manufacturers require the subfloor to be flat within 3/16 inch over 10 feet (and often 1/8 inch over 6 feet). Go beyond that and click joints flex, separate, or squeak, and the planks can telegraph every low spot.
The short answer: check flatness with a long straightedge, patch small isolated low spots with a trowel-applied floor patch, and pour a self-leveling compound when the problem covers a broad area or the whole room. Prime the substrate first, pour at the thickness the product allows, and wait until the underlayment has dried to the manufacturer’s moisture spec before laying planks. Rushing that last step is the most common way good leveling work ends up failing.
- Why Self Leveling Underlayment for Vinyl Plank Flooring Matters
- How to Check Your Subfloor
- Tools and Materials
- Step-by-Step: Leveling Subfloor for LVP
- Pour Thickness and Dry Time Before Laying Planks
- Patch vs Pour: A Quick Decision Guide
- Troubleshooting Common Problems
- Cost of Leveling Before LVP
- When to Call a Pro
- Frequently Asked Questions
This guide covers leveling subfloor for LVP from start to finish, including how to decide between patching and pouring, the tools you need, pour thickness, cure time, and what to do when things go wrong.
Why Self Leveling Underlayment for Vinyl Plank Flooring Matters
Rigid-core and flexible LVP both rely on a locking edge that expects a flat plane. When a plank bridges a dip, foot traffic pushes it down repeatedly, stressing the joint. Over months that creates peaking, gapping, clicking sounds, and in some cases a voided warranty. Glue-down vinyl is even less forgiving because every imperfection shows through the thin wear layer.
Note that “flat” and “level” are different. A floor can slope gently across a room and still be flat enough for LVP. What matters is local variation: humps, dips, and ridges. Self-leveling compound corrects both, but you usually only need to fix flatness to meet installation instructions.
How to Check Your Subfloor
Clean the floor, then lay a 10-foot straightedge or a straight aluminum level in several directions across the room. Wherever you can slide a 3/16-inch shim under it, mark the low spot with a pencil outline. Mark humps too; a gap at both ends of the straightedge means you are sitting on a high point.
- Small, isolated dips (a few square feet): trowel-applied patching compound.
- Humps and ridges: grind concrete high spots or sand/plane wood seams before any fill.
- Wide dips, multiple low areas, or a room-wide sag: pour self-leveling underlayment.
- Bouncy or deflecting wood subfloor: fix the framing or add plywood first; leveler is not a structural repair.
Tools and Materials
- Self-leveling underlayment rated for your substrate (concrete, plywood, or existing tile)
- The primer specified by that same manufacturer
- Two 5-gallon buckets, a 1/2-inch drill with a paddle mixer, and a measuring container for water
- Gauge rake or smoother, spiked shoes, and a straightedge
- Foam backer rod, weatherstripping, or expanding foam to dam doorways and seal gaps
- Metal lath and staples if the manufacturer requires reinforcement over wood
- Shop vacuum, floor scraper, and a concrete grinder or sander for high spots
- Safety gear: nitrile gloves, safety glasses, and an N95 or P100 respirator for mixing dust
Chemical and dust safety: cementitious powders release silica dust and are caustic when wet. Mix in a ventilated area, wear a respirator while pouring powder, and protect your skin and eyes. Primers can give off fumes, so open windows and run a fan. Never combine different brands of primer and leveler or mix in additives the label does not call for. Apply all primers and underlayments according to their label.
Old flooring caution: if you are leveling over or removing old sheet vinyl, vinyl tile, or black cutback adhesive, those materials may contain asbestos. Have them tested before you scrape, sand, or grind.
Step-by-Step: Leveling Subfloor for LVP
- Prepare the substrate. Remove old adhesive residue, paint, and dust. Concrete should be sound and free of curing compounds. Wood subfloors should be screwed down every 6 to 8 inches along joists, with no loose panels.
- Seal and dam. Fill cracks, gaps along walls, and holes in wood subfloors so the liquid cannot drain away. Dam doorways and floor registers with foam or wood strips.
- Prime. Apply the manufacturer’s primer with a roller or soft broom. Porous concrete may need two coats. Primer keeps the substrate from sucking water out of the mix, helps bonding, and prevents pinholes. Let it dry to the time on the label, usually a matter of hours, not days.
- Add lath if required. Many products require metal lath stapled over plywood. Check the data sheet.
- Mix correctly. Measure water exactly. Too much water weakens the surface and causes cracking; too little stops it from flowing. Mix with a paddle for the recommended time until lump-free.
- Pour and spread. Start at the far wall and pour in ribbons, working toward the exit. Use a gauge rake set to your target depth, then smooth lightly. Keep a wet edge and do not stop mid-room; most mixes stay workable for only 10 to 20 minutes.
- Protect while curing. Keep the room at the temperature on the bag, typically around 50 to 90°F, and avoid direct sun, strong drafts, or heaters blowing on the surface.
Pour Thickness and Dry Time Before Laying Planks
Every product lists a minimum and maximum depth. Many common self-leveling underlayments can go from a featheredge or about 1/8 inch up to roughly 1 inch in a single pour, with extended mixes (adding clean pea gravel) for deeper fills. Thinner is not always better: pouring below the stated minimum can leave a weak skin that cracks under planks.
Light foot traffic is usually allowed within a few hours. But walkable is not the same as ready for flooring. Vinyl plank is sensitive to moisture from below, so most leveler manufacturers give a separate time before floor coverings, often around 16 to 24 hours for thin pours and longer for deeper ones, cool rooms, or humid weather. When in doubt, test the moisture content as the flooring manufacturer specifies. Then lay any required vapor barrier or underlayment pad and install the planks.
If you are unsure which self leveling underlayment for vinyl plank flooring to buy, pick one that lists LVP or resilient flooring as an approved covering, is rated for your substrate, and has a primer from the same product line. A matched system is the simplest way to keep the warranty intact.
Patch vs Pour: A Quick Decision Guide
Trowel-applied patch is cheaper and faster for small repairs, and you can feather it to nothing. It is ideal for filling a few seams, grout lines in old tile, or a single dip under a doorway. Self-leveler shines when you have broad low areas or need to flatten a whole room. It flows to a flat plane on its own and saves hours of hand-troweling, but it costs more per room and requires careful prep so it does not leak away.
A rule of thumb many installers use: if the low spots add up to more than about a quarter of the room, pour. If they are a handful of isolated spots, patch.
Troubleshooting Common Problems
- Pinholes or bubbles: substrate was unprimed or under-primed. Sand lightly, prime, and skim-coat.
- Cracking: usually too much water, a pour thinner than the minimum, or a flexing wood subfloor.
- Dusty, soft surface: over-watered mix or fast drying from heat or drafts. Grind off the weak layer and apply a compatible skim coat.
- Leveler leaked into the basement: gaps were not sealed. Always seal around pipes, plates, and board seams.
- Still out of flat: check with a straightedge; minor ridges can be sanded, larger lows can take a second primed pour.
- Planks peaking later: the floor was covered while still damp, or expansion gaps at the walls are missing.
Cost of Leveling Before LVP
For DIY work, costs depend mostly on how deep the pour is. A 50-pound bag covers a modest area at 1/8 inch and much less at 1/2 inch, so a room with deep dips can take many bags. Add primer, a mixing paddle, and a gauge rake. Patching compound for a few low spots is a small line item by comparison.
Professional floor leveling is usually priced by square foot and depth, with a minimum charge for small rooms. Expect higher quotes where the subfloor needs grinding, crack repair, or plywood reinforcement first. Get the leveling quote and the flooring installation quote from the same contractor when possible, so one party owns the flatness spec.
When to Call a Pro
Hire a flooring contractor when you are leveling a large open area, when the pour needs to be over an inch, or when the floor must meet tight tolerances for glue-down vinyl. Many installers will quote self leveling underlayment for vinyl plank flooring as part of the installation package. Pros bring pump or barrel mixing, which lets them pour an entire room without cold joints. Bring in a contractor or engineer if the dips come from sagging joists, cracked or heaving slabs, or water damage, because leveler will not stop those problems from getting worse.
Frequently Asked Questions
How flat does a subfloor need to be for vinyl plank?
Most LVP manufacturers ask for flatness within 3/16 inch over 10 feet, and some also specify 1/8 inch over 6 feet. Always check the installation instructions for your specific plank.
Do I have to prime before pouring self-leveling underlayment?
Yes, in nearly every case. Primer improves the bond, prevents pinholes, and keeps the substrate from drawing water out of the mix. Use the primer made by the leveler’s manufacturer.
How long should self-leveler dry before installing LVP?
You can often walk on it in a few hours, but most products call for roughly 16 to 24 hours or more before floor coverings, depending on depth, temperature, and humidity. Follow the label and test moisture if unsure.
Can I pour self-leveling underlayment over a plywood subfloor?
Many products are approved over plywood if the subfloor is stiff, primed, sealed, and often reinforced with metal lath. Confirm your product allows wood substrates before starting.
Is floor patch good enough instead of self-leveler?
For a few small, isolated low spots, patch works well. For broad dips or an entire room, self-leveling underlayment is faster and produces a flatter result.
Prefer to explore on your own?
See how new flooring looks in your actual room in seconds — free, no signup.
Try the free Floor Studio →