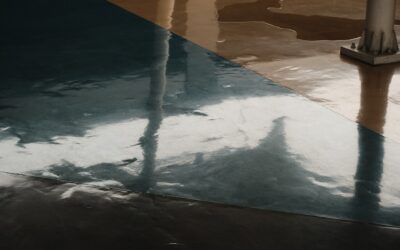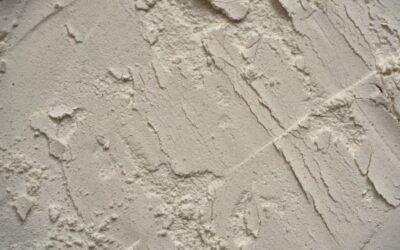
If your garage slab is pitted, cracked, or uneven, a thin roll-on coating will only highlight the flaws. What you need instead is a thicker, flowable system that fills low spots and cures into a smooth, glassy plane. Self leveling garage floor epoxy is exactly that — a high-solids, pourable resin that spreads out under its own weight to create a seamless, level surface far more forgiving of an imperfect slab than standard floor paint. This guide explains how it works, what it costs, how thick to pour it, and the step-by-step process to get a professional-looking floor.
Part of our Epoxy, Concrete & Garage Floors guide — explore the full guide →
- What "Self-Leveling" Actually Means
- Why Choose Self-Leveling Epoxy
- How Thick Should You Pour It?
- Surface Preparation: The Deciding Factor
- The Application Process
- Cost of a Self-Leveling Epoxy Floor
- Curing and Downtime
- Should You DIY It?
- Self-Leveling Epoxy vs. Standard Roll-On Kits
- Frequently Asked Questions
What “Self-Leveling” Actually Means
Regular garage epoxy is a thin coating rolled on like paint; it follows every dip and divot in the concrete. Self-leveling epoxy is formulated to be more fluid and is applied much thicker — often 1/16 inch to 1/8 inch or more in a single pour. Once spread with a squeegee and worked with a spiked roller, it flows and settles into a flat, mirror-smooth layer, filling minor imperfections and evening out shallow low areas as it goes.
It is important to set expectations: self-leveling epoxy smooths a surface and levels minor unevenness, but it is not a structural leveling compound for badly sloped or heavily damaged slabs. Large dips or significant slope correction still call for a dedicated cementitious self-leveling underlayment first, with the epoxy applied on top.
Why Choose Self-Leveling Epoxy
- Seamless, glass-smooth finish with no roller texture or lap marks.
- Fills minor cracks and pits that thin coatings cannot hide.
- Thicker, more durable film that resists impacts, hot tires, and heavy loads better than thin paint.
- Chemical and stain resistance against oil, gas, and solvents.
- Easy to clean — the seamless surface has nowhere for dirt or grime to lodge.
- Decorative options including solid colors, metallic pigments, and flake broadcasts.
How Thick Should You Pour It?
Thickness depends on the product and the condition of your slab. General guidance:
- 1/16 inch (about 1.5 mm): a typical single-pour depth for a residential garage in good shape, smoothing minor imperfections.
- 1/8 inch (about 3 mm): used where you need more filling of pits and small low spots, or a more robust wear layer.
- Multiple lifts: deeper builds are achieved in more than one pour, respecting the product’s maximum single-pour thickness so it cures properly.
Always follow the manufacturer’s coverage rate, which tells you how many square feet a kit covers at a given thickness. Pouring thinner than specified can leave a weak or uneven film; pouring too thick in one lift can trap heat and cure improperly.
Surface Preparation: The Deciding Factor
As with any epoxy, prep determines whether the floor lasts or peels. Self-leveling systems still need a clean, sound, profiled slab.
- Clean thoroughly, degreasing oil stains and removing any old coatings, sealers, or curing compounds.
- Profile the concrete by diamond grinding — the preferred method — or acid etching, so the epoxy bonds mechanically to the surface. Grinding also flattens high spots.
- Repair large cracks and holes with an appropriate patch or the manufacturer’s crack filler before the pour.
- Test for moisture. Tape a plastic sheet down overnight; condensation underneath signals a moisture problem that must be addressed with a moisture-mitigating primer, or the epoxy can delaminate.
- Prime with the recommended epoxy primer to seal the concrete and improve adhesion and flow of the self-leveling coat.
Skipping the grind and moisture test is the number-one cause of failure. A perfect self-leveling pour over unprepped concrete will still peel.
The Application Process
Self-leveling epoxy has a limited working time once mixed, so organization is everything. The general sequence:
- Prep and prime the slab and let the primer reach the right recoat window.
- Mix Part A and Part B exactly to ratio with a drill mixer, and add pigment or metallic if used. Mix only what you can apply within the pot life.
- Pour the epoxy onto the floor in ribbons and spread it with a notched or flat squeegee to the target thickness.
- Back-roll or use a spiked roller to even the coat and release trapped air bubbles, working while the material is still fluid.
- Broadcast flakes into the wet surface if you want a decorative flake floor, then topcoat once cured.
- Apply a clear topcoat — often a polyaspartic or polyurethane — for extra durability, UV stability, and slip resistance with an added grit.
Work quickly and keep a wet edge; self-leveling resin waits for no one once the hardener is in.
Cost of a Self-Leveling Epoxy Floor
Because the coating is thicker and uses more material than thin paint, self-leveling epoxy costs more per square foot:
- DIY materials: roughly $3 to $7 per square foot depending on thickness and whether you add metallic or flake decoration.
- Professional installation: about $7 to $15 per square foot installed, more for metallic or multi-color designs.
A two-car garage of 400 to 500 square feet therefore runs several hundred dollars in DIY materials or several thousand for a pro decorative floor. Prep — grinding, crack repair, moisture mitigation — is the largest labor cost on a professional job.
Curing and Downtime
Plan for the garage to be out of service while the floor cures. At around 70°F, expect foot traffic after about a day, furniture and light use in a few days, and vehicle traffic after a full 5 to 7 days so tires do not lift or imprint the coating. Cold slabs slow curing dramatically and can prevent a proper set below the product’s minimum temperature, so avoid pouring an unheated garage in winter unless the material is rated for it.
Should You DIY It?
Self-leveling epoxy is more demanding than a basic roll-on kit because the fast working time and squeegee technique leave little room to fix mistakes. A patient, well-prepared DIYer with the right tools — a grinder, a good drill mixer, squeegees, and spiked shoes — can absolutely tackle a single-color garage. But metallic effects, large areas, and any slab with moisture or leveling problems are where professionals earn their fee, both for the equipment and the experience to spread the material evenly before it kicks. Because a failed pour must be ground off before you can start again, many homeowners find a warrantied professional install worth the premium on a floor meant to last a decade or more. Whichever route you choose, respect the prep, respect the pot life, and self-leveling garage floor epoxy will reward you with a seamless, durable surface that makes the whole garage look finished.
Self-Leveling Epoxy vs. Standard Roll-On Kits
It helps to be clear about when you actually need the self-leveling product versus a cheaper roll-on kit. A standard roll-on epoxy is thin, follows the contours of the slab, and is perfect for a garage floor already in good, flat condition where you just want protection and a fresh look. It costs less and is more forgiving to apply.
Self-leveling epoxy earns its higher price when the slab is pitted, spalled, has minor low spots, or when you want a genuinely glass-smooth, thick, high-end finish like a metallic floor. It fills and smooths in a way a thin coat never can. If your concrete is rough or you want a showpiece floor, self-leveling is worth it; if the slab is smooth and sound and you want basic protection on a budget, a roll-on kit may be all you need.
Frequently Asked Questions
Can self-leveling epoxy fix a sloped floor? Not really. It levels minor imperfections and shallow low spots, but significant slope correction needs a cementitious self-leveling underlayment first, with epoxy applied on top.
Is the surface slippery? A smooth gloss coat is slick when wet, so add an anti-slip aggregate to the topcoat, especially near the garage door where rain and snow melt collect.
How soon can I park on it? Wait a full 5 to 7 days at around 70°F before driving on it, so tires do not lift or imprint the still-curing coating.