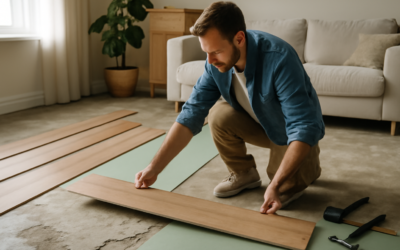
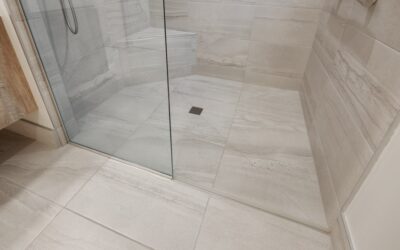
If a contractor told you the subfloor needs a “float” before new flooring goes down, you might picture a tool rather than a task. In flooring, a floor float refers both to the process of smoothing and leveling a subfloor and to the self-leveling compound (and the trowel) used to do it. The goal is the same either way: turn a bumpy, uneven subfloor into a flat, solid surface so your tile, vinyl, or hardwood lies perfectly and lasts.
This guide clears up the terminology, then walks through how self-leveling underlayment works over an uneven subfloor, including prep, priming, mixing, and pouring.
What “Floor Float” Means
The word “float” comes from the floating action of spreading a thin, smooth layer of compound across a surface. It carries a few related meanings in flooring.
- The process: floating a floor means applying a self-leveling or patching compound to flatten an uneven subfloor.
- The material: self-leveling floor compound, sometimes called floor leveler or self-leveling underlayment (SLU), is the cement-based product that does the work.
- The tool: a flat-bladed float or trowel used to spread and smooth compound, similar to the tools used for plaster and concrete.
This guide focuses on the most common homeowner job: using self-leveling underlayment to correct an uneven subfloor before installing finish flooring.
Why You Need to Float a Subfloor
Modern flooring is far less forgiving of an uneven base than people expect. Most manufacturers specify the subfloor must be flat within about 3/16 inch over a 10-foot span. Skip the leveling and you invite real problems.
- Tile can crack or develop hollow spots and lippage over dips and humps.
- Luxury vinyl and laminate telegraph every bump, flex over voids, and pop apart at the joints.
- Hardwood can squeak, gap, and move when laid over an uneven base.
Floating the floor creates the flat, sound foundation every flooring type depends on for a clean install and a long life.
Self-Leveling Compound vs. Patch
Know the difference before you buy. Self-leveling underlayment is a pourable, flowable compound designed to spread across a whole area and seek its own level, ideal for large uneven spaces. A floor patch or skim compound is a thicker, trowel-applied product meant for filling localized low spots, cracks, and small dips. Many jobs use both: patch the worst holes first, then pour self-leveler across the broader area.
Step 1: Prepare the Subfloor
Preparation makes or breaks a self-leveling job, and most failures trace back to a skipped prep step.
- Clean thoroughly: remove all old flooring, adhesive, dust, and debris. The surface must be sound and free of grease.
- Check for movement: on wood subfloors, screw down any loose or squeaky sections so the base is rigid.
- Fill large gaps and cracks and seal seams, expansion joints, and any holes so the liquid compound cannot leak through to the floor below.
- Dam the edges: block off doorways and the low end of a slope with foam strips or wood so the compound stays put.
Step 2: Prime the Surface
Priming is non-negotiable. Self-leveling compound bonds poorly to bare, porous, or smooth surfaces without a primer, and skipping it causes pinholes, bubbles, and delamination. Apply the manufacturer’s recommended primer with a roller or brush, working it into the surface, and let it dry per the label, often an hour or more. Porous concrete may need two coats. The primer also stops the subfloor from sucking water out of the compound too fast, which would weaken it.
Step 3: Mix the Compound
Self-leveler sets fast, so mix only what you can pour in the working time, typically 10 to 20 minutes. Add the powder to the correct amount of clean water, not the other way around, and blend with a paddle mixer on a drill until it is smooth and lump-free, like pancake batter. Follow the water ratio exactly; too much water weakens it and causes cracking, too little keeps it from flowing level. Have a helper ready, because timing matters once it is mixed.
Step 4: Pour and Spread
- Pour the mixed compound onto the subfloor, starting at the far corner and working toward your exit.
- Spread it with a gauge rake or smoothing trowel to the desired thickness; the material largely levels itself.
- Use a spiked roller to pop air bubbles and help it flow evenly.
- Work quickly and blend each fresh batch into the previous pour before it skins over.
Most self-levelers can be poured from a feather edge up to about a half inch in one pass, with thicker pours needing aggregate or multiple lifts. Always follow your product’s minimum and maximum thickness.
Common Mistakes to Avoid
Most self-leveling failures come from a handful of avoidable errors. Steer clear of these and your float job will turn out flat and durable.
- Skipping primer: the number-one cause of bubbles, pinholes, and delamination. Never pour over a bare or unprimed surface.
- Wrong water ratio: too much water weakens the compound and invites cracking; too little keeps it from flowing level. Measure precisely.
- Working too slowly: self-leveler sets in minutes. Mix small batches you can pour before they skin over.
- Not sealing leaks: unsealed gaps let the liquid drain away into the floor below, leaving voids and a mess.
- Exceeding thickness limits: going beyond the product’s maximum pour depth in one lift causes cracking and slow curing.
When to Call a Professional
Floating a small, simple floor is within reach for a confident DIYer, but some situations call for a pro. Large areas demand fast, coordinated pouring that is hard to manage alone, since the whole batch must blend before it sets. Severely out-of-level subfloors, structural issues, or significant moisture problems in a slab need proper assessment first, because self-leveler is a finishing step, not a fix for a failing subfloor. If you are leveling for tile in a wet area or over radiant heat, the stakes are higher and a flooring professional can ensure the right products and thickness. When the job is big, the floor is badly out of level, or the finished flooring is expensive and unforgiving, hiring an experienced installer is money well spent.
Curing and Next Steps
Self-leveling compound usually becomes walkable in a few hours, but full cure before installing flooring takes longer, often 24 hours or more, and tile or moisture-sensitive products may need a day or two. Check the label and confirm the surface is dry. Once cured, you have a flat, durable base ready for tile, vinyl, laminate, or hardwood. Take the time to prep, prime, and pour correctly, and floating the floor will pay off with a flooring installation that looks better and lasts far longer.
Prefer to explore on your own?
See how new flooring looks in your actual room in seconds — free, no signup.
Try the free Floor Studio →