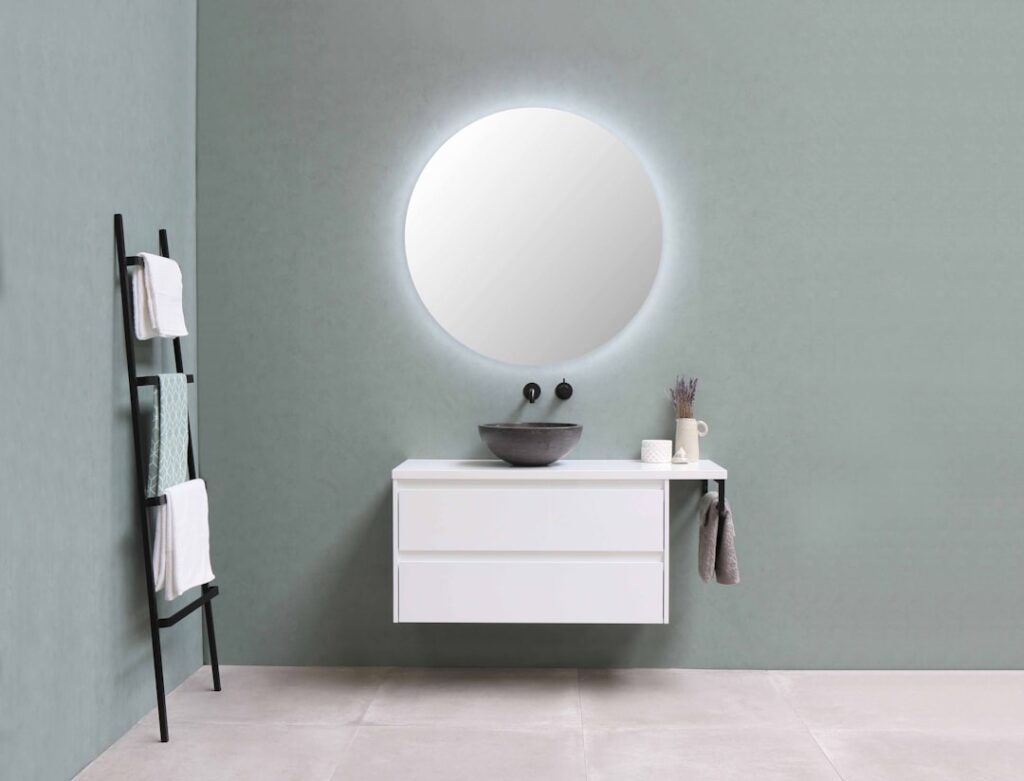
A wall-hung single vanity is the piece that reads “custom bathroom” even in a builder-grade room. A single floating bathroom vanity carries one sink and mounts entirely to the wall, giving you a clean, modern floating line and open floor beneath, without the double-sink footprint that not every bath can accommodate. This is the workhorse of contemporary bathroom design, and unlike a small powder-room float, a single floating vanity is often a full-size 30, 36, or 48-inch cabinet that has to hang solid while carrying a real load. The install details are what separate a rock-solid mount from a sagging one.
Here is how the mounting systems work, how much a single float can safely carry, and how to set one dead level.
What “Single” and “Floating” Mean Together
Single refers to one sink; floating refers to wall-mounted with no legs or toe kick touching the floor. Put them together and you get a one-basin vanity that appears to hover, typically in widths from 24 up to 48 inches. This is distinct from a small float, which is about squeezing into a tiny room. A single floating vanity is often the centerpiece of a normal-size bath, chosen for looks and cleanability as much as for space.
Because it can be a wider, heavier cabinet than a powder-room float, the structural demands are higher. A 48-inch single float loaded with a stone top and full drawers is a serious weight hanging on the wall, and the mount has to be engineered for it.
Mounting Systems: How It Hangs
Manufacturers use a few different systems to attach a floating vanity to the wall, and knowing yours drives the install:
- Ledger rail or mounting bracket: A metal rail lag-screwed into blocking or studs; the cabinet has a matching cleat on its back that hooks and locks onto the rail. The most common modern system.
- French cleat: A beveled rail on the wall meets a matching bevel on the cabinet, so gravity locks the two together. Extremely strong and self-aligning.
- Through-cabinet lag bolts: Heavy lags driven through a reinforced back panel directly into blocking. Simple and stout, but the fasteners must hit solid wood.
Whichever system your vanity uses, the load ultimately transfers to the wall structure, so the bracket is only as strong as what it is screwed into.
Blocking and Weight Limits
A single floating vanity needs solid backing, full stop. The gold standard is horizontal wood blocking, a 2×8 or 2×10 let into the studs at mounting height, so you have continuous solid wood to hit across the whole rail. Plywood backing across the studs works too. Fastening only to drywall with anchors is never acceptable for a full-size unit.
Properly blocked and bracketed, a floating vanity can carry several hundred pounds, far more than the cabinet plus a stone top plus its contents. The failures I see come from skipped blocking, not from the hardware. When you open the wall for plumbing, add the blocking then; it is the cheapest insurance in the whole project. Respect the manufacturer’s stated weight rating, and never let anyone sit on a floating vanity, which applies leverage the mount is not designed for.
Step-by-Step: Setting It Level
Installing a single float is a methodical job that rewards patience:
- Locate and mark your studs, and confirm the blocking behind the drywall at mounting height.
- Snap a level line for the top of the mounting rail at your chosen counter height, usually landing the finished counter at 32 to 36 inches.
- Lag the rail or cleat into the blocking, checking level across its full length; a rail out of level throws the whole cabinet off.
- Hang the cabinet on the rail and lock or fasten it per the system.
- Connect the drain and supply lines, set the top, and mount the sink and faucet.
The level line is everything. A floating vanity has no floor to reference, so if the rail is off, the counter and sink will visibly slope. Take the time to get that line dead level before you drill.
Sink, Top, and Faucet Choices
A single floating vanity handles any sink style, but the two most popular are an undermount bowl under a quartz slab for a seamless modern look, and an integrated single-piece top for budget builds. Vessel bowls suit floats well too, just remember a vessel adds height, so mount the cabinet a bit lower to keep the rim usable.
Wall-mounted faucets are a natural match and keep the counter uncluttered, but they need an in-wall rough-in that you must plan before closing the wall. A single-hole deck faucet is the simpler alternative. Exposed P-traps show on many floats, so consider a chrome or matte-black bottle trap to make the plumbing look deliberate.
Prices and Value
Single floating vanities cover a broad price range by width and material:
- Budget (24-30 inch, MDF box, integrated top): $300 to $600.
- Mid-range (30-48 inch, plywood box, quartz top, soft-close): $600 to $1,400.
- Premium (solid wood, thick stone, wall-mount faucet): $1,400 to $2,500.
Add $50 to $250 for a faucet, $30 for a drain, and budget extra labor for blocking, roughly $200 to $500 depending on how much wall you open. A wall-mount faucet valve adds material and rough-in time.
Common Install Mistakes to Avoid
Most floating-vanity failures trace back to a handful of avoidable errors, and knowing them saves you a sagging cabinet or a crooked counter. The number one mistake is skipping the blocking and trusting drywall anchors, which cannot carry a loaded full-size vanity no matter how the package is rated; add solid wood backing, period. The second is an out-of-level mounting rail, which throws the entire cabinet and its sink into a visible slope, so obsess over that level line before you drill.
Other frequent errors include mounting the cabinet at the wrong height because the counter height was not planned around the rail position, and forgetting to rough in a wall-mount faucet valve before closing the wall, which forces you to reopen finished drywall. People also overtighten lag screws into blocking and strip them, or under-drive them and leave the cabinet loose. Snug the lags firmly into solid wood, verify the cabinet locks fully onto its bracket, and give it a firm push-test before you trust it. A few extra minutes of care at these steps is the difference between a mount that feels bank-vault solid and one that worries you every time you lean on the counter.
Cleaning and Living With a Floating Vanity
The daily payoff of a single floating vanity is how easy the floor is to keep clean, and it is worth setting the room up to capitalize on it. With no toe kick to trap hair and dust, a dust mop or a robot vacuum glides straight under the cabinet, so the floor under the sink stops being the neglected zone it is with a floor-standing unit. Choose flooring that runs continuously under the cabinet to make the most of it.
Wipe the underside of the cabinet occasionally, since it is now a visible surface, and keep the exposed plumbing tidy with a decorative trap if the underside is open. Reseal the caulk line where the top meets the wall if you ever see it lifting, because a floating vanity relies on that seal to keep splash water out of the wall behind it. Beyond that, a wall-hung cabinet asks very little; the whole point is that it takes the hardest-to-clean part of the bathroom floor and makes it effortless.
Is It Right for You?
Choose a single floating vanity if you want a clean, contemporary look, easy floor cleaning, and the flexibility to set your own counter height, and if you are willing to prepare the wall properly. Add blocking, use the manufacturer’s bracket system, and obsess over a level rail. Match the sink and faucet to your chosen mounting height, and keep the load within the stated rating.
A single floating bathroom vanity delivers the modern floating look in a one-sink footprint that fits far more bathrooms than a double. The hardware is up to the job; your only real responsibility is giving it solid wood to hang on and a dead-level line to hang from.