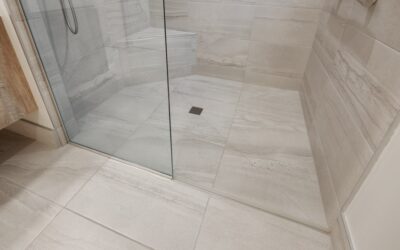
A floating floor is any floor that isn’t nailed, screwed, or glued to the subfloor. Instead, the planks or tiles connect to each other — typically through click-lock mechanisms — and rest on top of the subfloor as a single, unified surface. The floor’s own weight and friction keep it in place. This installation method has revolutionized DIY flooring and made professional installation faster and more affordable.
How Floating Floors Work
Each plank has a tongue on one side and a groove on the other. During installation, you angle the tongue into the groove of the adjacent plank and press down until it clicks into place. This creates a tight, gap-free connection between planks. The assembled floor sits on a thin underlayment (foam, cork, or IXPE) that provides cushioning, sound dampening, and a moisture barrier between the floor and the subfloor.
An expansion gap (typically 1/4 to 3/8 inch) is left around the entire perimeter — walls, cabinets, pipes, and any fixed object. This gap allows the floor to expand and contract naturally with temperature and humidity changes without buckling. Baseboards or quarter-round molding cover the gap.
Which Flooring Types Can Float?
Laminate
Laminate was essentially designed for floating installation. Click-lock laminate is the most common floating floor in homes. It’s affordable, DIY-friendly, and installs quickly over most subfloor types.
Luxury Vinyl Plank (LVP)
Rigid core LVP (SPC and WPC) floats over subfloors with excellent results. The rigid core provides stability, and the waterproof construction works over concrete in basements and bathrooms.
Engineered Hardwood
Engineered wood with click-lock edges can be installed as a floating floor. This gives you real hardwood on top with the ease of floating installation. Wider planks (7+ inches) may require glue at the joints for additional stability.
Cork
Click-lock cork tiles and planks float over underlayment just like laminate. Cork’s natural cushioning makes it particularly comfortable in a floating application.
Linoleum
Click-lock linoleum planks (like Forbo Marmoleum Click) install as floating floors, bringing eco-friendly linoleum into the easy-install category.
Pros of Floating Floors
- Easy DIY installation: No special tools, adhesives, or nails required. Most homeowners can install a room in a day.
- Fast: Professional crews can complete 500+ square feet per day.
- Versatile subfloor compatibility: Installs over concrete, plywood, existing tile, vinyl, and hardwood — as long as the surface is flat and sound.
- Easy removal: Click-lock floors can be disassembled without damaging the subfloor. Good for renters or homeowners who want to change floors later.
- No drying time: Walk on the floor immediately after installation (unlike glue-down or site-finished hardwood).
- Lower labor cost: Faster installation means less expensive professional work — saving $1 to $2 per square foot compared to nail-down or glue-down methods.
Cons of Floating Floors
- Hollow sound: Floating floors can produce a hollow, clicky sound underfoot because they’re not bonded to the subfloor. Quality underlayment minimizes but doesn’t eliminate this.
- Movement potential: In large, open spaces, floating floors can shift slightly over time. Transition strips at doorways and proper expansion gaps prevent major issues.
- Weight limitations: Very heavy items (pianos, massive bookshelves, kitchen islands) should sit on the subfloor, not on a floating floor. Cut the flooring around permanent heavy objects.
- Expansion gap requirement: The gap around the perimeter must be maintained. Pinching the floor between walls or fixed cabinets causes buckling.
Subfloor Requirements
Floating floors need a subfloor that is:
- Flat: Within 3/16 inch over a 10-foot span. Use self-leveling compound or sanding to correct high spots and dips.
- Dry: Test concrete for moisture before installing. Use underlayment with a vapor barrier over concrete subfloors.
- Clean: Remove all debris, dust, and old adhesive residue that could create bumps under the floor.
- Structurally sound: Fix squeaky or damaged subfloor sections before installation. A floating floor won’t fix subfloor problems — it will amplify them.
Underlayment Options
- Standard foam (2mm): $0.15 to $0.25/sq ft. Basic cushioning and sound dampening. Budget choice.
- Foam with vapor barrier: $0.25 to $0.50/sq ft. Required over concrete subfloors to prevent moisture migration.
- Cork underlayment (3mm): $0.50 to $1.00/sq ft. Superior sound absorption and thermal insulation. Premium choice for upper floors and bedrooms.
- IXPE foam (pre-attached): Included with many LVP and laminate products. Eliminates separate underlayment purchase and installation.
Common Mistakes to Avoid
- Skipping acclimation: Let flooring sit in the room for 48 hours before installation to adjust to the room’s temperature and humidity.
- Forgetting expansion gaps: Every wall, pipe, door frame, and fixed object needs a gap. Use spacers consistently.
- Installing over carpet pad: Remove carpet and padding completely. Floating floors need a firm, flat surface.
- Running floors into multiple rooms without transitions: Use transition strips at doorways. Continuous runs exceeding 30 to 40 feet without breaks can buckle.
- Installing cabinets on top: Kitchen and bathroom cabinets should sit on the subfloor, not on the floating floor. The weight prevents natural expansion.
- Neglecting subfloor prep: A bump or dip in the subfloor will telegraph through. Spending an hour leveling saves weeks of frustration.
Cost
Floating installation is the most affordable method:
- DIY: Materials only — $1 to $8/sq ft depending on flooring type
- Professional floating installation: $1.50 to $3.00/sq ft labor
- Underlayment: $0.15 to $1.00/sq ft (if not pre-attached)
Floating floors have made quality flooring accessible to DIY homeowners who would never attempt nail-down hardwood or mortar-bed tile. Choose the right product for your room’s demands, prepare the subfloor properly, and respect the expansion gaps — and you’ll have a beautiful floor installed in a weekend.
Prefer to explore on your own?
See how new flooring looks in your actual room in seconds — free, no signup.
Try the free Floor Studio →