
A sliding barn door that swings, rattles, and scrapes the frame almost always has one thing missing: a proper bottom guide. The barn door bottom guide is the small but essential piece of hardware that keeps the door’s lower edge tracking straight along the wall instead of swaying out into the room. Without it, the door pendulums on its top rollers, bangs the trim, and eventually chips the wall. This inexpensive component, usually $10 to $30, is the difference between a barn door that glides quietly and one that annoys everyone in the house.
Part of our Windows & Doors guide — explore the full guide →
- What a Bottom Guide Does
- Types of Bottom Guides
- Floor-Mount vs Groove Systems
- How to Install a Bottom Guide
- Troubleshooting Common Problems
- Choosing the Right Guide for Your Door
- Bottom Guides for Double Doors and Bypass Setups
- Choosing Between Nylon Rollers and Fixed Pins
- Frequently Asked Questions
What a Bottom Guide Does
Barn doors hang from rollers on a top-mounted track, which means the entire weight and motion of the door pivots from above. Gravity keeps the door down, but nothing stops the bottom from swinging toward or away from the wall as it moves. The bottom guide constrains that lateral movement, holding the lower edge a consistent distance off the wall while still letting the door slide freely side to side.
A good guide does its job without adding drag. It should stabilize the door without gripping it so tightly that sliding becomes a chore. Most also serve as a wall spacer, preventing the door face from rubbing the baseboard or casing.
Types of Bottom Guides
Guides fall into a few families, and the right choice depends on your floor and your door’s construction.
- Floor-mounted wall guide: A small T-shaped or L-shaped bracket screwed to the floor near the wall. A pin or roller rides in a groove cut into the door bottom. This is the most common and most secure type.
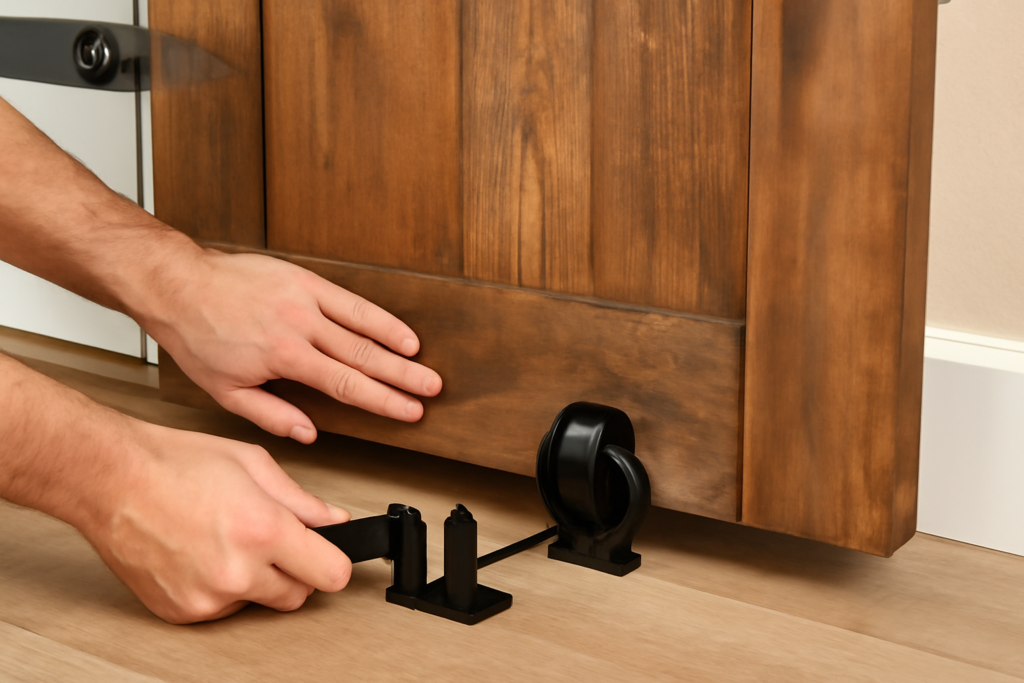
- Adjustable floor guide: A bracket with a slotted, sliding stay whose nylon rollers you tighten against both faces of the door. It fits a range of door thicknesses without grooving the door.
- Wall-mounted guide: Mounts to the wall or baseboard rather than the floor, useful over tile, radiant-heat floors, or thresholds you do not want to drill.
- Bottom groove and floor pin: A channel routed into the bottom edge of the door rides over a fixed floor pin, giving a nearly invisible guide with a clean floor line.
Adjustable floor guides are the easiest for retrofits because they clamp the door without requiring you to rout a groove, which demands a router and a steady hand.
Floor-Mount vs Groove Systems
The two dominant approaches trade convenience for aesthetics. A surface-mounted adjustable guide installs in ten minutes with two screws and works on nearly any door, but it is visible at the floor and can collect dust. A routed groove riding a floor pin looks cleaner because nothing protrudes from the door face, yet it requires cutting a straight channel the length of the door’s travel path and a precisely placed floor pin.
For most homeowners, the adjustable surface guide wins on simplicity. If you are building a custom door or want a showpiece installation, the groove system rewards the extra effort with an almost hidden guide.
How to Install a Bottom Guide
Installation is a short project, typically under 30 minutes, once the door is already hung on its top track.
- Slide the door to its fully open and fully closed positions, marking where the bottom edge travels along the floor.
- Position the guide directly below the wall track, centered on the door’s path, close to the wall so the door does not swing.
- Hold the door plumb with a level, then set the guide’s rollers or pin so the door hangs vertically without leaning.
- Mark the screw holes, pre-drill pilot holes to avoid splitting hardwood or cracking tile, and anchor into a joist or use appropriate anchors.
- Slide the door back and forth to confirm smooth, rattle-free travel, then fine-tune roller tension on adjustable models.
On tile or stone floors, use a masonry bit and appropriate anchors, and consider a wall-mounted guide instead to avoid drilling the tile at all.
Getting the Spacing Right
The gap between the door and the wall matters. Too tight and the door face rubs the trim; too loose and the door can still sway. Aim to hold the door about 3/8 to 1/2 inch off the finished wall, matching the standoff of your top track brackets so the door hangs parallel to the wall along its entire height.
Troubleshooting Common Problems
Even a correctly installed guide can develop issues over time. A door that suddenly swings again may have a guide that worked loose; re-tighten the mounting screws and check that the floor anchor still holds. If the door drags or sticks, the rollers may be pinching too tightly, so back off the adjustment a hair until it slides freely.
Scraping or squeaking usually means dirt or grit in the guide channel. Vacuum the area and wipe the rollers, then apply a dry silicone or graphite lubricant rather than an oil that attracts dust. If the door still knocks the wall at one end of its travel, the guide may be positioned too far from the wall; reposition it slightly closer.
Choosing the Right Guide for Your Door
Match the guide to three factors: door thickness, floor material, and how hidden you want the hardware. Standard interior barn doors run 1 3/8 to 1 3/4 inches thick, and most adjustable guides accommodate that range, but confirm before buying. Heavier solid-wood doors benefit from a guide with a wider base and roller stays rather than a single pin. For a bathroom or laundry where privacy and quiet matter, a well-adjusted guide also keeps the door from banging when someone closes it in a hurry.
A barn door bottom guide is a small purchase that solves the single most common complaint about sliding doors. Pick the type that suits your floor, install it centered below the top track with correct spacing, and keep the channel clean. Done right, it turns a swaying, scraping door into one that glides shut with a satisfying, quiet slide.
Bottom Guides for Double Doors and Bypass Setups
Single doors are the simplest case, but many installations use two doors that meet in the middle or bypass each other on parallel tracks, and these need extra thought. For a double, or biparting, setup where two doors close toward the center, each door gets its own guide near its outer edge, and a floor guide or a small center stop keeps the two leading edges aligned where they meet.
Bypass doors, which slide past one another on a double track, require guides that account for the gap between the two door planes. A common solution is a floor-mounted guide with two channels, one for each door, keeping both leaves tracking straight without letting them swing into each other. Measure the offset between the two doors carefully so the guide holds the correct spacing, otherwise the doors can rub or bind as they pass.
Choosing Between Nylon Rollers and Fixed Pins
Guides use two main mechanisms to control the door, and each has trade-offs. Nylon roller stays contact the door faces and roll as it slides, giving smooth, quiet operation and forgiving tolerances, which is why adjustable roller guides are so popular for retrofits. The rollers can wear over years of heavy use, but they are inexpensive to replace.
Fixed pins or a floor pin riding in a routed groove offer the cleanest look and no moving parts to wear out. The trade-off is precision: the groove must be straight and the pin exactly placed, or the door will bind. For a high-traffic door in a busy household, a roller guide’s smoothness usually wins. For a showpiece door where hidden hardware matters most, the groove-and-pin system is worth the added installation care.
Frequently Asked Questions
Do barn doors need a bottom guide?
Yes. Without a bottom guide, the door hangs only from its top rollers and swings freely at the bottom, banging the wall and trim. The guide is essential for keeping the door tracking straight and quiet.
Where should the bottom guide be positioned?
Center it directly below the top track, close to the wall, along the door’s travel path. Set it so the door hangs plumb and stays about 3/8 to 1/2 inch off the finished wall, matching the standoff of your top track brackets.
Can I install a bottom guide on a tile floor?
Yes, but drill pilot holes with a masonry bit and use appropriate anchors to avoid cracking the tile. Alternatively, choose a wall-mounted guide that fastens to the wall or baseboard so you never have to drill the tile at all.
How do I stop my barn door from swaying?
A properly installed and adjusted bottom guide is the fix. If the door still sways, check that the guide’s mounting screws are tight, the floor anchor holds, and the rollers or pin are set close enough to the wall to constrain the door’s movement.


