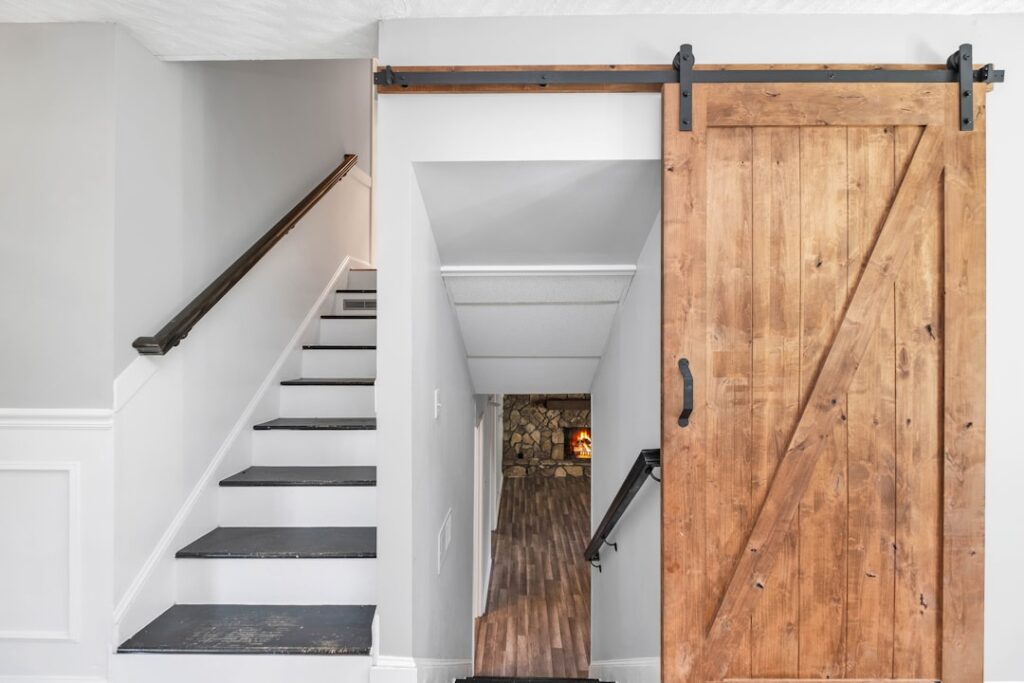
Swinging doors demand a clear arc of floor space that a lot of rooms simply don’t have. A barn door slider solves that by gliding flat along the wall on an overhead track, reclaiming the square footage a hinged door wastes while adding a striking architectural focal point. From closing off a pantry to hiding a laundry nook or dressing up a master bathroom, sliding barn doors have become one of the most popular interior upgrades around. This guide covers the hardware, sizing, materials, and step-by-step installation to help you get it right.
Part of our Windows & Doors guide — explore the full guide →
- Why Choose a Barn Door Slider?
- Understanding Barn Door Hardware
- Sizing Your Barn Door Correctly
- Choosing Your Door Material
- How to Install a Barn Door Slider
- Cost of a Barn Door Slider
- Single, Bypass, and Bi-Parting Configurations
- Soft-Close and Other Worthwhile Upgrades
- Making Your Barn Door Work Beautifully
Why Choose a Barn Door Slider?
The appeal starts with space. Because a barn door slides parallel to the wall instead of swinging out, it frees up the floor area a traditional door would need to open, a real advantage in tight hallways, small bathrooms, and cramped bedrooms. That makes sliders ideal where a swinging door would collide with furniture or fixtures.
Beyond function, barn doors deliver serious style. The exposed track hardware and solid door slab become a design feature, adding character that a plain hollow-core door never could. They work across aesthetics too, from rustic reclaimed wood to sleek modern glass-and-steel, which is why designers reach for them so often.
Understanding Barn Door Hardware
The hardware is what makes a barn door a barn door, and it’s worth understanding the components before you buy. A quality kit is the difference between smooth, quiet operation and a rattly, sticking door.
- Track (rail): The horizontal bar mounted above the opening that the door hangs from. It must be roughly double the door’s width so the door can fully clear the opening.
- Rollers (hangers): The wheeled brackets that attach to the door top and ride along the track.
- Floor guide: A small guide at the bottom that keeps the door from swinging out or banging the wall.
- Wall spacers/standoffs: Hold the track off the wall so the door clears trim and baseboards.
- Door stops: Bumpers on the track ends that prevent the door from rolling off.
- Anti-jump discs: Small pieces that keep rollers from hopping off the track.
Weight rating matters here. Confirm the hardware kit is rated for your door’s weight, especially for heavy solid-wood or glass slabs. Most residential kits handle doors up to 150 to 200 pounds.
Sizing Your Barn Door Correctly
Proper sizing is critical for both coverage and looks. A barn door needs to be larger than the opening it covers, and the track needs room to let it slide fully clear.
- Door width: Add 2 to 4 inches to each side of the opening so the door overlaps and blocks light gaps. For a 32-inch opening, a door around 36 to 40 inches wide works well.
- Door height: Add about 1 inch to the opening height for coverage, accounting for the roller and floor clearance.
- Track length: Roughly twice the door width, so the door has somewhere to go when open.
- Wall space: Ensure you have clear, flat wall beside the opening equal to the door’s width for it to slide onto.
That last point trips people up. If there isn’t enough uninterrupted wall next to the opening, a light switch, window, or return wall in the way, a standard slider won’t work, and you may need a bypass or bi-parting setup instead.
Choosing Your Door Material
Barn door slabs come in a wide range of materials, each with a different look, weight, and price. Match the material to your style and to the hardware’s weight rating.
- Solid wood: Classic and heavy, with rich grain. Beautiful but demands robust hardware.
- MDF or engineered: Affordable, stable, and paint-ready, lighter than solid wood.
- Reclaimed/rustic wood: Full of character for a true farmhouse look.
- Glass panel: Frosted or clear glass in a metal frame for a modern, light-passing look, often used for offices and bathrooms.
- Metal and wood combo: Steel frames with wood inserts deliver an industrial-modern edge.
For privacy rooms like bathrooms, remember barn doors don’t seal like hinged doors, so add a privacy latch and consider a door wide enough to fully cover the opening with overlap.
How to Install a Barn Door Slider
Installing a barn door is a very achievable DIY project for a weekend, provided you mount the track securely. The single most important step is anchoring into solid framing.
- Install a backer board (recommended): Mount a 1×6 board across the studs above the opening. It gives you solid anchoring anywhere along the track and a clean look.
- Locate the studs: The track must bolt into studs or the backer board, never just drywall, because it carries the full door weight.
- Mark the track height: Position the track so the hung door clears the floor by about a half inch. Level it carefully.
- Mount the track: Bolt it up with the provided lag screws through the spacers, checking level as you go.
- Attach the rollers: Fasten the roller brackets to the top of the door.
- Hang the door: Lift the door and set the rollers onto the track. Install the door stops and anti-jump discs.
- Add the floor guide: Secure the bottom guide so the door tracks straight and doesn’t swing.
A level track is everything. If it’s even slightly off, the door will roll open or closed on its own. Take your time confirming level before the final tighten.
Cost of a Barn Door Slider
Barn door setups span a broad price range depending on the door and hardware quality. A basic kit with an MDF door and standard hardware might run $200 to $400, while a solid-wood or glass door with premium soft-close hardware can reach $600 to $1,500 or more. Hardware kits alone typically cost $80 to $300. Soft-close mechanisms, which gently stop the door instead of letting it slam, are a worthwhile upgrade for around $40 to $100.
Single, Bypass, and Bi-Parting Configurations
Not every opening suits a single sliding door, and knowing the configurations helps you solve tricky layouts. The right setup depends on your opening width and how much adjacent wall you have.
- Single slider: One door sliding to one side. The classic look, requiring clear wall space equal to the door width.
- Bypass (double): Two doors on parallel tracks that slide past each other, ideal for wide closets where you lack side wall space.
- Bi-parting: Two doors that meet in the middle and slide apart in opposite directions, great for very wide openings like a large pantry or room divider.
Bypass and bi-parting setups are the answer when a single door won’t work, either because the opening is too wide for one panel or because there’s no uninterrupted wall to receive it. They cost a bit more in hardware but dramatically expand where barn doors can go.
Soft-Close and Other Worthwhile Upgrades
A few upgrades transform a basic barn door from functional to genuinely refined, and most are affordable add-ons worth considering during your build. They address the small annoyances that come with a heavy sliding slab.
Soft-close mechanisms are the top upgrade, gently catching and easing the door to a stop at each end instead of letting it slam into the stops, which protects both the door and the wall. A quality floor guide keeps the door from swinging and rattling, while felt or rubber wall bumpers prevent the slab from marking the wall. For heavier doors, upgrade to smooth-rolling nylon-coated or sealed-bearing rollers, which run quieter and last longer than basic metal wheels. Together these touches make the door feel high-end every time you use it, and they’re far cheaper to include now than to retrofit later.
Making Your Barn Door Work Beautifully
A barn door slider is one of the most rewarding home upgrades you can tackle, saving floor space while adding real architectural personality. Success comes down to a few essentials: size the door 2 to 4 inches wider than the opening, choose hardware rated for the door’s weight, confirm you have clear wall space for it to slide onto, and mount the track into solid framing with a backer board. Nail those fundamentals, keep the track level, and add a soft-close and a privacy latch where needed. The result is a smooth-gliding, head-turning door that works as well as it looks.