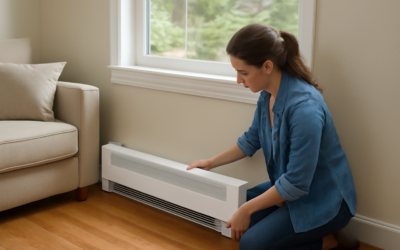
A dented, rusted, or yellowed baseboard heater cover can drag down an otherwise clean-looking room, and replacing one is among the cheapest upgrades a homeowner can make. The metal shell that runs along the wall takes a beating from furniture, vacuums, and years of foot traffic, but the heating element inside usually keeps working fine. Swapping just the cover restores the look without the cost of a full heater replacement, and on most units the job takes well under an hour.
What a Baseboard Heater Cover Does
The cover is the visible metal housing that surrounds the heating element. It serves two jobs at once. First, it protects the element and electrical or hydronic connections from contact and debris. Second, it shapes airflow, directing cool air in at the bottom and warm air out at the top through a convection cycle that heats the room.
Because the cover channels that airflow, a crushed or blocked cover actually reduces how efficiently the heater works. A bent fin or a cover dented against the element can choke the convection and leave the room cooler than it should be.
Electric vs. Hydronic: Know What You Have
Before you buy or work on a cover, identify your heater type, because the safety rules differ. Electric baseboard heaters convert electricity directly to heat and can run quite hot at the element. Hydronic (hot water) baseboard heaters circulate heated water or oil through a pipe and tend to run at a steadier, lower surface temperature.
For electric units especially, never block the airflow and never let curtains, furniture, or bedding rest against the cover. Manufacturers typically call for keeping combustible materials a minimum of several inches away, and drapes should clear the top of the unit. Always shut off power at the breaker before removing a cover on an electric heater.
Types of Replacement Covers
You have a few routes depending on how much you want to spend and how the old cover looks.
- Full replacement covers: a complete new metal housing that matches a standard heater length, ideal when the old one is badly damaged.
- Snap-on or slip-over covers: a fresh shell that fits over the existing back plate, the fastest swap for many units.
- End caps and corner pieces: sold separately to finish runs and turns neatly.
- Premium architectural covers: heavier-gauge or designer styles that upgrade the look in living spaces.
Covers come in standard lengths, commonly 2 to 8 feet, and most can be cut down to fit. Confirm your heater’s make and the cover’s mounting style before ordering, since hardware varies between brands.
What It Costs
Replacement covers are inexpensive relative to most home projects. A basic snap-on or slip-over cover generally runs from $20 to $60 depending on length. Full replacement housings and heavier premium covers can range from $50 to $150 or more. End caps and corner pieces typically add a few dollars each.
If you do the work yourself, that is the whole cost. Hiring an electrician to handle an electric unit and confirm the connections are sound might add $75 to $200 in labor, which is worth it if you are not comfortable working near wiring.
How to Replace a Cover Yourself
On a typical unit the job is straightforward, but follow the safety steps in order:
- For electric heaters, turn off the breaker that powers the unit. Confirm it is dead before touching anything.
- Remove the end caps, which usually snap or screw off.
- Unclip or unscrew the front cover from the back plate.
- Inspect the fins inside and gently straighten any that are bent to restore airflow.
- Measure and cut the new cover to length if needed, then clip or screw it into place.
- Reinstall the end caps and restore power.
Take care not to bend the thin aluminum fins on the element during the swap, as crushed fins reduce heat output. A wide-jaw pliers or a fin comb makes straightening easy if any got mashed over the years.
Measuring for a Replacement
Accurate measurements prevent a frustrating return trip. Measure the total length of the existing cover from end to end, and note the height and depth of the unit so the new cover clears the heating element. Many covers come in standard lengths that you trim to fit, but confirm the mounting style matches your heater, since clip-on, slip-over, and screw-mount systems are not interchangeable.
If you have a long run made of multiple sections, measure each section and account for the joiner pieces and corner trim between them. Buying a touch long and cutting down is safer than coming up short, since covers are made to be trimmed at the ends.
Refreshing vs. Replacing
Not every tired cover needs to be swapped. If the metal is structurally fine but just scuffed, scratched, or an outdated color, you can repaint it instead. Clean it thoroughly, lightly sand glossy areas for adhesion, and use a paint rated for high heat and metal. A fresh coat of an appliance or metal enamel can make an old cover look brand new for the price of a spray can.
For an electric heater, always remove the cover and paint it away from the element, and let it fully cure before reinstalling and powering it back up. Painting in place risks getting paint on the element and creating an odor or fire hazard when the heater first runs.
Maintenance and Safety Reminders
Once the new cover is on, keep it working safely with a little upkeep. Vacuum dust out of the element a couple of times a year, since dust buildup both reduces efficiency and, on electric units, can smell or smoke when the heater first fires up each season.
Maintain clearance around the unit at all times. Keep furniture pulled away from the front, never drape clothing or bedding over it, and make sure floor-length curtains stop above the cover. Treated with that basic respect, a clean new baseboard heater cover refreshes the room and keeps the heat flowing safely for years.