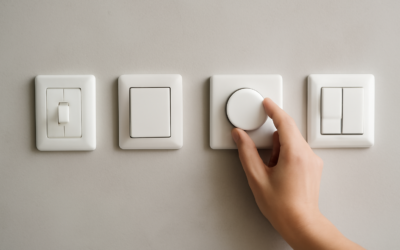
The humble wall switch controls more than light in a modern bathroom, where the same box often handles the vanity fixtures, the exhaust fan, and sometimes a heat lamp. Choosing the right bathroom light switch can save energy, cut down on the fan running all day, and even improve safety in a room that combines electricity with water and humidity. Before you grab the cheapest single-pole toggle at the hardware store, it is worth understanding the handful of switch types that solve real bathroom problems and the code rules that govern this damp environment.
Part of our Bathroom Remodeling & Flooring guide — explore the full guide →
Switch Types and What Each Solves
Standard Single-Pole Switch
The basic on-off toggle or rocker controls one light from one location and costs $1 to $5. It works, but it does nothing clever. Fine for a closet-sized powder room, underwhelming for a full bath.
Dimmer Switch
A dimmer lets you drop the vanity lights to a soft glow for a late-night trip and full brightness for grooming. LED-compatible dimmers run $15 to $40; buy one rated for LED loads or your bulbs will flicker or buzz. A dimmer also extends bulb life and trims energy use.
Timer Switch
The single best upgrade for an exhaust fan is a countdown timer switch. Set it for 20, 30, or 60 minutes and the fan clears humidity after your shower, then shuts off on its own. That prevents both the wasted energy of a fan left running all day and the moisture damage of one shut off too soon. Expect $20 to $45.
Motion-Sensor (Occupancy) Switch
An occupancy sensor turns the lights on when you walk in and off when the room empties, which is a small luxury with kids who never flip switches off. Vacancy-sensor versions require a manual on but auto-off. Both run $18 to $50.
GFCI and the Wet-Location Rules
Bathrooms are governed by strict electrical code because water and electricity share the room. Receptacles in a bathroom must be GFCI-protected, but a common point of confusion is the switch itself. A standard light switch does not need to be GFCI, however any switch or fixture within the tub or shower zone must be rated for damp or wet locations and protected accordingly. If your switch sits inside the 3-foot horizontal reach of a tub or shower, code steers you toward relocating it or using proper wet-rated controls. When in doubt, keep switches outside the immediate splash zone.
Controlling Multiple Devices
Most full bathrooms have three things on the wall: lights, fan, and sometimes a heat lamp or second light group. You have two clean ways to handle them:
- Multi-gang box: separate switches side by side, one per device, the most flexible setup
- Combination switch: a single device with two or three stacked controls, ideal when the box is too small to expand
A popular combo pairs a timer for the fan with a dimmer for the lights in one two-gang plate, giving you set-and-forget humidity control alongside adjustable lighting.
Wiring Basics and Safety
Swapping a bathroom light switch is a common DIY job, but respect the electricity. Always shut off the breaker feeding the circuit and confirm the wires are dead with a non-contact voltage tester before touching anything, because the neutral in a switch box can still be shared with a live circuit.
- Turn off the breaker and verify zero voltage at the switch.
- Photograph the existing wiring before disconnecting so you can replicate it.
- Note whether a neutral wire (white) is present in the box, required for many smart and timer switches.
- Transfer the hot, load, ground, and neutral to the matching terminals on the new switch.
- Tuck the wires in neatly, screw the switch to the box, and restore power to test.
If the box has no neutral wire, older homes often lack one, some smart and timer switches will not work, so check before you buy.
Smart Switch Options
Wi-Fi and smart switches bring app control, schedules, and voice commands to the bathroom. A smart dimmer can auto-dim to 10 percent as a nightlight after 10 p.m., and a smart fan timer can log humidity. Most require a neutral wire and cost $25 to $60. They are genuinely useful for a fan you always forget to run or lights you want on a sunrise schedule, though a simple mechanical timer solves the fan problem for less money and never needs a firmware update.
Choosing the Right Combination
For a typical family bathroom, the best value setup pairs three controls: a countdown timer on the exhaust fan, an LED-rated dimmer on the vanity lights, and a standard or motion switch on any secondary lighting. That trio addresses the three real problems, humidity, harsh brightness, and forgotten lights, for well under $80 in parts. In a small powder room, a single motion sensor switch handles everything by turning the light on and off automatically for guests.
Final Recommendation
Skip the plain toggle unless the room is tiny. Put a timer on the fan to protect your walls from moisture, a proper LED dimmer on the vanity for comfort, and keep all switches clear of the tub and shower splash zone to satisfy code and common sense. If you are comfortable killing the breaker and matching wire colors, these are afternoon swaps; if the box lacks a neutral or sits near the shower, bring in a licensed electrician and do it right.