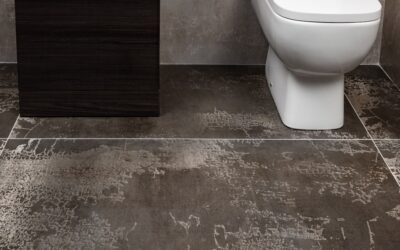
A bathroom is the smallest room in most houses and the most expensive per square foot to remodel, which surprises nearly every first-time renovator. A bathroom reno packs plumbing, electrical, waterproofing, tile, ventilation, and fixtures into a space that might be only 40 square feet, and every one of those trades has to coordinate in a tight sequence. Understanding the real scope, budget, and order of operations before you swing a hammer is what separates a smooth six-week project from a stalled, over-budget mess.
Part of our Bathroom Remodeling & Flooring guide — explore the full guide →
Whether you are refreshing a tired guest bath or gutting a primary suite to the studs, the fundamentals are the same. Plan the layout and budget first, respect the waterproofing, and sequence the work so trades do not trip over each other.
Setting a Realistic Budget
Bathroom renos span an enormous price range depending on scope and finishes. A cosmetic refresh, new paint, vanity, mirror, light fixture, and toilet, might run $3,000 to $7,000. A mid-range full remodel with new tile, tub or shower, vanity, and fixtures typically lands between $12,000 and $25,000. A gut renovation of a primary bath with moved plumbing, custom tile, and premium fixtures can exceed $35,000.
Labor eats the majority of any full reno, often 50 to 65 percent of the total, because of the many specialized trades in a small space. Always carry a contingency of 15 to 20 percent, because bathrooms hide the nastiest surprises: rotted subfloor under a leaking toilet, corroded supply lines, or mold behind the shower wall. Decide early where you will splurge and where you will save, since a $2,000 vanity and a $200 vanity occupy the same footprint but very different budgets.
Layout: Keep Plumbing Where It Is
The fastest way to blow a bathroom budget is to move the plumbing. Relocating a toilet, tub, or shining new freestanding tub across the room means rerouting supply lines and, worse, drain lines that must maintain a precise downhill slope, often requiring the floor or ceiling below to be opened. Every fixture you move adds hundreds to thousands of dollars.
Whenever possible, keep the toilet, sink, and shower in their existing locations and improve everything around them. You can dramatically change how a bathroom feels, larger shower, floating vanity, better lighting, without touching the drain locations. If the current layout is genuinely dysfunctional, moving one fixture is sometimes worth it, but go in knowing that a “small” layout change is where budgets quietly double. Sketch the plan to scale and confirm clearances: at least 15 inches from a toilet centerline to any side wall, and 21 inches of clear space in front of fixtures.
Waterproofing Is the Part You Cannot See
The most important work in a bathroom reno is invisible once finished, and skimping on it guarantees failure. Behind every tiled shower must be a continuous waterproof system, a sheet or liquid membrane like Schluter-Kerdi or RedGard over a proper backer board, never plain drywall or green board. The shower pan needs a correctly sloped mortar bed, roughly a quarter inch of fall per foot toward the drain, under its own membrane.
This is where cutting corners costs the most later. A shower that was not waterproofed correctly will leak into the wall and subfloor, and by the time you see a stain on the ceiling below, thousands of dollars of rot has already occurred. If you hire out only one part of the job, make it the shower waterproofing, and if you DIY it, follow the membrane manufacturer’s system exactly. Ventilation belongs in this category too: a properly sized exhaust fan, rated for your room’s square footage and vented outside, not into the attic, prevents the chronic moisture that breeds mold.
The Right Order of Operations
Bathrooms fail when trades are sequenced wrong, so the order matters as much as the work itself. A typical full reno flows in a set sequence, and skipping ahead forces expensive backtracking.
- Demolition: strip to the studs and subfloor, inspect for rot and mold
- Rough-in: plumbing and electrical moved or updated while walls are open
- Backer board and waterproofing: membranes installed and tested
- Tile: shower walls, floor, then grout and seal
- Fixtures and finishes: vanity, toilet, faucets, trim, paint, and accessories
Inspections by your local building department usually fall after rough-in and again at completion for permitted work, so schedule them into the timeline. A full bathroom reno realistically takes four to six weeks, with unavoidable dead time while mortar and grout cure.
Choosing Durable, Water-Smart Materials
Material choices in a bathroom must respect constant moisture. Porcelain tile is the gold standard for floors and shower walls because it is dense, waterproof, and nearly impervious to wear. For flooring, luxury vinyl is a budget-friendly, warmer, waterproof alternative that has become popular in secondary baths. Avoid solid hardwood and standard laminate entirely; the humidity will destroy them.
For the vanity top, quartz outperforms marble because it never needs sealing and shrugs off toothpaste, cosmetics, and water. Choose a quality exhaust fan and moisture-resistant paint, typically a satin or semi-gloss that wipes clean and resists mildew. Spend on the fixtures you touch daily, the shower valve and faucet, since a cheap valve is a future leak and a miserable retrofit to replace once the tile is in.
Lighting, Ventilation, and the Details That Age Well
The elements homeowners treat as afterthoughts often determine how a finished bathroom feels day to day. Ventilation is the most important and the most neglected; an undersized or improperly vented exhaust fan lets humidity linger, peeling paint, fogging mirrors, and breeding mildew in the grout. Size the fan to the room, roughly 1 CFM per square foot for a standard bath, and vent it through the roof or an exterior wall, never into the attic where the moisture simply migrates back into the structure. Run it during every shower and for 20 minutes after, ideally on a timer switch so it is not left to memory.
Lighting deserves the same deliberate planning. A single overhead fixture casts harsh shadows on the face; layering ambient recessed cans with task lighting at the mirror and a fixture in the shower makes the room both functional and inviting. Choose bulbs around 2700K to 3000K with a color rendering index of 90 or higher so skin tones and finishes read true. Small details round out a reno that ages gracefully: blocking in the walls for future grab bars even if you do not install them now, a comfort-height toilet, a handheld shower on a slide bar, and a lit or well-placed niche instead of a caddy hanging off the showerhead. These touches cost little during a renovation and are expensive or impossible to add later.
Accessibility and Aging in Place
A renovation is the ideal moment to build in features that keep a bathroom usable for decades, even if you do not need them yet. Adding solid blocking behind the walls during the open-stud phase costs almost nothing and lets you or a future owner mount grab bars anywhere later, versus the expensive retrofit of opening finished walls. A curbless shower with a wide entry, a handheld shower on an adjustable slide bar, a comfort-height toilet at 17 to 19 inches, and lever-style faucet handles all improve daily comfort now and accessibility down the road. Non-slip floor tile with a higher coefficient of friction, and a bench or niche within the shower, add safety without sacrificing style. Because these choices are far cheaper to include during a gut renovation than to add afterward, thinking ahead pays real dividends whether you plan to stay in the home or eventually sell it.
DIY, Hire Out, or Split the Work
Few homeowners should tackle an entire bathroom reno alone, but many can handle parts. Demolition, painting, installing a vanity and mirror, and swapping a toilet are all reasonable DIY tasks that save real labor money. Tile setting is learnable but unforgiving in a wet area, and plumbing and electrical often require permits and inspections that favor licensed pros.
A common and cost-effective approach is to do your own demo and finish work while hiring out the plumbing, electrical, waterproofing, and tile. That hybrid keeps the high-risk, code-sensitive work in professional hands while trimming the bill on the labor you can safely provide. However you divide it, respect the sequence, over-invest in the waterproofing you will never see, and keep a healthy contingency, and your bathroom reno will look great and stay dry for decades.