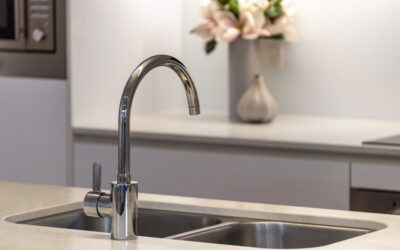
A dripping, corroded, or dated faucet is one of the most satisfying weekend fixes in the house, and it rarely requires a plumber. A straightforward bathroom sink faucet replacement takes most homeowners under an hour once the water is off and the right tools are laid out. The job trips people up not because it is technically hard, but because of a cramped cabinet, rusted nuts, and one specialty tool almost everyone forgets to buy. This guide walks you through the whole process and the small mistakes that turn a 45-minute swap into an afternoon.
Part of our Bathroom Remodeling & Flooring guide — explore the full guide →
- Tools and Materials You'll Need
- Step 1: Shut Off the Water
- Step 2: Disconnect the Old Faucet
- Step 3: Understand Your Mounting Type
- Step 4: Install the New Faucet
- Step 5: Test for Leaks
- Common Problems and Fixes
- Choosing the Right Replacement Faucet
- Handling Corroded or Stuck Parts
- Cost: DIY Versus Hiring a Plumber
- Replacing Sink Faucet Supply Lines and Drains: Pressure Relief, Fittings, and Chemical Safety
Tools and Materials You’ll Need
Gather everything before you crawl under the sink. Nothing is more frustrating than lying on your back and realizing you need a trip to the hardware store.
- Basin wrench: the one tool that makes this job doable, reaching the mounting nuts hidden behind the sink bowl
- Adjustable wrench and pliers for supply lines and compression fittings
- Bucket and towels to catch residual water
- Plumber’s putty or silicone if your new faucet lacks a gasket
- Plumber’s tape (PTFE) for threaded connections
- Flashlight or headlamp for the dark cabinet
- New supply lines, since reusing old braided lines invites leaks
Buy fresh flexible supply lines even if the old ones look fine. They cost a few dollars each and are the most common source of post-replacement leaks.
Step 1: Shut Off the Water
Locate the two shutoff valves under the sink, one for hot and one for cold, and turn both clockwise until they stop. Then open the faucet to relieve pressure and confirm the water is truly off. If your shutoff valves are seized or you do not have them, turn off the main water supply to the house instead. Place a bucket under the connections; there is always some water left in the lines.
Step 2: Disconnect the Old Faucet
Use the adjustable wrench to loosen the compression nuts connecting the supply lines to the faucet tailpieces. If the fittings are corroded, penetrating oil and a few minutes of patience beat brute force, which can crack the valve. Next comes the part everyone dreads: the mounting nuts up behind the basin.
This is where the basin wrench earns its keep. Its long shaft and pivoting jaw reach up into the tight space and grip the nut you cannot see or reach with a normal wrench. Loosen both mounting nuts, lift the old faucet free, and scrape away the old putty or gasket residue from the sink deck with a plastic scraper.
Step 3: Understand Your Mounting Type
Faucets are not universal, and buying the wrong configuration means a return trip. Before you shop, count the holes in your sink or countertop.
- Single-hole: one hole, one combined spout-and-handle unit; the cleanest modern look
- Centerset: three holes spaced 4 inches apart, with handles and spout on one base plate
- Widespread: three separate holes 8 to 16 inches apart, with independent handles and spout
Match the new faucet to your existing hole configuration, or use a deck plate to cover extra holes when downsizing from a three-hole to a single-hole faucet.
Step 4: Install the New Faucet
Feed the new faucet’s supply tubes and mounting shank down through the sink holes. If the faucet came with a rubber or foam gasket, seat it first; if not, roll a rope of plumber’s putty around the base to seal against water seeping under the deck. Hold the faucet straight and level from above while you hand-thread the mounting nuts from below, then snug them with the basin wrench. Do not overtighten, especially on a ceramic or porcelain sink, which can crack.
Wrap the threaded tailpieces with two or three turns of plumber’s tape, then connect your new supply lines, hand-tightening first and finishing with a quarter turn from the wrench. Snug is the goal, not gorilla-tight; overtightening crushes the rubber washers and causes the very leaks you are trying to avoid.
Step 5: Test for Leaks
Before you declare victory, remove the aerator from the spout tip so any debris in the lines flushes out instead of clogging it. Turn the shutoff valves back on slowly and watch every connection under the sink. Run both hot and cold for a full minute, then feel each fitting with a dry finger or paper towel. Even a slow weep will show up.
Reinstall the aerator once the water runs clear. Check the connections again the next morning, because a slow drip sometimes only reveals itself after hours of settling.
Common Problems and Fixes
Two issues account for most calls after a DIY faucet swap. Low water pressure at the new faucet almost always means debris caught in the aerator or the supply lines; unscrew and rinse the aerator and the problem usually disappears. A persistent drip at a supply connection means the fitting needs another slight turn or fresh plumber’s tape, not more force.
If the handle feels loose or the faucet wobbles on the deck, the mounting nuts underneath backed off or never seated fully. Re-tighten them with the basin wrench. And if your old shutoff valves would not budge or leaked when you reopened them, replace those too while you are under there; a $10 valve now saves an emergency later.
Choosing the Right Replacement Faucet
Before you unbox anything, make sure the new faucet actually fits your sink and your habits. Measure the hole spacing, confirm the number of holes, and check the faucet’s reach and height so the spout lands water in the drain rather than the back of the basin. A faucet with too tall an arc can splash in a shallow bathroom sink, while one too short crowds your hands.
Pay attention to the valve type inside, since it determines how long the faucet lasts drip-free. Ceramic disc cartridges are the gold standard, resisting the wear that causes dripping far better than older rubber-washer or ball valves. Finish matters for durability too: brushed nickel and matte black hide water spots and fingerprints, while polished chrome shows every smudge. Buy a faucet with a solid brass body rather than a lightweight zinc or plastic one, because the brass unit will survive years of daily use without cracking at the connections.
Handling Corroded or Stuck Parts
The single most common thing that turns this job difficult is corrosion. Older faucets in hard-water areas often have mounting nuts and supply connections seized by mineral buildup and rust. Do not fight them with brute force, which can crack the sink or snap a supply stub inside the wall. Instead, apply a penetrating lubricant, let it sit for 10 to 15 minutes, and try again.
If a plastic mounting nut is fused, sometimes cutting through it with a rotary tool or hacksaw blade is faster and safer than wrenching. When the old shutoff valves themselves are corroded and will not close fully, plan to replace them while you have the water off at the main; a modern quarter-turn valve is a few dollars and makes every future repair easier. Taking a few extra minutes on stuck hardware prevents the kind of damage that escalates a simple swap into an emergency plumber call.
Cost: DIY Versus Hiring a Plumber
A mid-range bathroom faucet runs $60 to $200, with designer finishes climbing higher. Supply lines, tape, and putty add maybe $15. Do it yourself and that is your entire cost. Hire a plumber and expect $150 to $350 in labor on top of the faucet, since most charge a one- to two-hour minimum for the visit.
For a homeowner comfortable working in a tight cabinet, the savings are substantial and the skill transfers to kitchen faucets and shutoff valves down the road. The only reason to call a pro is if the shutoff valves are corroded into the wall or the supply stubs themselves are damaged, which turns a simple swap into a soldering or repiping job. For the standard case, a confident bathroom sink faucet replacement is one of the best value DIY plumbing projects you can tackle in an afternoon.
Replacing Sink Faucet Supply Lines and Drains: Pressure Relief, Fittings, and Chemical Safety
The step that causes the most mess when replacing sink faucet hardware is not the faucet itself but what happens at the valves and drain while everything is open. A few checks before the first nut turns keep water in the pipes and harsh chemicals out of your hands.
Confirm the Water Is Truly Off
- Close both under-sink shutoff valves, then open the faucet handles fully in hot and cold. Water should slow to a trickle and stop within a few seconds. If it keeps running, a valve is not sealing.
- If you had to use the main shutoff, open a faucet on the lowest level of the house as well as the one you are working on. This drains the lines and relieves pressure so water does not surge out when a connection is loosened.
- Loosen the first supply nut slowly with a towel wrapped around it. A short spurt of trapped water is normal; steady flow means stop and recheck the valves.
Match the Supply Lines to the Fittings
Take a photo of the existing connections before removing anything. Many modern faucets have flexible lines already attached and need only a connector at the shutoff valve, while others require separate lines that thread onto the faucet shank. Check the valve outlet size and the faucet inlet size in the new faucet’s instructions, measure the distance from each valve to the faucet, and buy lines long enough to reach with a gentle curve rather than a tight kink. Compression fittings seal with their ferrule or rubber cone, so plumber’s tape is generally not needed on those threads; follow the line maker’s instructions.
Handle the Drain With Care
Many new faucets include a matching pop-up drain, so you may also be disconnecting the P-trap. If anyone has poured a chemical drain cleaner into that sink recently, assume residue is still sitting in the trap. Wear gloves and eye protection, keep a bucket under the trap, and flush the drain with plenty of plain water before opening it. Never add a second, different drain product to a slow drain, and never mix drain cleaners with each other or with bleach; some combinations react violently or release toxic gas. If a clog remains, use a plunger or a drain snake instead. Finally, stuff a rag in the open drain opening while you work so small parts cannot fall in.