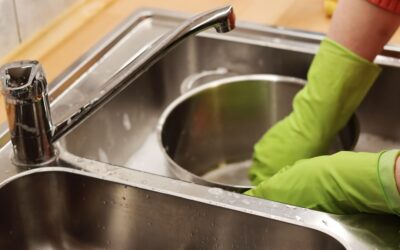
Replacing a kitchen or bathroom faucet is the kind of job plumbers charge $225 to $475 in labor to handle, even though the actual work takes 45 to 90 minutes with hand tools any homeowner can buy for under $40. The trick is not the new installation; it is the removal of the old fixture, which is where most DIY attempts go sideways. How to remove faucet safely depends on knowing the supply line setup, the mounting nut geometry, and the corrosion conditions you will encounter under the sink. Here is the working contractor’s method that has handled thousands of faucet removals without flooding a kitchen.
- Tools You Will Need Before Starting
- Shut Off the Water Supply
- Disconnect the Supply Lines
- Disconnect the Sprayer or Side Spray
- Remove the Mounting Nuts
- Free Stuck or Corroded Nuts
- Lift the Faucet Out
- Clean the Sink Surface
- Common Problems and Fixes
- Final Verification Before Installing the New Faucet
Tools You Will Need Before Starting
Gather these tools before you crawl under the sink:
- Basin wrench (about $18 at Home Depot, mandatory for tight spaces)
- Adjustable wrench, 10-inch and 12-inch
- Channel-lock pliers
- Slip-joint pliers
- Flathead and Phillips screwdrivers
- Penetrating oil (PB Blaster or WD-40 Specialist Rust Release)
- Plastic dish bin to catch water
- Headlamp or work light
- Old towels and rags
- Safety glasses
The basin wrench is the unsung hero of this job. It is the only tool that reaches the mounting nuts hidden behind the sink basin.
Shut Off the Water Supply
Before touching anything, shut off the water at the supply valves under the sink. Most homes have two valves (hot and cold), turning clockwise to close. Run the faucet open for 30 seconds after shutting the valves to confirm no water flows and to relieve line pressure.
If the shutoff valves are corroded or won’t fully close (a common issue in homes 15+ years old), shut off water at the main supply valve to the house. Plan to replace the supply valves while the faucet is out; it adds 15 minutes and $25 in parts.
Disconnect the Supply Lines
The supply lines connect the shutoff valves to the bottom of the faucet. They are typically braided stainless steel or PEX with brass compression fittings on each end.
Place a dish bin under the connections to catch residual water. Use an adjustable wrench on the nut at the shutoff valve and slowly back off the connection counterclockwise. Expect 1/4 cup of water to drain. Repeat for both hot and cold lines. Set the old supply lines aside if reusable, or plan to install new ones with the replacement faucet.
Disconnect the Sprayer or Side Spray
If your faucet has a pull-down sprayer or separate side spray, disconnect that hose before tackling the mounting nuts. Pull-down sprayer hoses typically have a quick-disconnect plastic clip near the connection at the faucet body underside.
Squeeze the clip and pull the hose down. Side sprays usually have a threaded brass nut similar to the supply line connection; back it off with an adjustable wrench.
Remove the Mounting Nuts
This is the step that derails most DIY attempts. The mounting nuts hold the faucet to the sink from underneath, typically located behind the back rim of the sink basin. Without a basin wrench, they are nearly impossible to reach.
With the basin wrench:
- Position the spring-loaded jaw of the basin wrench around the mounting nut
- Pull the head of the wrench counterclockwise (viewed from below)
- The nut should rotate freely; if not, apply penetrating oil and wait 10 minutes
- Once loose, finish unthreading by hand
- Repeat for the second mounting nut on the other valve
Some faucets have a single retaining bracket instead of individual nuts; loosen the bracket with a Phillips screwdriver or hex key.
Free Stuck or Corroded Nuts
If the mounting nuts will not turn after penetrating oil and wrench pressure, try these escalating tactics:
- Tap the basin wrench handle gently with a rubber mallet while applying turning pressure
- Apply additional penetrating oil and wait 30 minutes
- Heat the nut with a hair dryer (not a torch) to expand the metal
- As a last resort, cut the mounting bolt with a hacksaw or reciprocating saw using a metal-cutting blade
Cutting the bolt destroys the old faucet, which is acceptable if you are replacing it anyway. Be careful not to scratch the sink basin.
Lift the Faucet Out
With both mounting nuts removed, the faucet should lift straight up out of the sink mounting holes. Old plumber’s putty or silicone sealant under the faucet base may resist; gently rock the faucet side to side to break the seal.
Pull the faucet up and through the holes, threading the supply tubes and sprayer hose carefully so they do not catch on anything below. Set the old faucet aside.
Clean the Sink Surface
Old plumber’s putty leaves a ring around the mounting holes. Scrape it off with a plastic putty knife (metal scratches stainless or porcelain sinks). Wipe the area clean with a damp rag and isopropyl alcohol.
Inspect the holes for chips or cracks. If the porcelain shows chips, address them with porcelain repair compound ($12 per kit) before installing the new faucet.
Common Problems and Fixes
Three problems show up repeatedly during faucet removal:
- Supply line nuts spinning the entire valve — hold the valve body with one wrench while loosening the nut with another
- Mounting bolt sheared off in the sink hole — use a screw extractor (Irwin Hanson set, $24) to remove the broken bolt
- Water continuing to drip from “closed” shutoff valve — failure of the valve packing; replace the valve before installing new faucet
Final Verification Before Installing the New Faucet
Once the old faucet is out, you have completed the hardest part of the entire project. Take photos of the underside before installing the new fixture; you will need them when you order parts later. Confirm the new faucet matches the existing mounting-hole pattern (1-hole, 3-hole, 4-hole, or 8-inch spread). Understanding how to remove faucet correctly turns a $400 plumber call into a Saturday morning project, and the skill applies to every sink in the house for the rest of your homeownership.