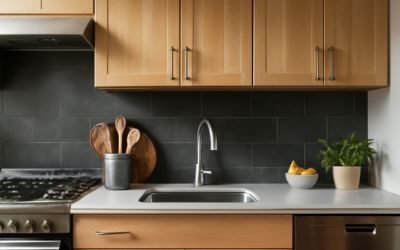
Water splashing behind a faucet seems harmless until it seeps into drywall and the paint starts peeling. A bathroom vanity backsplash protects the wall behind your sink from moisture while giving the vanity a finished, intentional look. The question is what material to use, how high to take it, and whether you need one at all. This guide walks through the practical and design decisions so your vanity area stays both beautiful and protected.
Do You Actually Need a Backsplash?
Strictly speaking, a backsplash is not always required, but it is almost always a good idea. The wall directly behind a bathroom sink takes a daily beating from splashes, toothbrushing, and handwashing. Without protection, moisture works into the paint and drywall, leading to peeling, mold, and water damage over time.
If your vanity sits against a fully tiled wall, you may not need a separate backsplash. But for the typical painted or wallpapered bathroom wall, a backsplash is cheap insurance against expensive repairs.
Backsplash Materials to Consider
Many materials work behind a vanity, each with its own look and price point:
- Ceramic and porcelain tile: Affordable, waterproof, and endlessly varied in color and shape. The most common choice.
- Natural stone: Marble or travertine for a luxe look, though it needs sealing to resist water spots.
- Glass tile: Sleek and reflective, great for brightening small bathrooms.
- Quartz or stone slab: A continuous piece matching the countertop for a seamless, high-end feel.
- Peel-and-stick tile: A budget, renter-friendly option for low-splash areas.
For most bathrooms, a small tile backsplash balances cost, durability, and style nicely.
How High Should It Be?
Backsplash height is largely a design choice with a few practical guidelines. A standard short backsplash runs about 4 inches tall, matching the typical countertop bump-up and covering the splash zone right behind the faucet. This is the most common and budget-friendly option.
A mid-height backsplash, around 6 to 8 inches, adds more protection and visual weight. For a dramatic, fully protected look, many homeowners run tile all the way up to the bottom of the mirror or even to the ceiling. Taller backsplashes guard against splashes better and create a striking focal point, but they use more material and labor.
Design Ideas That Work
The backsplash is a small canvas where you can add personality without overwhelming the room.
- Subway tile: A classic, clean look that suits nearly any style.
- Mosaic accents: Small glass or stone mosaics add texture and a hint of color.
- Matching slab: Continue the countertop material up the wall for a seamless, modern statement.
- Bold patterned tile: A patterned cement-look tile turns the vanity into the room’s highlight.
- Vertical stack: Stacking rectangular tiles vertically draws the eye up and feels contemporary.
Installation Basics
A small vanity backsplash is one of the more approachable tile projects. The basic steps look like this:
- Prep the wall. Clean it, fill any holes, and make sure it is smooth and dry.
- Dry-lay the tile. Plan your layout and cuts before applying adhesive, centering the pattern on the sink.
- Apply adhesive. Spread thin-set or use mastic for small areas, combing it with a notched trowel.
- Set the tile. Press tiles in place with spacers for even grout lines.
- Grout and seal. After the adhesive cures, grout the joints, then caulk the seam where the backsplash meets the countertop.
That caulk line where the counter meets the wall is critical, because it flexes and keeps water from sneaking behind the backsplash.
Cost Expectations
A vanity backsplash is usually an inexpensive upgrade because the area is small. Materials for a short 4-inch tile backsplash often run just $20 to $80. A taller, full-wall tile design might reach $100 to $400 in materials. Hiring a tile setter for a small vanity backsplash typically adds $150 to $500 depending on complexity and tile type. A continuous quartz slab backsplash costs more, since it is fabricated with the countertop.
Matching the Backsplash to Your Bathroom
A backsplash should feel like part of a cohesive design rather than an afterthought. Coordinate it with the countertop, cabinet finish, and fixtures. A continuous slab backsplash matching the vanity top reads sleek and modern, while a contrasting tile can become a deliberate accent. In a small bathroom, light, glossy tile bounces more light and makes the space feel larger, whereas dark or matte tile adds drama in a bigger room.
Think about hardware and fixtures too. Brushed nickel, chrome, matte black, and brass finishes on your faucet and lighting look best when the backsplash either complements or intentionally contrasts them. Pulling a single accent color through the backsplash, a towel, and a piece of art ties the whole vanity area together.
Maintenance and Sealing
Most backsplash materials are low maintenance, but a little care keeps them looking sharp. Wipe tile and grout regularly with a mild cleaner to prevent soap scum and water spots from building up. If you used natural stone like marble or travertine, seal it on installation and reseal periodically, since unsealed stone stains and etches from toothpaste, soap, and water. Glass and ceramic tile need no sealing and clean up with a quick wipe. Inspect the caulk line where the backsplash meets the counter once a year and recaulk if it cracks or pulls away, because that seam is your first defense against water sneaking behind the wall.
Final Thoughts
A bathroom vanity backsplash is a small detail that protects your walls and pulls the vanity area together. Match the material to your budget and moisture exposure, pick a height that fits your style, and never skip the caulk seam between counter and wall. Whether you choose a simple 4-inch tile run or a dramatic floor-to-mirror feature, a well-installed backsplash keeps your bathroom looking sharp and damage-free for years.
If you are renovating on a budget, the backsplash is one of the highest-impact places to spend a small amount of money. A handful of statement tiles behind a single vanity costs little yet completely changes the look of the room, and the labor stays low because the area is so contained. For renters or anyone wanting a no-commitment refresh, peel-and-stick options deliver a quick visual upgrade in a low-splash zone. Whichever route you take, prioritize a watertight installation first and let the style follow, because a backsplash that fails to keep moisture out is no bargain no matter how good it looks.