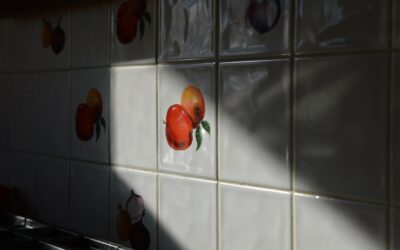
Painting a dated tile backsplash sounds like a shortcut that should not work, but with the right products and prep, it lasts five years or more and looks remarkably good. Backsplash paint is the best low-cost option for transforming a tired 1990s pink or beige backsplash into something modern without the demolition, mess, and $1,500 cost of a full tile replacement. After painting backsplashes in two of my own homes and several rental flips, I have a reliable process.
Part of our Kitchen Remodeling guide — explore the full guide →
This guide walks through the right paint system, the prep steps, and the long-term realities of painted backsplashes.
What You Can and Cannot Paint
Most ceramic and porcelain tile backsplashes paint successfully with the right bonding primer. Natural stone like marble, travertine, and slate also accepts paint, but the finished look loses the depth of the original stone, which is rarely worth the trade-off. Glass tile, metal mosaics, and stainless steel sheet backsplashes are harder to paint because of adhesion issues and high heat near cooktops.
Drywall backsplashes, common in casual cottage and rental kitchens, are the easiest to paint and look great with a good design.
The Right Paint System for Tile
The paint system makes or breaks the durability. Skip the all-in-one cabinet kits sold for tabletops; they are not made for the heat and moisture of a kitchen backsplash. Use this layered system instead.
- Bonding primer: Stix Acrylic Bonding Primer by Insl-X or Zinsser Bullseye 1-2-3 Plus. About $40 per gallon.
- Topcoat: Benjamin Moore Advance, Sherwin-Williams Emerald Urethane Trim Enamel, or Sherwin-Williams ProClassic. $65 to $80 per gallon.
- Optional sealer: General Finishes High Performance Topcoat in flat or satin sheen. $30 per quart.
Buy a quart of each rather than gallons. A backsplash typically needs less than 16 ounces of any one product.
Cleaning and Prep
Grease, soap scum, and cooking residue prevent paint from adhering. Even tiles that look clean to the eye carry a thin film of oils. Clean thoroughly before any sanding or priming.
Wipe down the entire backsplash with a degreaser like Krud Kutter Original Concentrated Cleaner mixed per the label, or use TSP substitute from Home Depot. Scrub with a non-scratch pad, then rinse twice with clean water. Allow to dry completely, usually 2 hours minimum.
Light Sanding for Adhesion
Glossy tile and stone surfaces need light sanding to give the primer something to grip. Use 220-grit sandpaper or a fine-grit sanding sponge. Work in small circles across the entire surface, including the grout lines, until the gloss has dulled to a uniform matte appearance.
Sanding does not have to be deep. You are just scuffing the surface. Wipe away all dust with a damp microfiber cloth and let dry completely before priming.
Grout Lines Need Attention
Damaged or moldy grout will read through any paint job. Inspect every grout line and repair as needed. For minor cracks, push fresh sanded grout into the line with a finger, then wipe clean. For moldy grout, clean with diluted bleach and a stiff brush, then dry completely.
If you want the painted backsplash to read as a smooth surface rather than tile, fill the grout lines flush with the tile using a thin coat of skim-coat plaster like Sheetrock Plus 3 lightweight joint compound. Sand smooth after drying. This step alone transforms the final look dramatically.
Priming the Surface
Apply the bonding primer with a high-density foam mini-roller and a small angled brush for corners. Two thin coats give better adhesion than one thick coat. Allow 4 to 6 hours of dry time between coats per the product label.
Bonding primer feels different from regular wall primer. It is stickier going on and shows roller marks more readily. Roll slowly and overlap each pass by 25 percent for even coverage. Inspect for any missed spots after the first coat dries.
Painting the Topcoat
Apply the topcoat with the same foam mini-roller used for primer. Two thin coats deliver the best finish, with 16 hours between coats. Alkyd hybrid paints like Benjamin Moore Advance level out brush and roller marks as they dry, producing a near-glass-smooth finish even from a roller.
Lean toward semi-gloss or satin sheen rather than eggshell. The kitchen backsplash needs to wipe clean, and flatter finishes hold cooking residue and grease that you cannot wipe off.
Sealing for Extra Durability
For backsplashes behind cooktops or in high-use areas, add a clear sealer after the paint fully cures, typically 30 days. General Finishes High Performance Topcoat is a water-based polyurethane that adds a chemically tough barrier and is rated for kitchen and bath use.
Apply with a foam mini-roller in two thin coats with 4 hours between. The sealer dries clear without yellowing and increases the lifespan of the painted finish to 5 to 7 years in normal use.
What Painted Backsplash Looks Like Up Close
Set realistic expectations. A painted tile backsplash looks like painted tile, not a new sheet of solid material. You can still see the texture of the tile and the grout lines if you did not fill them. Lighting reveals the texture more in some angles than others.
- From across the room: looks like a fresh, custom backsplash
- From 3 feet away: you can see tile texture but the color reads uniform
- Up close at 12 inches: tile shape, grout lines, and subtle imperfections become visible
For most homeowners and rental refreshes, the result is more than acceptable.
How Long It Will Last
A properly prepped and painted backsplash with sealer lasts 5 to 7 years in average kitchen use. Heavy use behind a daily cooking range may show chipping or wear in 3 to 4 years, mostly along the grout lines. Touch-up is straightforward; keep a small jar of the topcoat for any future spot repairs.
For total cost, expect $60 to $120 in materials, plus a full weekend of work. Compared to $1,500 to $3,000 for a replacement tile backsplash installed, the savings are substantial. When you eventually want a permanent upgrade, painted tile is easier to demo than freshly installed tile because the bond breaks more easily under a chisel.