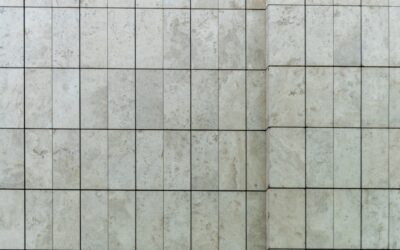
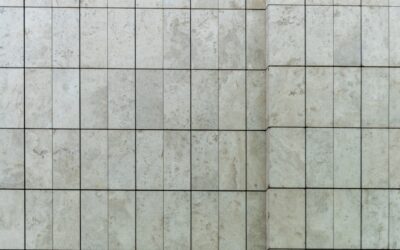
A fresh backsplash transforms a kitchen faster and cheaper than almost any other upgrade, and mosaic sheets make it surprisingly doable in a weekend. Learning how to install mosaic tile backsplash the right way means the difference between crisp, gallery-straight lines and a wavy, grout-clogged mess you will regret every time you cook. The mesh-backed sheets do most of the spacing work for you, but the prep, the layout, and the finish details are where careful work pays off. Here is exactly how the pros do it.
Tools and Materials You Will Need
Gather everything before you spread a drop of thinset. Stopping mid-job to run to the store while mortar cures on the wall is the fastest way to ruin a section.
- Mosaic tile sheets (buy 10 percent extra for cuts and mistakes)
- White thinset mortar or premixed tile adhesive (mastic)
- Unsanded grout (for joints under 1/8 inch)
- 1/4-inch V-notch trowel
- Tile spacers (1/16 inch if needed at sheet seams)
- Wet saw or manual tile cutter, plus nippers for small cuts
- Rubber grout float and two grout sponges
- 4-foot level, tape measure, and pencil
- Painter’s tape, drop cloths, and a bucket
- Caulk in a matching color for edges and corners
Step 1: Prep the Wall Surface
Your backsplash is only as good as the surface behind it. Turn off power to the outlets at the breaker, then remove switch plates and loosen the outlets so they can be pulled forward flush with the finished tile depth. Clean the wall thoroughly with a degreaser, since kitchen grime kills adhesion. Sand any glossy paint to give the mortar a grip, fill dents with spackle, and wipe away dust.
Lay painter’s tape along the countertop and up the cabinet edges to protect them, and cover the counter with a drop cloth. A clean, dry, flat wall is non-negotiable for a lasting install.
Step 2: Plan Your Layout
Find the center of your main wall or the focal area behind the range and mark a vertical plumb line with your level. Working out from the center keeps any cut tiles balanced at both ends rather than leaving a sliver on one side. Measure your height, typically 18 inches from countertop to the bottom of the upper cabinets, and dry-lay a few sheets on the counter to see how the pattern falls.
Snap a level horizontal reference line about one tile-sheet height up from the counter. Countertops are rarely perfectly level, so this line, not the counter itself, is what keeps your rows straight as you climb the wall.
Step 3: Apply the Thinset
Mix thinset to a peanut-butter consistency if using powder, or open your premixed mastic. Mastic is fine and convenient for a dry kitchen backsplash; thinset is stronger and better behind a range or near a sink. Using the flat side of the trowel, skim a thin coat onto a two- or three-foot section of wall, then comb it with the notched edge held at a 45-degree angle to leave even ridges.
Only spread as much as you can tile in about 15 to 20 minutes before it skins over. If the mortar loses its tackiness or forms a film, scrape it off and start fresh; tiles will not bond to skinned mortar.
Step 4: Set the Mosaic Sheets
Press your first sheet into the mortar starting at your reference lines, using a slight twisting motion to seat it. Push evenly across the whole sheet with a flat grout float or a scrap of wood so no tiles sit proud. Butt the next sheet up against the first, matching the spacing between sheets to the spacing within them, otherwise the seams will show as fat or thin grout lines later.
Step back every few sheets and eyeball the joints. Adjust while the mortar is still wet; you have a few minutes of working time before it grabs. Keep a damp sponge handy to wipe any mortar that squeezes up into the tile faces immediately, because dried thinset in the joints is miserable to dig out before grouting.
Cutting Around Outlets and Edges
For outlets, measure and cut individual tiles off the mesh with nippers or a wet saw. Mosaic sheets flex, so you can often cut the mesh with a utility knife and remove just the tiles you need, then trim the last row to fit. At the ends of a run, a wet saw gives the cleanest edge on glass or stone mosaics, which chip easily with manual cutters.
Step 5: Let It Cure, Then Grout
Give the mortar at least 24 hours to cure before grouting. Rushing this pulls tiles loose. Mix unsanded grout to a smooth, toothpaste-like consistency; unsanded is correct for the tight joints on most mosaics, while sanded grout can scratch glass and is meant for wider gaps.
Hold your rubber float at a 45-degree angle and work the grout diagonally across the joints, pressing it fully into every gap. Cover a small area, then move on. Diagonal strokes avoid dragging grout back out of the lines.
Step 6: Clean and Seal
Wait 15 to 20 minutes until the grout firms up, then wipe diagonally with a damp, well-wrung sponge. Rinse the sponge often and keep the water clean. A hazy film will remain; let it dry another hour and buff it off with a dry microfiber cloth. Do not flood the joints with a soaking sponge, which washes out the grout and weakens it.
After the grout cures for 48 to 72 hours, apply a penetrating grout sealer if you used a cement-based grout, especially near the stove and sink where splatter and moisture attack the joints. Finally, run a bead of color-matched caulk, not grout, along the seam where the tile meets the countertop and in the inside corners. Those junctions move slightly and grout would crack there.
Choosing the Right Mosaic for Your Kitchen
Material affects both looks and difficulty. Glass mosaics reflect light and brighten a kitchen but chip easily and demand a wet saw and white thinset, since colored mortar shows through translucent glass. Ceramic and porcelain mosaics are the most forgiving for a first-timer, cutting cleanly and hiding mortar. Natural stone like marble or travertine looks rich but is porous and must be sealed before and after grouting or it will soak up grout haze and cooking splatter.
- Glass: $8 to $25 per sq ft, bright and modern, needs a wet saw and white thinset
- Ceramic/porcelain: $5 to $15 per sq ft, easiest to work with, durable
- Natural stone: $10 to $30 per sq ft, upscale look, requires sealing
- Metal or mixed-blend: $15 to $40 per sq ft, statement accents, mind the cutting
Whatever you choose, buy all your sheets from the same dye lot at once. Color shifts between production runs are subtle but obvious once installed side by side on a wall.
Pro Tips for a Flawless Finish
A few habits separate a clean install from an obvious DIY job. Keep your hands and tools clean throughout; smeared thinset on tile faces is the number one giveaway. Check the wall and each sheet with your level constantly rather than trusting your eye. When you master how to install mosaic tile backsplash on a small section, the rhythm carries you through the rest.
- Buy an extra sheet or two beyond your measurement for future repairs from the same dye lot.
- Reinstall outlet spacers or box extenders so covers sit flush over the new tile depth.
- Work in good light so you can spot uneven tiles before the mortar sets.
- Wipe, wipe, wipe: a clean sponge run after every sheet saves hours of scrubbing later.
Take your time on layout and prep, and the tiling itself goes quickly. Most homeowners finish a standard 30-square-foot kitchen backsplash in a single weekend, with grouting the following day, for a total material cost of $200 to $600 depending on tile choice.
Prefer to explore on your own?
See how new flooring looks in your actual room in seconds — free, no signup.
Try the free Floor Studio →