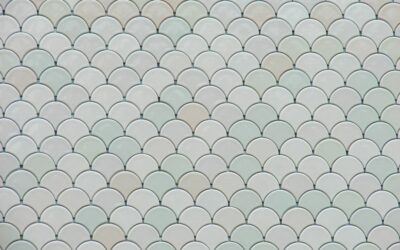
Small tiles once meant painstakingly setting hundreds of individual chips by hand, but mosaic tile sheets changed all of that. By bonding dozens of tiny tiles onto a 12-by-12-inch mesh, paper, or peel-and-stick backing, manufacturers made intricate mosaic looks accessible to weekend DIYers and fast for the pros. Instead of placing each glass or stone piece one at a time, you install a whole sheet at once, and the pre-spaced tiles keep your grout lines perfectly even. From glass backsplashes and marble hexagon shower floors to penny-round accents and subway-style blends, mosaic sheets deliver detailed designs with a fraction of the labor. This guide breaks down the types, materials, costs, and the installation process so you can tackle your project with confidence.
Part of our Tile & Grout guide — explore the full guide →
How Mosaic Sheets Are Constructed
Understanding the backing is the key to buying and installing correctly, because there are three main systems and they behave differently. Mesh-backed sheets are the most common: the tiles are glued to a fiberglass or nylon mesh on the back, which stays in place and gets embedded in thinset mortar during installation. Paper-faced sheets have paper glued to the front of the tiles instead; you set the sheet face-down into mortar and then peel the paper off after it cures, a system often used for glass and premium mosaics where a mesh shadow might show through.
Peel-and-stick mosaic sheets are the newest and easiest category. These have a self-adhesive backing and require no mortar or grout at all in their simplest form, though some gel-style products mimic grout lines. They are perfect for renters and quick backsplash refreshes, but they are not as durable or heat-resistant as true set-in-mortar tile and are not suitable for floors or wet showers.
Materials and Popular Styles
Mosaic sheets come in nearly every material and shape imaginable, and the choice affects both looks and where you can use them. Glass mosaics are prized for backsplashes because they are non-porous, reflect light, and clean easily, though they can scratch and are too slippery for floors. Natural stone mosaics, including marble, travertine, and slate, bring organic texture and are popular for shower floors and accent bands, but they are porous and must be sealed.
- Glass: luminous, stain-proof, ideal for kitchen and bath backsplashes
- Porcelain and ceramic: durable and versatile, great for floors and walls alike
- Natural stone: marble, travertine, pebble; beautiful but needs sealing
- Metal and mixed-media: stainless or aluminum blended with glass for modern accents
- Penny round, hexagon, and subway: popular shapes that read classic or contemporary depending on grout
For shower floors specifically, small mosaic tiles are the standard choice because the many grout lines provide grip and the small pieces conform to the slope toward the drain. Just confirm the tile’s slip rating and choose a textured or matte stone or porcelain rather than glossy glass.
What Mosaic Tile Sheets Cost
Pricing varies enormously with material. Basic ceramic and porcelain mosaic sheets start around $5 to $12 per sheet, which works out to roughly $5 to $12 per square foot since most sheets cover about one square foot. Glass mosaics typically run $10 to $25 per sheet, and premium natural stone, handmade, and metal-blend sheets can reach $20 to $50 or more each.
Factor in setting materials as well: thinset mortar, grout, and sealer for stone add a few dollars per square foot. If you hire a tile setter, labor for mosaics runs higher than for large-format tile, often $10 to $20 per square foot, because the small pieces and detail work take more time. Always buy 10 to 15 percent extra to cover cuts, breakage, and future repairs, and check that all your sheets come from the same dye lot to avoid color shifts.
Installing Mosaic Sheets Step by Step
For mesh-backed sheets set in mortar, the process is approachable for a determined DIYer. Start with a clean, flat, and primed substrate, such as cement board in a wet area. Plan your layout and dry-lay a few sheets first so cut sheets land in the least visible spots. Mix thinset to a peanut-butter consistency and spread it with the correct notched trowel for small tile, usually a 3/16-inch V-notch, then flatten the ridges slightly so they do not squeeze up between the tiny tiles.
Press each sheet firmly into the mortar, using a grout float or a flat block of wood to bed it evenly and keep the surface flush. Match the spacing between sheets to the spacing within each sheet so the joints look continuous, not gridded. Cut individual tiles or trim sheet edges with tile nippers or a wet saw. Let the mortar cure per the label, typically 24 hours, before grouting. For paper-faced sheets, dampen and peel the front paper once the mortar sets, then check alignment.
Grout with an unsanded grout for narrow joints or sanded for wider ones, working it into every seam and wiping diagonally to avoid pulling grout out of the lines. After it hazes over, polish the surface clean. Seal natural stone mosaics both before and after grouting to prevent staining.
Where to Use Them and Final Tips
Mosaic sheets are most at home on kitchen and bathroom backsplashes, shower walls and floors, accent strips, and small feature areas where their detail pays off. They are less practical for large floor expanses, where the sheer number of grout lines makes cleaning tedious and the cost climbs. Peel-and-stick versions are best reserved for low-moisture backsplashes and temporary or rental updates rather than showers or floors.
Before you commit, order a single sheet as a sample to check the color and finish in your own lighting. Take your time bedding each sheet flat, since uneven mosaics are far more noticeable than uneven large tile, and keep grout lines consistent. Done with care, mosaic tile sheets give you the rich, custom look of hand-set tile with a manageable amount of effort and a result that adds real character and value to your home.
Backsplash Mesh Backing: Setting Mesh-Backed Sheets on a Wall
For a backsplash, mesh backing is the easiest sheet system to handle: the tiles stay spaced on a fiberglass or nylon mesh, and the whole sheet presses into adhesive in one move. The mesh stays on the wall and gets embedded in the adhesive, so it must be fully covered and bonded. Choose the right adhesive, keep it out of the joints and watch for mesh showing through clear glass tile.
Adhesive Choice for Mesh-Backed Backsplash Tile
| Adhesive | Where it works | Notes |
|---|---|---|
| White polymer-modified thinset | Most kitchen and bath backsplashes, including glass | Strong bond; white color avoids gray showing through glass |
| Premixed mastic | Dry backsplash areas with ceramic or porcelain | Convenient, but many glass tile makers do not recommend it; not for wet areas |
| Premixed tile adhesive rated for glass | Backsplashes where the label allows glass | Check coverage and cure time on the label |
Tips Specific to Mesh
- Check that each tile is firmly glued to the mesh; loose tiles are easier to re-glue before setting than after.
- Back-butter or flatten the trowel ridges so the mesh beds flat and no air pockets form behind glass.
- Scrape any adhesive that squeezes into the joints before it sets, so grout can fill them fully.
- Cut the mesh with a utility knife to split sheets around outlets, windows and cabinet ends.
- Trim stray mesh threads at the edges so they do not show through the grout or caulk line.
Clear Glass and Mesh Show-Through
With clear or translucent glass mosaics, the mesh, the adhesive color and even trowel lines can be visible through the tile. Use white adhesive, spread it evenly, and press the sheet flat so the mesh disappears into a uniform layer. Some glass mosaics come with dots of glue rather than full mesh, or with paper on the face, for this reason. Set one test sheet on a scrap board, let it cure and look at it in kitchen light before tiling the wall.
Wall Prep
Painted drywall behind a backsplash is usually fine for dry areas once it is clean, sound and lightly sanded to remove gloss. Remove loose paint and wallpaper. Behind a sink with constant splashing, consider a waterproofing membrane first. Turn off the circuit at the breaker and confirm it is dead with a non-contact voltage tester before removing outlet covers, then use box extenders so outlets finish flush with the tile.
Prefer to explore on your own?
See how new flooring looks in your actual room in seconds — free, no signup.
Try the free Floor Studio →