Walk into a spa-inspired bathroom or a Tuscan-style kitchen and there is a good chance the surface catching your eye is travertine mosaic. This natural stone, formed over thousands of years by mineral springs, carries a warm, earthy palette that manufactured tile struggles to imitate. Homeowners love it for shower floors, backsplashes, and accent bands. But travertine is also porous, softer than porcelain, and demands the right prep. Get the details right and you end up with a surface that looks handcrafted and lasts decades.
- What Travertine Mosaic Actually Is
- Where a Travertine Mosaic Works Best
- Cost: What You Will Pay
- Sealing Is Not Optional
- Installing Travertine Mosaic Step by Step
- Cleaning and Everyday Care
- Pros and Cons at a Glance
- Travertine Mosaic Versus Other Materials
- Common Mistakes to Avoid
- Choosing the Right Sheet for Your Project
What Travertine Mosaic Actually Is
Travertine is a form of limestone deposited by mineral-rich hot springs. When it is cut into small pieces—typically 1×1 inch, 2×2 inch, or elongated subway chips—and mounted on a mesh backing sheet, you get a mosaic. Each 12×12 inch sheet holds dozens of individual stones, which makes curved and contoured surfaces like shower pans far easier to tile than they would be with large-format cuts.
The stone comes in several finishes. Tumbled travertine has soft, rounded edges and a matte, rustic look. Honed pieces are ground flat to a smooth satin surface. Polished travertine reflects light almost like marble. Color ranges from ivory and beige through walnut, gold, and silver-gray, with the natural veining and pitting that give the material its character.
Where a Travertine Mosaic Works Best
Shower floors are the classic application. The small stones and abundant grout lines create natural slip resistance, and the mesh backing hugs the slope toward the drain. A tumbled travertine mosaic on a shower pan paired with larger travertine or porcelain on the walls is one of the most requested combinations in mid-to-upscale bathroom remodels.
Backsplashes are the second most popular use. Because a backsplash never sees foot traffic and rarely gets standing water, the stone’s softness is a non-issue and its warmth shines. Homeowners also use mosaic sheets as decorative inlays, niche liners, borders around a tub deck, and fireplace surrounds. On floors it can work in low-traffic powder rooms, though the maintenance load rises quickly in busy areas.
Cost: What You Will Pay
Material pricing runs roughly $8 to $20 per square foot for standard travertine mosaic sheets, with premium colors, unusual chip shapes, and pre-blended patterns pushing toward $25 or more. Compare that to $5 to $10 for a basic ceramic mosaic and you can see travertine sits at the premium end without reaching the price of marble.
- Material: $8–$25 per sq ft depending on finish and color
- Professional installation: $10–$18 per sq ft for detailed mosaic work
- Sealer: $30–$60 per quart, covering roughly 150–250 sq ft per coat
- Setting materials: white thinset and non-sanded grout add $2–$4 per sq ft
Budget for 10 to 15 percent waste. Small mosaics generate more cutting and blending loss than large tile, and having spare sheets on hand for future repairs is smart because dye lots vary from batch to batch.
Sealing Is Not Optional
This is the single most important thing to understand before you commit. Travertine is porous, so it absorbs water, oils, wine, coffee, and cooking grease unless it is sealed. Plan to apply a penetrating (impregnating) sealer before grouting to keep grout haze from staining the stone, then again after grouting cures.
In a shower, reseal every 12 to 18 months. On a kitchen backsplash, every two to three years is usually enough. Test whether resealing is due by dripping water on the stone: if it beads, the sealer is holding; if it darkens and soaks in within a couple of minutes, it is time for another coat. Skip this routine and you will eventually see dark water spots and etch marks from acidic splashes.
Installing Travertine Mosaic Step by Step
The mesh-backed sheets speed things up, but natural stone still asks for patience. Here is the sequence a pro follows.
- Prep a flat, waterproofed substrate—cement backer board or a waterproofing membrane over the pan or wall. Any high spots telegraph through small mosaics.
- Spread white polymer-modified thinset with a 3/16-inch V-notch trowel. White mortar prevents gray from bleeding through light-colored, translucent stone.
- Press each sheet into the mortar and beat it in gently with a grout float and a flat block so every chip sits level. Nudge sheets tight so the seams between them read like every other joint.
- Let the thinset cure 24 hours, then apply a pre-grout sealer coat.
- Grout with non-sanded grout for joints under 1/8 inch, or sanded grout for wider joints. Work it in, then clean the surface promptly before haze sets.
- After the grout cures for 48 to 72 hours, apply the final penetrating sealer.
The one step DIYers skip and regret is beating in the sheets. Uneven chips catch the light and look sloppy, so take the time to level every piece.
Cleaning and Everyday Care
Treat travertine gently. Use a pH-neutral stone cleaner or plain warm water, never vinegar, lemon, bleach, or acidic bathroom sprays—those etch the calcium carbonate and leave dull spots. A soft microfiber cloth or a soft-bristle brush for the grout lines handles routine grime.
In showers, squeegee the walls after use to cut down on soap scum and mineral buildup. Wipe kitchen splashes as they happen rather than letting tomato sauce or citrus sit. For deeper cleaning, a poultice made for natural stone will pull out set-in oil stains without harsh chemicals.
Pros and Cons at a Glance
Weigh both sides before you buy. The upsides are real, and so are the maintenance obligations.
- Pros: unmatched natural warmth, excellent slip resistance in mosaic form, timeless look, cooler underfoot in hot climates, adds resale appeal.
- Cons: requires regular sealing, softer and more scratch-prone than porcelain, sensitive to acids, filled holes can pop out over time, higher upfront cost.
If low maintenance is your top priority, a porcelain tile that mimics travertine gives you the look with far less upkeep. But if you want the genuine article—the depth, the subtle color shifts, the way the stone feels—nothing replicates a true travertine mosaic.
Travertine Mosaic Versus Other Materials
It helps to see where travertine sits among the alternatives. Compared with marble, travertine is more affordable, more forgiving of foot traffic thanks to its matte surface, and easier to blend into casual, rustic, and Mediterranean styles—though marble reads as more formal and luxurious. Against porcelain that imitates stone, real travertine wins on authenticity and depth but loses on maintenance, since porcelain never needs sealing and shrugs off acids.
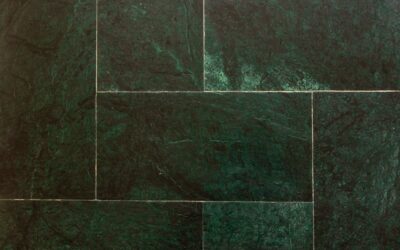
Glass and ceramic mosaics cost less and clean easily, but they lack the natural variation and cool, earthy feel of stone. Slate offers a similar organic quality with a darker, more textured personality. If your priority is a warm, natural surface with genuine character and you accept the sealing routine, travertine hits a sweet spot that few materials match at its price.
Common Mistakes to Avoid
A few errors turn up again and again on DIY travertine projects, and each is easy to sidestep once you know it. Skipping the pre-grout sealer coat lets grout pigment lodge in the pores and permanently haze the stone. Using gray thinset under light, translucent chips causes a muddy shadow to show through. Cleaning with vinegar or a standard bathroom spray etches the calcium in the stone within weeks.
- Do not let grout haze dry on the surface—wipe it while it is still workable.
- Never install over a flexing or uneven substrate; small mosaics crack and pop.
- Avoid cheap sealers that fail fast in wet areas—buy a quality impregnator.
- Do not forget an expansion joint of flexible caulk where the mosaic meets tubs, counters, and corners.
Steer clear of those pitfalls and the installation will look professional and hold up for years without drama.
Choosing the Right Sheet for Your Project
Order samples and view them in your own light, both daytime and at night under your fixtures, because travertine’s tone shifts noticeably. For a cohesive look, pull the field tile, mosaic, and grout color together at the store rather than matching from memory. A grout shade one step darker than the stone hides everyday dirt; a matching grout gives a seamless, monolithic effect. Buy an extra sheet or two beyond your waste allowance so a chipped stone years from now is a five-minute fix rather than a scavenger hunt.
Done thoughtfully, a travertine mosaic rewards the extra care with a surface that reads as custom, ages gracefully, and keeps its old-world charm long after trendier finishes have dated.
Prefer to explore on your own?
See how new flooring looks in your actual room in seconds — free, no signup.
Try the free Floor Studio →