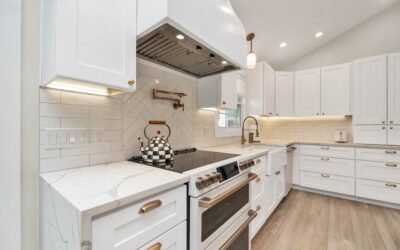
Learning how to do a backsplash is one of the most rewarding weekend DIY projects in any kitchen. It transforms the look of the whole room, protects your wall from splatter, and can usually be finished in two or three days for a few hundred dollars in materials.
Part of our Kitchen Remodeling guide — explore the full guide →
You do not need to be a pro tiler to get a clean result. You need patience, a few tools, and a methodical process. This guide walks through every step, from measuring the wall to caulking the final joint, plus the mistakes that trip up first-timers.
- Tools and Materials You Will Need
- Step 1: Measure and Plan the Layout
- Step 2: Prep the Wall
- Step 3: Find Your Center and Set Guide Lines
- How to Do a Backsplash: Setting the Tile
- Step 5: Cut Tiles to Fit
- Step 6: Grout the Joints
- Step 7: Seal and Caulk
- Timeline and Cost
- Common Mistakes to Avoid
- Choosing Your Tile
- Final Thoughts on How to Do a Backsplash
Tools and Materials You Will Need
Gather everything before you start so you are not running to the store with wet thinset on the wall. For a standard kitchen backsplash you will want:
- Tile of your choice (buy 10 to 15 percent extra for cuts and breakage)
- Thinset mortar or premixed tile mastic
- Notched trowel (1/4-inch V-notch for mosaics, 1/4-inch square for larger tile)
- Tile spacers (1/16 to 1/8 inch)
- Grout (sanded for joints over 1/8 inch, unsanded for narrow joints)
- Grout float, sponge, and two buckets
- Tile cutter or wet saw, plus tile nippers
- Level, tape measure, pencil, and a chalk line
- Painter’s tape, drop cloths, and a caulk gun with matching caulk
- Grout sealer
Step 1: Measure and Plan the Layout
Measure the width and height of each wall section to find your square footage, then multiply by 1.1 to 1.15 for waste. Sketch the layout on paper. Decide where the focal point sits, usually centered behind the stove or sink, and plan so cut tiles land at the edges and corners rather than dead center.
Dry-lay a row of tile on the counter first to see how the pattern falls. This five-minute step prevents an awkward sliver of tile ending up in the most visible spot.
Step 2: Prep the Wall
A clean, sound wall is everything. Turn off power to outlets, remove switch and outlet covers, and unscrew the outlets so you can float them forward over the tile later. Clean the wall with a degreaser to strip cooking grease, since thinset will not bond to an oily surface.
Fill holes and sand glossy paint so it has some tooth. Wipe away dust. If the wall has heavy gloss or is in a wet zone, a quick scuff and a coat of primer improve adhesion. Lay drop cloths and tape off the countertop and cabinets.
Step 3: Find Your Center and Set Guide Lines
Never trust that your countertop is level; it rarely is. Use a level to draw a true horizontal reference line one tile-height up from the lowest point of the counter. Find the horizontal center of your focal wall and mark a vertical plumb line there.
These two lines are your roadmap. Working out from the center keeps the pattern balanced and ensures both ends of the wall get symmetrical cuts. This is the single biggest thing separating an amateur job from one that looks installed by a pro.
How to Do a Backsplash: Setting the Tile
Now for the satisfying part. This is the core of how to do a backsplash, and working in small sections keeps your adhesive from skinning over before you set tile into it.
- Apply adhesive: Spread thinset or mastic on a 2- to 3-square-foot area with the flat side of the trowel, then comb it with the notched side held at a 45-degree angle to leave even ridges.
- Set the first tile: Press it into place at your center line with a slight twist to collapse the ridges and lock it in.
- Add spacers: Insert tile spacers between tiles to keep grout lines uniform. Sheet-mounted mosaics have built-in spacing.
- Work outward and up: Continue along your guide lines, checking level every few tiles. Wipe excess adhesive out of the joints as you go.
- Keep tiles flat: Sight down the wall periodically so no tile sits proud or sunken.
Step 5: Cut Tiles to Fit
You will need cuts at the ends, corners, outlets, and under cabinets. A manual snap cutter handles straight cuts on most ceramic and porcelain. For glass, stone, or lots of L-shaped cuts around outlets, a wet saw gives cleaner edges and less breakage.
Use tile nippers for small curved or notched cuts. Measure twice, mark with a pencil, and cut slow. Position cut edges where they will be hidden, against the counter, under upper cabinets, or into a corner, so the factory edges always face out.
Step 6: Grout the Joints
Let the adhesive cure for at least 24 hours before grouting, or the tiles can shift. Mix grout to a peanut-butter consistency, then load your grout float and spread it diagonally across the joints, pressing firmly to pack them full. Hold the float at a 45-degree angle and scrape off the excess.
Wait 15 to 20 minutes for the grout to firm up, then wipe the surface with a damp (not soaking) sponge in gentle circles, rinsing often. Do not dig grout out of the joints. After a couple of hours a hazy film appears; buff it off with a dry microfiber cloth.
Step 7: Seal and Caulk
Most cement grout needs sealing to resist stains and moisture. Wait the time the grout label specifies, usually 48 to 72 hours, then wipe a grout sealer along the joints and let it cure. Epoxy grout is the exception and does not need sealing.
Never grout the joint where the backsplash meets the countertop or where two walls meet in a corner. These are movement joints. Instead, run a bead of color-matched silicone or acrylic caulk. Caulk flexes with the house and the counter, while rigid grout there would crack within months. Tool the bead smooth with a wet finger for a clean line.
Timeline and Cost
A standard 30-square-foot kitchen backsplash is a realistic weekend project. Plan on setting tile Saturday, letting it cure overnight, and grouting, sealing, and caulking on Sunday and Monday evening.
DIY material cost typically runs $5 to $15 per square foot for tile, plus $50 to $100 for thinset, grout, spacers, and sealer. All in, most homeowners spend $200 to $600 doing it themselves versus $1,000 to $1,500 hiring out a comparable job. Renting a wet saw for a day adds about $40 to $70 but pays for itself in clean cuts.
Common Mistakes to Avoid
- Skipping the level line: Following a crooked counter makes the whole wall drift off. Always work from a drawn level line.
- Too much adhesive at once: Mastic skins over in 10 to 15 minutes. Spread only what you can tile in that window.
- Grouting too soon: Give thinset a full 24 hours or tiles shift and joints crack.
- Wiping grout with a wet sponge: Excess water washes grout out and leaves weak, pitted joints. Wring the sponge nearly dry.
- Grouting the counter and corner joints: Those need flexible caulk, not rigid grout.
- Forgetting outlet spacers: Reset outlets forward with box extenders so they sit flush over the new tile.
Choosing Your Tile
Beginners have the easiest time with mesh-mounted mosaic sheets, since the spacing is built in and small tiles hide minor unevenness in the wall. Classic 3×6 subway tile is also forgiving and cheap. Large-format and natural stone tiles look great but demand a flatter wall and more careful setting, so save those for your second project once you have the technique down.
Final Thoughts on How to Do a Backsplash
Knowing how to do a backsplash comes down to preparation and patience: plan the layout, prep a clean wall, work from true level and center lines, set tile in small sections, and respect the cure times before grouting and sealing. Take your time on the cuts and the corner caulk, and you will end up with a durable, professional-looking backsplash you built yourself for a fraction of the contractor price.