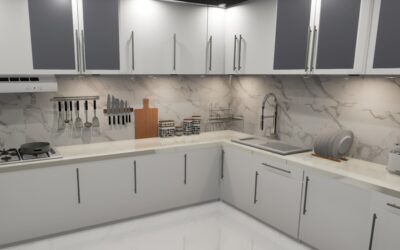
If you’ve never set tile before and want a project you can genuinely finish in a weekend, a mosaic backsplash DIY kitchen project is where I tell every beginner to start. I say this as a contractor who makes money installing tile: mesh-backed mosaic sheets are the most forgiving format in the trade. The sheets are light, they cut with snips instead of a wet saw for most of the job, small tiles hide wavy walls, and a backsplash is low-stakes — nobody walks on it, no water pools against it, and mistakes hide behind toasters. Here’s the full process I’d walk a friend through, from shopping list to final caulk bead.
- What This Project Costs and How Long It Takes
- Choosing the Right Mosaic for a First Install
- Prep: The Unsexy Half That Decides the Result
- Setting the Sheets
- Grouting: Where the Wall Comes Together
- Finishing: Caulk, Outlets, and Sealing
- The Mistakes I See on Every First-Timer Wall
- Tool List Worth Owning vs. Renting
What This Project Costs and How Long It Takes
A typical backsplash covers 25 to 35 square feet. Budget-wise, expect:
| Item | Cost |
|---|---|
| Mosaic sheets (30 sq ft + 10% waste) | $250–$700 ($8–$20/sq ft) |
| Thinset mortar (or mastic), 1 bag/tub | $15–$40 |
| Grout, 1 box (unsanded or per mfr.) | $15–$35 |
| Trowel, snips, spacers, float, sponges, caulk | $60–$100 |
| Total DIY | $350–$875 |
A pro would charge $900 to $2,000 labor for the same wall, so you’re saving real money. Time-wise, plan a true weekend: Saturday for prep and setting tile, Sunday for grouting after the thinset cures overnight, plus 30 minutes the following day for caulk. Rushing grout onto uncured thinset is the classic first-timer error — don’t.
Choosing the Right Mosaic for a First Install
Not all mosaics are equally beginner-friendly. From easiest to hardest: square and hex glass or porcelain on sturdy mesh (easy), penny rounds (easy but grout-hungry), kit-kat sticks (moderate — alignment shows), marble mosaics (moderate — need sealing and blade cuts), and glass sheets with foil or paper facing (skip these your first time). Check that the mesh backing is well-adhered — sheets shedding tiles in the box will fight you on the wall. Buy 10 percent overage, and confirm all boxes share a dye lot number.
Prep: The Unsexy Half That Decides the Result
Every failed DIY backsplash I’ve been called to fix failed at prep, not tiling. Do these steps properly:
- Kill the power to outlets in the splash zone at the breaker. Remove cover plates. You’ll pull the outlets forward later with longer screws or box extenders (code requires the outlet flush to the finished surface).
- Clean the wall. Degrease with TSP substitute or a strong dish-soap solution — years of cooking film will stop thinset from bonding. Rinse and let dry.
- Scuff glossy paint with 80-grit sandpaper. Fill holes with setting compound. Painted drywall is a fine substrate for a backsplash; you do not need cement board on a splash that isn’t in a shower.
- Find your lines. Countertops are never level. Measure up from the counter at several points, find the lowest spot, and draw a level line one sheet-height up. You’ll set to the line and caulk the small gap at the counter later.
- Plan the layout dry. Lay sheets on the counter and see where cuts land. Center the pattern on the range wall — that’s the wall people see. Push cut sheets into corners and under cabinets where nobody looks.
- Tape off the countertop and upper cabinets with painter’s tape and rosin paper. Thinset drips stain and grout haze is stubborn.
Setting the Sheets
Mix thinset to peanut-butter consistency (or use premixed mastic for glass-rated applications — check the tub says it’s approved for your tile type; many glass mosaics require white thinset so the color doesn’t shadow through). Work in sections of 2 to 3 square feet — mosaic is slower than big tile and thinset skins over in about 15 minutes.
- Spread with a 3/16″ V-notch trowel, combing ridges in one direction.
- Flatten the ridges with the flat side of the trowel until you have an even 1/8″ bed. This is the key mosaic trick: notch ridges squeeze up through mosaic joints and ruin your grout lines. Bed the sheets in flattened thinset.
- Press each sheet up to your level line, then tap it flat with a grout float or a wood block. Every tile should sit in the same plane — rake a flashlight across the wall to catch proud corners while the mortar’s still wet.
- Match the joint spacing between sheets to the spacing within sheets, or the seams will telegraph as a grid. Step back six feet and squint after every few sheets; sheet-edge lines are invisible up close and glaring from across the room.
- Around outlets, cut the mesh with snips and trim individual tiles as needed. Glass tiles cut fine with a $25 wheeled tile nipper; porcelain and marble may want a cheap wet saw or an angle grinder with a diamond blade for the last few slivers.
Pull the sheet back off the wall on your first placement and check the coverage — you want near-full contact on the tile backs. Adjust your technique before you’re ten sheets in. Let everything cure 24 hours.
Grouting: Where the Wall Comes Together
Grout is 30 percent of the visual result. For joints 1/8″ or narrower — which is nearly all mosaic — use unsanded grout, or better, a premium pre-mixed urethane or acrylic grout that resists staining without sealing. Sanded grout scratches glass tile; avoid it there.
- Mix grout to a smooth paste and let it slake 10 minutes, then remix.
- Load a rubber float and sweep diagonally across the joints at 45 degrees, packing them full. Work 8 to 10 square feet at a time.
- Wait 15 to 20 minutes until the grout firms, then wipe with a damp — not wet — sponge in light diagonal passes, rinsing constantly. Two buckets (one wash, one rinse) keep your water cleaner and your haze lighter.
- After the surface hazes over, buff with a dry microfiber cloth. Stubborn glass-tile haze comes off next day with a nylon pad and a vinegar-water wipe.
Grout color strategy: matching the tile color hides your imperfect joints (choose this as a beginner); contrasting grout showcases the mosaic pattern but broadcasts every wobble. Pick your confidence level honestly.
Finishing: Caulk, Outlets, and Sealing
Never grout the joint where tile meets the countertop or an inside corner — those joints move and grout there cracks by spring. Run color-matched siliconized acrylic or 100 percent silicone caulk in a thin bead, tool it with a wet finger, and pull the tape immediately. Reinstall outlets with box extenders so they sit flush with the new tile face, and put the power back on. If you installed natural stone mosaic, wipe on a penetrating sealer ($20 a pint, 15 minutes) now and yearly after. Glass and porcelain need nothing.
The Mistakes I See on Every First-Timer Wall
- Grout joints that wander because ridges weren’t flattened — bed mosaics flat, always
- Visible sheet seams from inconsistent spacing — check from a distance early and often
- Grouted corners and counter joints cracking — caulk changes of plane, no exceptions
- Outlets buried below the tile plane — buy box extenders before you start, they’re $3
- Starting behind the range where the eye lands — start under a cabinet and find your rhythm on the wall nobody studies
Tool List Worth Owning vs. Renting
For a one-wall mosaic project, here’s my honest split. Worth buying: a 3/16″ V-notch trowel ($8), a rubber grout float ($10), two large tiling sponges ($6), a wheeled tile nipper for glass and ceramic ($20–$30), a 2-foot level ($15), and a box of nitrile gloves — bleach-free hands make better grout joints. Worth borrowing or renting only if needed: a wet saw. Most mosaic backsplashes never need one; the nipper and snips handle mesh cuts and single tiles, and a $40 rental for the final afternoon covers the rare stone mosaic or a row of precise outlet cuts. Skip entirely: laser levels, tile leveling-clip systems (they’re for large format, not mosaic), and any “grout in a caulk tube” product — those are for repairs, not walls, and they dry blotchy over an area this size.
One more planning note that saves beginners real grief: check your counter-to-cabinet height against sheet math before ordering. Standard 18″ of wall height divides evenly into a 12″ sheet plus a 6″ cut course, or exactly one and a half sheets — which means a full horizontal cut line somewhere. Decide now whether that cut course lives at the counter (hidden behind faucets and small appliances) or at the cabinet line (hidden in shadow). Either is fine; splitting sheets mid-wall where the eye lands is the rookie tell. Sketch the wall on paper with real dimensions, count your sheets, and your order will be right the first time.
Final word from the trade: your goal on this project isn’t perfection, it’s flatness and clean lines at eye level. Small tiles forgive small errors, grout hides the rest, and caulk finishes the story. Take your time on layout, let the thinset cure fully, and don’t grout tired at 9 p.m. Do that, and the wall you set yourself will look pro enough that guests will ask who you hired — which is, I promise, the best part of the whole project.