
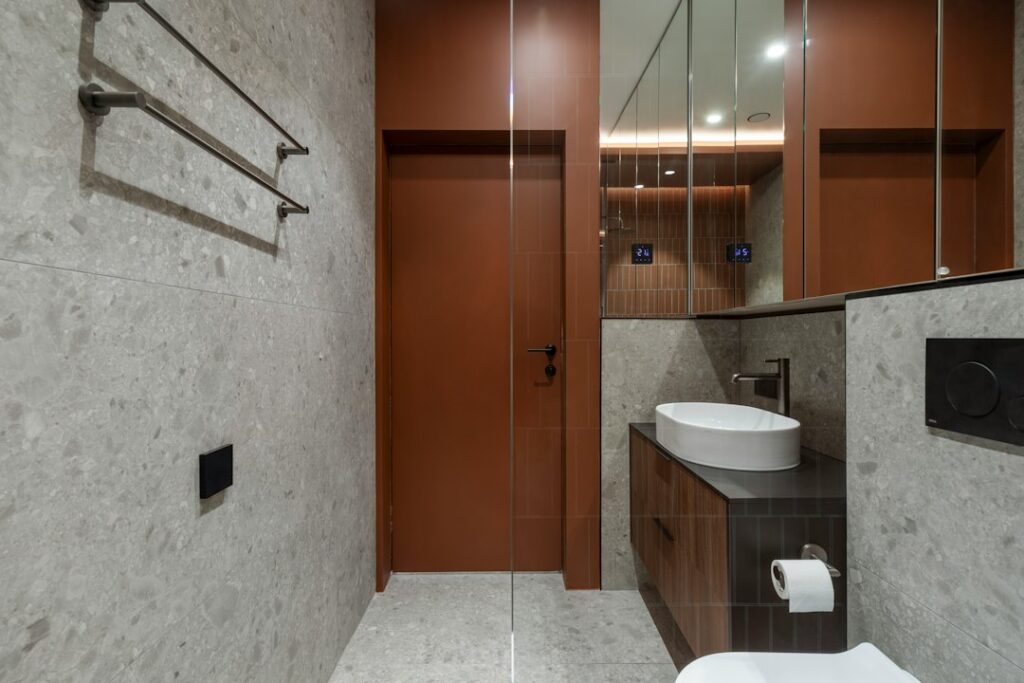
The most common vessel sink mistake has nothing to do with style. It happens when someone sets a 6-inch-tall bowl on a standard 34-inch vanity and suddenly the rim sits at elbow height. A bathroom vessel sink sits on top of the counter instead of dropping into it, so every measurement, from vanity height to faucet spout reach, has to account for the bowl. Get the math right and you have a striking, easy-to-clean basin; get it wrong and you splash water across the counter every morning.
Part of our Bathroom Remodeling & Flooring guide — explore the full guide →
In plain terms, a vessel sink is a freestanding bowl that rests on the countertop and drains through a single hole. It needs either a tall faucet or a wall-mount faucet, a vessel-style drain (usually without an overflow), and a vanity that is shorter than normal or a bowl that is shallow. Installation is simpler than an undermount because there is no clipping or epoxying a basin to the underside of the stone.
Under the counter, though, the plumbing is ordinary: a P-trap, supply lines and shutoff valves. That makes a vessel sink a friendly upgrade for a weekend DIYer who is comfortable with basic plumbing.
Bathroom Vessel Sink Pros and Cons vs Undermount
Vessel sinks, sometimes called above counter sinks or bath bowl sinks, change both how a bathroom looks and how it works day to day. Weigh these points before you commit.
Advantages
- Visual impact: The bowl becomes a centerpiece, and you can choose shapes and materials that would never work as an undermount.
- Simpler counter fabrication: The counter needs only a drain hole and a faucet hole instead of a large polished cutout.
- More storage underneath: Because the bowl sits on top, the vanity cabinet loses less interior space.
- Easy replacement: Swapping the bowl later rarely means replacing the counter.
Drawbacks
- Cleaning the base: Grime collects where the bowl meets the counter, and the outside of the bowl needs wiping too.
- Splashing: Shallow or wide bowls throw water if the faucet is mismatched.
- Height for kids: A raised rim can be awkward for small children and some people with limited mobility.
- Durability: An exposed rim can chip if something heavy hits it.
An undermount sink keeps the counter flat and is easier to wipe crumbs and water into. If you want the easiest daily cleaning, undermount wins. If you want a design statement and a simpler install, a bathroom vessel sink is hard to beat.
Counter Height Math
Comfortable rim height for most adults is about 34 to 36 inches from the floor. Standard vanities are now often 34 to 36 inches tall on their own, which is why vessel sinks pair best with lower vanities in the 30 to 32 inch range. Run the numbers like this:
- Measure the vessel bowl’s height, including any ring or mounting base. Typical bowls run 4 to 7 inches.
- Decide on a target rim height. Start at 36 inches and adjust for the tallest regular user.
- Subtract the bowl height from the target rim height. That is your ideal counter height.
Example: a 5.5-inch bowl and a 36-inch target rim height means a counter at about 30.5 inches. If you are keeping an existing 34-inch vanity, look for a low-profile bowl of 4 inches or less, or a semi-recessed vessel that drops partway into the counter. A small vessel sink in a powder room can get away with a slightly higher rim because people use it briefly.
Faucet Height, Reach and Drain Choices
Your faucet must clear the rim and land the stream near the center of the bowl. Two figures matter: spout height and spout reach.
- Spout height: The aerator should sit 1 to 3 inches higher than the rim. Too low and you hit your knuckles; too high and water splashes.
- Spout reach: The stream should fall roughly at the drain. Measure from the faucet hole center to the drain center and match that number to the faucet’s listed reach.
- Wall-mount option: A wall-mount faucet frees the counter and avoids reach problems on deep bowls, but it requires opening the wall for the supply valve, which is best planned during a remodel.
Vessel drains come in two main types. A pop-up drain lets you plug the bowl with a push of the cap. A grid drain stays open all the time and is common for bowls you never plan to fill. Most vessel bowls have no overflow hole, so you need a drain specifically labeled “no overflow.” If your bowl does have an overflow, use a drain with a slot that aligns with it, or water will back up. Many vessel drains also need a mounting ring between the bowl and counter to stabilize round-bottomed bowls.
Tools and Materials
- Vessel bowl, such as a ceramic vessel sink, which is lightweight and easy to clean
- Vessel faucet or wall-mount faucet, and matching drain (pop-up or grid)
- Mounting ring or gasket if the bowl requires it
- 1.25-inch P-trap kit and tailpiece extension
- Two braided supply lines
- Drill with diamond or carbide hole saw sized to the drain and faucet holes
- Clear 100 percent silicone sealant, plumber’s tape, adjustable wrench, basin wrench
- Painter’s tape, level, tape measure, bucket and towels
Step-by-Step: Installing a Vessel Sink
- Shut off the water. Close the hot and cold shutoff valves under the vanity, open the old faucet to relieve pressure, and keep a bucket handy. If the stops do not seal, shut off the main.
- Mark the layout. Center the bowl on the counter, leaving at least 1 to 2 inches between the bowl and the backsplash for cleaning. Mark the drain center and the faucet hole based on the faucet’s reach.
- Drill the holes. Put painter’s tape over the marks to keep the bit from wandering. Drill slowly with water cooling the bit on stone or quartz. Most vessel drains need a 1.75-inch hole; faucets usually need about 1.25 inches.
- Mount the faucet. Install the faucet and its supply lines before the bowl so you have room to work. Tighten the mounting nut from underneath with a basin wrench.
- Assemble the drain. Set the mounting ring or gasket over the counter hole, set the bowl on top, and push the drain body down through the bowl, ring and counter. Use the gaskets supplied rather than plumber’s putty if the bowl is stone, since putty can stain porous material.
- Seal the bowl. Run a thin bead of clear silicone where the bowl or ring meets the counter. Tighten the drain nut from underneath just until the bowl cannot rotate. Overtightening can crack glass or ceramic.
- Connect the trap. Cut the tailpiece extension to length and connect the P-trap to the wall drain. Keep the trap arm sloping slightly toward the wall.
- Test. Turn on the supply valves slowly, run water for several minutes and check each connection with a dry paper towel. Let the silicone cure for 24 hours before heavy use.
Choosing Material and Size
For a first bathroom vessel sink, a white vessel sink in vitreous china is the most forgiving choice: it resists stains, shrugs off most cleaners and weighs little. Tempered glass shows water spots but looks dramatic. Stone and concrete look substantial but weigh far more and need sealing. Copper develops a patina that some people love and others fight. For size, a 16 to 18 inch round bowl suits most single vanities; a small vessel sink of 12 to 14 inches fits powder rooms but splashes more. Over counter bathroom sink options also include rectangular bowls, which give more usable basin area for the same footprint.
Troubleshooting
Bowl wobbles: The counter is not flat or the bowl base is rounded. Add the manufacturer’s mounting ring and re-seal.
Water pools around the base: The silicone bead has a gap, or splashing is running down the outside of the bowl. Reseal and reconsider faucet reach.
Slow drain: Grid drains catch hair. Pull the drain cap or use a plastic drain snake.
Leak at the trap: Realign the slip nuts and washers; hand-tight plus a quarter turn is usually enough on plastic traps.
Typical Costs and When to Call a Plumber
Ceramic and glass vessel bowls generally fall in the low to moderate range, while stone and hand-made designs cost more. Expect to budget separately for the faucet and drain, which can equal or exceed the bowl price. Professional installation of a sink and faucet on an existing vanity is usually a modest labor charge, and it rises if the counter needs new holes cut in stone or the supply and drain lines need relocating.
Call a licensed plumber if the drain line has to move, if you are installing a wall-mount faucet that requires new supply lines inside the wall, or if shutoff valves are corroded and will not close. Local plumbing code and permit rules apply whenever lines are relocated, so check before opening walls.
Frequently Asked Questions
How tall should a vanity be for a vessel sink?
Subtract the bowl height from your preferred rim height, usually 36 inches. Most vessel setups land on a counter around 30 to 32 inches.
Do vessel sinks need a special faucet?
Yes. Use a tall vessel faucet or a wall-mount faucet so the spout clears the rim and reaches the center of the bowl.
Do vessel sinks have an overflow?
Most do not. Buy a drain labeled for no-overflow sinks, or the bowl will not drain or seal correctly.
Are vessel sinks hard to clean?
They take a little more effort because you wipe the outside of the bowl and the joint at the counter, but smooth ceramic cleans quickly.
Can I put a vessel sink on an existing vanity?
Yes, if the height works. Choose a low-profile bowl for a standard-height vanity, or lower the cabinet if the rim ends up too high.


