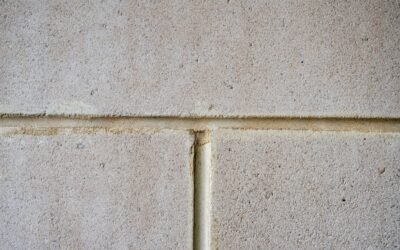
Finding the best way to clean tile floors and grout comes down to using the right method for your tile type, cleaning grout lines before they trap grime, and sealing the grout so dirt cannot soak in again. Tile itself is one of the easiest floors to keep clean, but the grout between the tiles is porous, sits slightly below the surface, and quietly collects mop water, food spills, and foot traffic until those bright lines turn gray or brown. The good news is that you rarely need harsh chemicals or a professional service. With a handful of household products, the right brush, and a sensible routine, you can bring tired tile and grout back to life and keep it that way.
Part of our Tile & Grout guide — explore the full guide →
This guide covers routine cleaning, deep cleaning stained grout, which cleaners are safe for which tile, the tools that make the job faster, and the sealing step most people skip.
Know Your Tile Before You Clean
The safest cleaner depends on what your floor is made of.
- Ceramic and porcelain are tough, non-porous, and tolerate almost any cleaner, including mild acids like vinegar. These are the most common floor tiles and the most forgiving.
- Natural stone (marble, travertine, slate, limestone) is porous and acid-sensitive. Never use vinegar, lemon, or acidic cleaners; they etch and dull the surface. Use a pH-neutral stone cleaner only.
- Cement and saltillo tile are also porous and need gentle, neutral products and regular sealing.
If you are unsure whether a tile is glazed ceramic or natural stone, do a discreet test: a drop of vinegar on stone will fizz or dull the spot. When in doubt, treat the floor as stone and stick to pH-neutral cleaners.


The Routine Cleaning Method
Most dullness is just accumulated dust and grit, not a stain. Handle it with a simple weekly routine:
- Sweep or vacuum first. Grit acts like sandpaper and scratches glaze over time. A dust mop or vacuum on a hard-floor setting is ideal.
- Mop with warm water and a mild cleaner. For ceramic and porcelain, a squirt of dish soap or a dedicated tile cleaner in warm water works. For stone, use a pH-neutral stone cleaner.
- Rinse. This is the step people skip. Soapy residue dries into a dull film that actually attracts more dirt. Go over the floor a second time with clean water.
- Dry. Buff with a microfiber cloth or towel to prevent water spots, especially on dark or polished tile.
Avoid sponge mops, which push dirty water straight into the grout lines. A flat microfiber mop or a string mop that you wring well is better.
Deep Cleaning Stained Grout
Grout is the real challenge. Because it sits lower than the tile and is porous, it collects everything. Here is the most reliable deep-clean sequence, from gentlest to strongest:
- Baking soda paste: Mix baking soda with a little water into a paste, spread it along the grout lines, let it sit 10 minutes, then scrub with a stiff nylon brush or an old toothbrush. This is safe on all tile and stone.
- Baking soda plus hydrogen peroxide: For tougher stains on ceramic or porcelain grout, mix baking soda with 3% hydrogen peroxide instead of water. The mild oxidizer lifts organic stains. Safe on stone as well, since peroxide is not acidic.
- Oxygen bleach (like OxiClean): Dissolve in warm water, apply to grout, let it dwell 10 to 15 minutes, and scrub. Excellent for a whole-floor refresh and gentler than chlorine bleach.
- Steam cleaning: A handheld or floor steam cleaner with a grout attachment blasts grime out of the lines using only heat and water, no chemicals. It is one of the fastest ways to deep-clean a large tiled area.
Work in small sections, keep the grout wet with the cleaner while it dwells, and rinse thoroughly afterward so no residue remains in the lines.
What About Vinegar and Bleach?
These two get recommended constantly, but with caveats.
Vinegar is a mild acid. It is fine on ceramic and porcelain and cuts soap scum and hard-water film. But it will slowly erode cement grout and etch natural stone, so avoid it on stone floors and use it sparingly on grout.
Chlorine bleach whitens grout dramatically but is harsh. It can discolor colored grout, weaken the grout over time, and gives off strong fumes. Reserve it for badly mildewed grout, dilute it, ventilate the room, never mix it with vinegar or ammonia (which creates toxic gas), and rinse well. Oxygen bleach is a safer everyday choice.
The Best Tools for the Job
- Stiff nylon grout brush or an electric spin-scrubber for hands-off scrubbing of large areas.
- Microfiber flat mop for daily cleaning without pushing dirt into grout.
- Steam cleaner for periodic chemical-free deep cleans.
- Old toothbrush for corners and edges.
- Knee pads and a bucket of clean rinse water for whole-floor grout projects.
A cordless electric scrubber with a grout brush head is the single biggest time-saver for anyone with a lot of tile, turning an hours-long scrub into a manageable job.
Seal the Grout So It Stays Clean
Here is the step that separates a floor that stays clean from one you fight constantly: sealing. After you deep-clean and the grout is completely dry (wait 24 hours), apply a penetrating grout sealer. The sealer soaks into the porous grout and creates a barrier so spills bead up instead of soaking in, buying you time to wipe them away.
Reseal cement grout every one to two years in high-traffic areas. To test whether it is time, drip water on the grout; if it soaks in and darkens the grout, it needs resealing. Epoxy grout, increasingly common in new installations, is already stain-resistant and does not need sealing, which is one reason it is popular in kitchens and showers.
Common Mistakes to Avoid
- Using acidic cleaners on natural stone, which etches and permanently dulls it.
- Skipping the rinse, leaving a sticky film that attracts dirt.
- Letting dirty mop water dry in the grout lines, which is how grout turns gray in the first place.
- Scrubbing grout with metal brushes or abrasive pads that scratch tile and gouge grout.
- Never sealing the grout, guaranteeing the stains come right back.
- Mixing bleach with vinegar or ammonia, a genuinely dangerous combination.
A Simple Maintenance Rhythm
The easiest floor to keep clean is the one you never let get filthy. Sweep or vacuum a few times a week, mop weekly with a neutral cleaner and a proper rinse, wipe spills promptly, and do a baking-soda or oxygen-bleach grout scrub a couple of times a year. Reseal the grout on schedule, and you will almost never need to break out the heavy chemicals.
Dealing With Specific Stains
Not every mark responds to the same treatment, so it helps to match the method to the stain. Grease and food spills in a kitchen respond best to a degreasing dish soap and warm water, followed by a baking-soda scrub on any that reached the grout. Hard-water and soap-scum film, common in bathrooms, dissolves with a vinegar-water solution on ceramic and porcelain (never on stone), or a dedicated lime-scale remover. Mold and mildew in damp grout respond to hydrogen peroxide or a diluted oxygen-bleach solution left to dwell, then scrubbed and rinsed; improving ventilation is what keeps it from returning. Rust stains, often from a metal can or furniture leg left on wet tile, need a dedicated rust remover rather than a general cleaner. And colored stains from wine, coffee, or dye lift best with an oxygen-bleach paste given time to work.
Whatever the stain, two principles apply. First, always test any new cleaner on an inconspicuous tile before treating the whole floor, especially on stone or colored grout. Second, resist the urge to reach straight for the harshest chemical; start gentle and escalate only if needed. Aggressive acids and chlorine bleach can permanently discolor grout, etch stone, and damage the very surface you are trying to save, so they are a last resort, not a first move.
For homeowners who dread grout scrubbing entirely, another long-term option is grout colorant or a grout stain and sealer. After a deep clean, applying a grout colorant recoats the lines in a uniform shade and seals them at the same time, effectively renewing stained or mismatched grout without the labor of regrouting. It is a popular refresh for older tile floors where the grout has become permanently discolored.
Bright tile and clean grout are less about muscle and more about method: match the cleaner to your tile, treat the grout as the porous surface it is, rinse and dry, and protect the grout with sealer. Follow that approach and your floors will look freshly installed for years, without the cost of a professional cleaning service.
Prefer to explore on your own?
See how new flooring looks in your actual room in seconds — free, no signup.
Try the free Floor Studio →