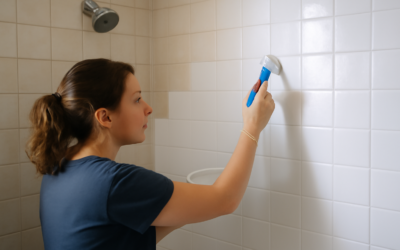
Ripping out tile is expensive and messy, so painting it is a tempting shortcut when you want to turn dated pink or beige tile into a sleek, modern surface. Black tile paint can transform a tired backsplash, tub surround, or floor for well under a hundred dollars, provided you understand where it works and where it fails.
Part of our Tile & Grout guide — explore the full guide →
The difference between a paint job that lasts five years and one that peels in five months comes down to prep and product choice. A specialty tile epoxy applied over meticulously cleaned and primed tile behaves nothing like a coat of wall paint slapped on a Saturday afternoon. Here is what actually holds up.
Floor Tile vs Wall Tile: Different Demands
Where the tile lives dictates which product you need. Wall and backsplash tile see little abrasion, so a two-part epoxy coating or even a durable enamel bonds well and lasts. Floor tile is a harder case because it takes foot traffic, grit, and furniture, all of which wear through paint.
For floors, you want a true floor-rated epoxy, the same category of product sold for garage floors, tinted black rather than a thin brush-on tile paint. On walls, kits like Rust-Oleum Tub and Tile refinishing epoxy, INSL-X Sure Grip or Cabinet Coat, and various tub-and-tile epoxy kits give a hard, glossy black finish that resists moisture. Match the product’s abrasion rating to the surface and you avoid most disappointments.
Where Black Tile Paint Works and Where It Doesn’t
Painted tile performs best on dry or occasionally damp vertical surfaces: kitchen backsplashes, bathroom walls, tub surrounds above the splash line, and fireplace surrounds. It also does fine on light-to-moderate-traffic floors like a powder room or laundry.
- Good candidates: backsplashes, accent walls, tub surrounds, low-traffic floors, fireplace tile.
- Poor candidates: shower floors and any surface with standing water, pool decks, heavy-traffic entryways, and countertops that see knives and hot pans.
Shower pans and wet floors are the number one failure point. Constant water sits in grout lines and under foot pressure, and no coating survives that for long. If your project is a shower floor, painting is the wrong tool; re-tile or reglaze professionally instead.
Prep: The Step That Determines Everything
Roughly 80 percent of a successful tile-painting job is preparation. Skip it and the coating will peel in sheets. Follow this sequence.
- Degrease. Scrub every square inch with a strong degreaser or TSP substitute to strip soap scum, body oil, and cooking grease. Rinse and let dry fully.
- Repair. Fill chips and cracked grout, and re-caulk any failed seams. Paint will not hide missing grout.
- Sand. Scuff the glossy glaze with 220-grit sandpaper so the primer has a mechanical grip. Wipe away all dust with a tack cloth.
- Prime. Apply a high-adhesion bonding primer rated for glossy surfaces, such as a bonding primer from Rust-Oleum, INSL-X STIX, or Zinsser. This is what makes paint stick to slick ceramic.
Ventilate the room and wear a respirator, because both epoxy and bonding primers give off strong fumes.
Applying the Black Finish
With prep done, application is straightforward. For epoxy kits, mix only what you can use within the pot life printed on the can, often 2 to 3 hours, since mixed epoxy hardens in the container. Apply thin, even coats with a high-density foam roller for large areas and a quality brush for grout lines and corners. Two thin coats always beat one thick coat, which sags and cures unevenly.
To keep grout lines visible, some homeowners tape and paint the grout a contrasting gray after the tile cures; others let the black flow over everything for a seamless look. Plan a light recoat window per the product instructions, typically applying the second coat within a few hours or after 24 hours, never in between.
Cure Time and Durability Limits
Cure time is the most misunderstood part of painting tile. The surface may feel dry to the touch in a few hours, but full chemical curing takes far longer. Keep the surface dry and out of use for up to 3 days; most tub-and-tile epoxies specify a full 72 hours before water exposure. Rushing back into the shower on day two is the fastest way to ruin the finish.
Be realistic about longevity. On walls and backsplashes, a well-applied epoxy can look sharp for 5 or more years. On floors, expect 2 to 4 years before you see wear paths, then a recoat. Painted tile is a cosmetic refresh, not a permanent replacement, and it will chip if you drop something heavy on it. Grout lines remain the weak point, since paint bridging a recessed line is thinner and more prone to cracking.
What It Costs
This is a genuinely budget-friendly upgrade. A Rust-Oleum Tub and Tile kit covers about a standard tub-and-surround and runs roughly $25 to $40. A quart of bonding primer adds $15 to $25, and sandpaper, rollers, and tape another $20. For a small bathroom, total materials land around $60 to $120. A floor-rated black epoxy for a larger area costs more, often $50 to $150 depending on square footage. Compare that to $1,500 or more to re-tile, and the appeal is obvious for a rental refresh or a stopgap before a full remodel.
Choosing the Right Product for the Job
Not every can labeled for tile behaves the same, so match the chemistry to the wear the surface will see. For a backsplash or accent wall that stays mostly dry, a quality bonding primer topped with a durable acrylic-alkyd enamel like Benjamin Moore Advance in black gives a smooth, hard finish that is easy to apply and recoat. For tub surrounds and shower walls above the splash zone, step up to a two-part epoxy such as the Rust-Oleum Tub and Tile kit, which cures to a moisture-resistant film built for constant humidity.
On floors, reach for a true floor epoxy tinted black rather than a thin brush-on tile paint, because floor epoxies are formulated for abrasion and impact. Whatever you choose, buy from a single system when possible: a bonding primer, base coat, and topcoat from the same manufacturer are engineered to bond to each other, which reduces the risk of the layers separating down the road.
A Quick Product Cheat Sheet
- Backsplash or dry wall tile: bonding primer plus acrylic-alkyd enamel.
- Tub surround or shower walls: two-part tub-and-tile epoxy kit.
- Low-traffic floor: tinted floor epoxy with a nonslip additive.
- Shower pan or standing water: none, re-tile or reglaze instead.
Maintenance After Painting
Once fully cured, clean painted tile gently. Use a soft cloth and mild dish soap, and avoid abrasive scrubbing pads, bleach, and harsh bathroom cleaners that dull and lift the coating. Wipe standing water off promptly, especially near tub edges. When wear finally shows, scuff-sand the worn area, wipe clean, and roll on a fresh topcoat; because you are recoating your own paint rather than raw tile, spot repairs blend easily.
One more habit protects your work: dry the surface after each use for the first couple of weeks, even past the 72-hour cure window, since a full chemical cure continues to harden for up to 30 days. A bath mat outside the tub and a squeegee kept in the shower go a long way toward keeping water off the fresh finish while it reaches full toughness. Treated as a maintainable finish rather than a permanent one, black tile paint buys you years of a fresh, modern look for the price of a nice dinner out.
Prefer to explore on your own?
See how new flooring looks in your actual room in seconds — free, no signup.
Try the free Floor Studio →