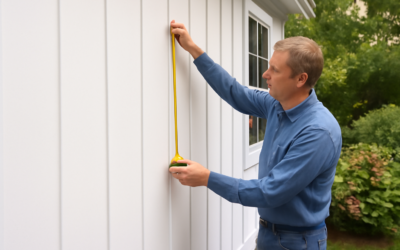
Board and batten started as a barn-siding solution: wide vertical boards with narrow strips nailed over the seams to keep rain out. Today it shows up on farmhouse exteriors, dining room walls, nursery accent walls, and even kitchen islands. The catch is that “board and batten” now covers a dozen distinct looks, and picking the wrong one for your house can make a space feel busy or dated. This guide walks through the most popular board and batten styles, how each is spaced and sized, where it works best, and what it costs, so you can choose the version that fits your home.
- Understanding Board and Batten Styles Before You Choose
- Classic Interior Styles
- Grid and Geometric Styles
- Exterior Siding Styles
- Choosing Batten Width and Spacing
- Materials and What They Cost
- Matching the Style to Your Home
- Installation Tips for Clean Results
- Common Mistakes That Make Battens Look Amateur
- Picking Your Board and Batten Style
Understanding Board and Batten Styles Before You Choose
Every version shares two parts. The board is the flat background, which may be actual wide planks, a sheet of plywood or MDF, or simply your existing drywall. The batten is the narrow strip applied over the top, usually 1 1/2 to 3 1/2 inches wide. What changes between styles is the batten size, spacing, orientation, how the top is finished, and whether horizontal rails are added to create a grid.
On interiors, the battens are decorative. On exteriors, they still do a job: covering the joint between boards so water cannot get behind them. That functional difference affects material choice, fastening, and spacing, which is why exterior and interior styles are covered separately below.
Classic Interior Styles
1. Traditional Vertical Batten Wainscot
The most common interior version runs vertical battens from a baseboard up to a horizontal top rail at about one-third of the wall height. On an 8-foot wall, the rail typically sits between 32 and 42 inches off the floor, or roughly chair-rail height. Battens are usually 1×3 (actual 2 1/2 inches wide) spaced 12 to 16 inches apart. A small cap or ledge on top of the rail finishes the look. This style suits dining rooms, hallways, and mudrooms where it also protects walls from chair backs and backpacks.
2. Tall Wainscot (Two-Thirds Height)
Raising the top rail to 54 to 66 inches creates a more dramatic, room-defining look. It works especially well in rooms with 9-foot or taller ceilings and in bedrooms, where the rail can double as a shelf for art. Keep spacing proportional; taller battens look better with slightly wider gaps of 16 to 20 inches.
3. Full-Height Floor-to-Ceiling Battens
Running battens all the way to the ceiling, with no mid rail, gives a modern farmhouse feel and visually raises the ceiling. This is the go-to style for feature walls behind a bed, a TV, or a staircase landing. Spacing of 12 to 18 inches is typical, and many installers add a crown or a simple flat frieze board at the top to hide ceiling irregularities.
Grid and Geometric Styles
4. Square Grid
Add horizontal battens between the verticals and you get a grid of squares or rectangles. A popular layout uses equal 16-by-16-inch or 24-by-24-inch squares across the upper wall. Grids suit transitional and contemporary rooms. They take roughly twice the batten material and considerably more cutting, because every horizontal piece must fit tightly between two verticals.
5. Rectangular Panel (Shaker-Inspired)
This style uses a lower row of short rectangles and an upper row of tall rectangles, mimicking the look of paneled Shaker millwork. It reads more formal than straight vertical battens and pairs well with crown molding. Widths of 3 1/2 inches for rails and stiles look substantial without being heavy.
6. Picture-Frame Box Style
Sometimes grouped with board and batten, this version uses flat battens to outline individual boxes rather than a continuous grid. It is great for making plain drywall look custom in living rooms and entryways, and it hides imperfect walls well because each box is independent.
Exterior Siding Styles
7. Traditional Wide Board and Narrow Batten
The historic barn look uses boards 8 to 12 inches wide with 2- to 3-inch battens over each seam. Real wood boards are nailed only down one edge or through the center so they can expand and contract with humidity; the batten covers the gap. This is the most authentic rustic style, and it suits farmhouses, cabins, and outbuildings.
8. Reverse Board and Batten
Here the narrow strips go on first and the wide boards cover them, creating deep recessed channels between broad boards. The result is bolder shadow lines. It is less common and requires careful flashing, but it gives a contemporary barn look many architects like.
9. Modern Slim Batten on Panel Siding
Fiber-cement or engineered-wood panels (typically 4 by 8 or 4 by 10 feet) are installed first, then slim 1×2 or 1×3 battens are applied every 12 to 16 inches. This is the fastest and most popular exterior method on new construction. Many homeowners combine it with lap siding on the lower story, using board and batten on gables or bump-outs as an accent.
Choosing Batten Width and Spacing
Proportion is what separates a professional-looking wall from an amateur one. A few rules of thumb help:
- Wider walls and taller ceilings handle wider battens (3 1/2 inches) and wider spacing (16 to 24 inches).
- Small rooms and powder baths look better with slim 1 1/2- to 2 1/2-inch battens spaced 10 to 12 inches apart.
- Always lay out from the center of the wall or a focal point, such as a bed or window, so the end gaps match on both sides.
- Equal spacing beats stud spacing. Use construction adhesive and 18-gauge brad nails to fasten battens between studs rather than forcing the layout onto 16-inch centers.
To calculate spacing, subtract the total width of all battens from the wall width, then divide by the number of gaps. For example, a 144-inch wall with ten 2 1/2-inch battens leaves 119 inches of open space across nine gaps, or about 13 1/4 inches per gap.
Materials and What They Cost
| Material | Best Use | Approx. Cost |
|---|---|---|
| Primed MDF strips | Dry interior walls | $0.60 to $1.20 per linear ft |
| Poplar or pine 1×3 | Interior, higher traffic | $1.20 to $2.50 per linear ft |
| PVC trim | Bathrooms, laundry, exterior | $1.80 to $3.50 per linear ft |
| Fiber-cement panels and battens | Exterior siding | $5 to $12 per sq ft installed |
| Cedar boards and battens | Rustic exterior | $8 to $15 per sq ft installed |
For an interior accent wall of about 12 by 8 feet, most DIYers spend $100 to $300 on materials and a full weekend on labor. Hiring a carpenter typically runs $600 to $1,800 for the same wall, depending on the style; grids and Shaker panels land at the high end because of the extra cuts.
Matching the Style to Your Home
Traditional wide exterior battens and chair-rail wainscot fit farmhouse, Craftsman, and colonial homes. Full-height slim battens and grids suit transitional and modern interiors. In a mid-century or minimalist house, keep battens slim, spacing generous, and paint them the same color as the wall so the texture reads subtly. For a coastal cottage, a white vertical batten wainscot with a narrow shelf cap looks right at home.
Color also changes how each style reads. Painting battens and wall the same deep shade, such as navy, forest green, or charcoal, creates a rich, tailored look that hides minor gaps. A two-tone scheme with white battens over a colored wall is bolder and shows every joint, so it demands tighter carpentry.
Installation Tips for Clean Results
- Remove baseboards and outlet covers. Use outlet box extenders so receptacles sit flush with the new surface.
- Snap level lines for the top rail and use a laser level for verticals; walls and floors are rarely true.
- Install the baseboard and top rail first, then fit verticals between them.
- Fill nail holes with lightweight spackle, caulk every joint with paintable acrylic latex caulk, then prime and paint with satin or semi-gloss for easy cleaning.
On exteriors, install a water-resistive barrier and flash every horizontal joint. If you are cutting into exterior walls, moving electrical boxes, or replacing damaged sheathing, a licensed contractor or electrician should handle that portion of the work.
Common Mistakes That Make Battens Look Amateur
A few errors show up again and again on DIY walls. The first is starting the layout in a corner, which almost guarantees a skinny, awkward gap at the opposite end. Centering the layout fixes that. The second is using battens that are too thin in profile. Strips only 1/4 inch thick cast almost no shadow, so the wall looks flat once painted; 1/2- to 3/4-inch-thick stock produces the crisp relief people expect.
Skipping texture removal is another trap. If your drywall has heavy orange-peel or knockdown texture, the background between battens will look rough next to smooth trim. Skim coat the wall first or apply 1/4-inch MDF sheets as the board layer. Finally, do not ignore existing features. Plan how the battens meet window casings, door trim, light switches, and thermostats before cutting anything, and adjust spacing slightly so a batten never lands a half inch from a casing.
Picking Your Board and Batten Style
The best board and batten styles for your home come down to proportion, purpose, and architecture. Choose chair-rail wainscot for durable, classic walls; full-height battens for drama; grids or Shaker panels for a more formal finish; and wide boards or slim battens over panels for exterior siding. Plan spacing carefully from the center of the wall, choose moisture-resistant materials where needed, and the result will look like original millwork rather than a weekend add-on.