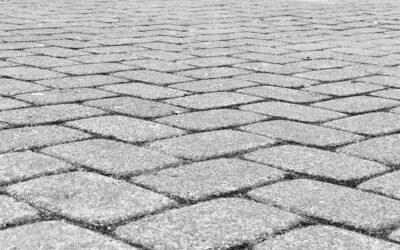
A well-built brick paver walkway can outlast the house it leads to, with clay pavers commonly rated for 50 years or more of freeze-thaw cycles. Unlike poured concrete that cracks and stains, individual pavers flex with the ground and can be lifted and reset if a root heaves them. If you are weighing a front-yard path or a side-yard connector, this guide walks through materials, patterns, cost, and the base prep that separates a walkway that lasts from one that ripples after one winter.
Clay Brick vs. Concrete Pavers
The term “brick paver” covers two very different products. True clay brick pavers are fired in a kiln, keeping their color permanently because the pigment runs all the way through. Concrete pavers, molded and cured, come in more shapes and cost less, but the surface dye can fade over 15 to 20 years of sun exposure.
Clay runs about $6 to $12 per square foot for materials, while concrete pavers land around $3 to $6. For a walkway you want to look sharp for decades, clay earns its premium; for a large project on a budget, concrete delivers the paver look for less.
Choosing a Pattern
Pattern affects both the look and the structural strength of your path. Consider these classics:
- Running bond: Simple offset rows, fast to lay, ideal for narrow straight walks.
- Herringbone: A 45- or 90-degree zigzag that resists shifting under foot traffic, the strongest interlock of the group.
- Basketweave: Traditional pairs of bricks that read as old-world and charming.
- Stack bond: A clean grid look, though it locks together the least and suits low-traffic accents.
For a walkway that people actually walk on daily, herringbone is the workhorse because the interlocking angles distribute weight and prevent creep.
Planning Width and Layout
A comfortable walkway for two people to pass measures 48 inches wide; a single-person path can shrink to 36 inches. Sketch the route, favor gentle curves over sharp angles, and use a garden hose to trace the line on the ground before you dig. Order 5 to 10 percent extra pavers to cover cuts and future repairs.
Building the Base
Ninety percent of walkway failures trace back to a weak base, not the pavers. The goal is a compacted, well-draining foundation that won’t shift.
Excavation
Dig down 7 to 9 inches to allow for 4 to 6 inches of gravel base, 1 inch of bedding sand, and the paver thickness. Slope the excavation about 1/4 inch per foot away from the house for drainage.
Gravel and Sand
Fill with crushed stone (a mix of angular gravel and fines, often sold as paver base or road base), compacting in 2-inch lifts with a plate compactor. Screed a level 1-inch layer of coarse bedding sand over the compacted gravel. Skip the temptation to use a thick sand bed; too much sand invites ruts.
Setting the Pavers
Start against a fixed edge and work outward, laying pavers snug so joints stay tight. Tap each one level with a rubber mallet. Check your pattern with a string line every few rows to keep the lines true. When you reach borders or curves, mark cuts and score them with a masonry saw or a splitter. A soldier-course border, where bricks stand on end along the edges, frames the path and locks the field pavers in place.
Edge Restraint and Joint Sand
Pavers with no edge restraint will spread apart within a season. Install plastic or metal edging staked into the base along both sides, hidden just below grass level. Once the field is set, sweep polymeric sand into the joints, mist it lightly with water, and let it harden. Polymeric sand resists weeds and washout far better than plain sand, though you’ll need to reapply it every few years.
Cost Breakdown
For a DIY 3-foot-wide, 30-foot-long walkway (about 90 square feet), budget roughly:
- Pavers: $270 to $1,080 depending on clay or concrete
- Gravel base and sand: $120 to $200
- Edging and polymeric sand: $80 to $150
- Plate compactor rental: $60 to $90 per day
All in, expect $500 to $1,500 doing the work yourself. Hiring a contractor typically runs $15 to $30 per square foot installed, so that same path could cost $1,350 to $2,700.
Maintenance for the Long Haul
A finished paver path needs little upkeep. Sweep debris, pull the occasional weed, and rinse with a hose. Reapply polymeric sand when joints look low, and reseal clay or concrete pavers every three to five years if you want to deepen color and repel stains. If a single paver settles or cracks, pry it up, add bedding sand, and reset it, a repair impossible with poured concrete.
Handling Slopes and Curves
Real yards rarely offer a flat, straight run, and how you handle grade changes separates an amateur path from a professional one. On a gentle slope, keep the pavers flush with the grade and let the whole path fall with the land, maintaining that 1/4-inch-per-foot cross slope for drainage. Where the drop is steep, break the walk into short landings with a single step between them rather than a treacherous ramp. For curves, plan the radius before you dig and use full pavers on the outer edge with tapered cuts on the inside, keeping joint lines consistent. A soldier-course border bent to follow the curve hides the cuts and gives the eye a clean, flowing edge.
Final Thoughts
A brick paver walkway rewards the effort you put into the base. Get the excavation depth, compaction, and edge restraint right, and the surface will stay flat and handsome through decades of foot traffic and freeze-thaw. Choose clay for lasting color or concrete for value, lay a herringbone pattern for strength, and you’ll have a path that lifts curb appeal the moment guests step out of the car.