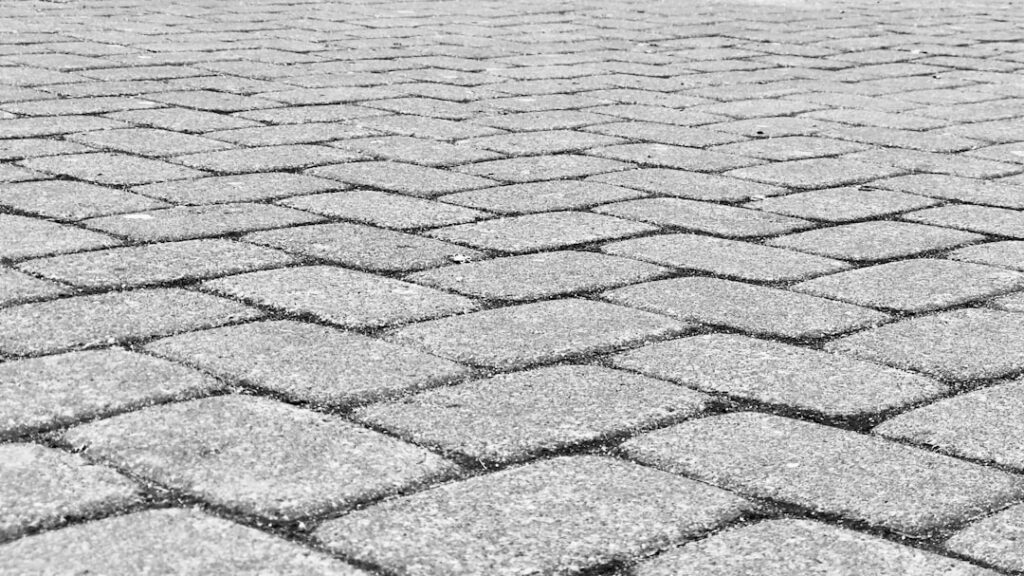
A poured concrete sidewalk cracks, and when it does, you replace the whole slab. Walkway pavers shrug off the same freeze-thaw cycles because every joint is a built-in expansion gap, and a settled paver can be lifted, re-bedded, and reset in twenty minutes. That repairability is why paver paths from the 1990s still look presentable while their concrete neighbors are spalling. The trade-off is a higher upfront price — $8 to $25 per square foot installed versus $6 to $12 for plain concrete — and a base-prep job that punishes shortcuts.
Paver Materials Compared
Concrete pavers dominate the walkway market for good reason. They cost $2 to $6 per square foot for material, come in dozens of shapes and blended colors, and hit compressive strengths of 8,000 PSI — roughly double a poured sidewalk. Brands like Belgard, Unilock, and Techo-Bloc all make walkway-scale lines. Their weakness is color: the pigment lives in the top layer, so heavy wear or aggressive pressure washing can fade them over 15 to 20 years. Our full concrete pavers guide breaks down the manufacturing types in more detail.
Clay brick pavers run $3 to $8 per square foot and never fade because the color is fired through the entire unit. A herringbone brick path in front of a colonial or craftsman house is a classic that adds resale appeal. Bricks are smaller, though, which means more units to lay and slightly more labor. Natural stone — bluestone, travertine, granite, flagstone — is the premium tier at $10 to $30 per square foot for material alone. Irregular flagstone set with planted joints suits informal garden paths; sawn bluestone in a running bond reads formal and crisp.
Porcelain pavers are the newest option, typically 24-by-24 inches and 3/4 inch thick, priced from $6 to $15 per square foot. They resist stains and fading better than anything else, but their thin profile demands a dead-flat base and they can crack under point loads, so save them for straight, well-drained paths.
How a Walkway Differs From a Patio
A path is a long, skinny ribbon, and that geometry changes the engineering. Edge restraint matters far more than it does on a patio because a walkway is nearly all edge — a 4-foot-wide path has one linear foot of vulnerable perimeter for every 2 square feet of surface. Skimp on restraint and the outer pavers creep sideways within two seasons. Walkways also carry concentrated, repetitive traffic down the centerline, so bedding-sand consistency matters; a 1/4-inch hollow that would go unnoticed on a patio becomes a rocking paver underfoot on a path.
Drainage runs across the path rather than along it. Pitch the surface 1/4 inch per foot to one side (away from the house on approach walks) so water sheets off instead of channeling down the walkway and washing out joint sand. If you are also planning a larger entertaining surface, the base and drainage rules in our patio pavers guide apply — just scaled up.
Width and Layout Planning
Width determines how the path feels. Use these working minimums:
- Front entry walk: 48 inches — two people walking side by side
- Secondary path (side yard, garden access): 36 inches
- Stepping-stone garden trail: 24 inches, with stones spaced 24 inches on center
- Path that must pass a wheelbarrow or mower: 42 inches minimum
Gentle curves look better than arbitrary wiggles. Lay a garden hose on the ground, walk the line naturally, and let the hose define the sweep — a curve should exist because it routes around a tree, a bed, or a grade change, not for decoration. For pattern, running bond and 45-degree herringbone both handle curves gracefully because the cut pieces at the border stay small. Large-format slabs fight curves; keep them for straight runs.
Base Depth: Where Walkways Live or Die
Excavate 7 to 9 inches below finished grade for a foot-traffic path: 4 to 6 inches of compacted 3/4-inch crushed stone (crusher run or dense-grade aggregate), 1 inch of concrete bedding sand, then the paver. In clay soils or the freeze-prone upper Midwest and Northeast, go to the full 6 inches of stone. Compact the aggregate in 2-inch lifts with a plate compactor — a hand tamper will not achieve the 95 percent density you need. Lay woven geotextile fabric between soil and stone on soft or organic ground; the $0.30 per square foot it costs prevents the base from pumping down into mud over time.
Screed the bedding sand with a pair of 1-inch EMT conduit rails and a straight 2×4. Never walk on screeded sand, and never use it to fill low spots in the stone — sand thicker than about an inch shifts and creates dips.
Edging That Actually Holds
Install edge restraint on both sides before joint sanding. Options that work: commercial-grade plastic paver edging (Snap Edge or Pave Tech, about $2 per linear foot) spiked with 10-inch galvanized nails every 12 inches, a 6-inch-wide concrete toe troweled against the outer course, or steel edging for tight modern lines. Options that fail: the flimsy big-box rolled edging, or nothing but soil. On curves, cut the plastic edging’s outer flange so it bends smoothly. Backfill against the restraint with topsoil and let the lawn grow to the paver edge — the turf hides the hardware and adds lateral support.
Joints, Sealing, and Upkeep
Sweep polymeric sand (Techniseal, Alliance Gator, roughly $25 to $35 per 50-pound bag covering 50 to 75 square feet of walkway) into the joints, compact again, sweep to 1/8 inch below the chamfer, and mist per the label. Polymeric sand hardens against weeds, ants, and washout — worth the premium over mason’s sand on any path with pitch. Expect to top up joints every 3 to 5 years. Sealing is optional: a wet-look acrylic sealer deepens color for $0.30 to $0.50 per square foot in product but must be reapplied every 2 to 3 years, so many contractors skip it on walkways and let the pavers weather naturally.
What a Paver Walkway Costs
Budget numbers for a typical 4-by-25-foot (100 square foot) path, professionally installed:
- Concrete pavers: $800 to $1,800
- Clay brick: $1,200 to $2,200
- Bluestone or flagstone: $1,800 to $3,500
- Porcelain: $1,500 to $3,000
DIY cuts those figures roughly in half, since labor is 50 to 60 percent of the bill. The materials-only cost for a concrete paver path lands near $4 to $7 per square foot including base stone, sand, edging, and joint sand. Rent a plate compactor ($90 a day) and, if you have curves, a masonry wet saw ($60 to $100 a day) — a diamond blade on an angle grinder works for a handful of cuts but gets tedious fast.
The DIY Install Sequence
For a straight 4-foot path, the weekend rhythm looks like this. Day one: mark the layout with paint 6 inches wider than the finished path on each side, excavate, compact the subgrade, lay fabric, then spread and compact stone in lifts, checking your cross-pitch with a 4-foot level and a 1/4-inch shim taped to one end. Day two: set screed rails, pull the bedding sand, lay pavers from one end working off the finished surface (never kneel on the sand), cut borders, install edging, then compact the field with a pad or plywood protecting the surface before sweeping joints. A first-timer should plan 20 to 25 square feet per hour of laying time — curves and cuts cut that rate in half. String lines are worth the five minutes they take: a taut line down each edge keeps courses straight in a way your eye alone never will.
Mistakes That Ruin Walkway Pavers
Three failures account for nearly every ugly paver path. First, thin or uncompacted base — the path ripples within a year and every fix requires tearing back to the stone. Second, missing or cheap edging, which lets the field spread until joints gap open. Third, flat installation with no cross-pitch, leaving puddles that breed algae and ice. Get those three right and a walkway paver path is genuinely a 30-year surface; the day one paver does settle, you pry it out, add a scoop of sand, tap it back down, and the repair is invisible.