Nine out of ten paver patios that fail — the wavy surfaces, the sunken corners, the joints sprouting weeds by year two — fail below the surface, in a base that was too thin or never compacted. The pavers themselves almost never break. That’s the first thing to understand about patio pavers: choosing the stone is the fun 20 percent of the project, and building what’s underneath it is the 80 percent that determines whether your patio still looks sharp in 2040. This guide walks through the material options, the laying patterns that suit each one, and the base and edging details that separate a professional-grade patio from a weekend regret.
- Choosing a Paver Material for a Patio
- Laying Patterns and What They Say
- Base Prep: The Part That Decides Everything
- Edges and Joints: Locking It All Together
- Planning, Quantities, and Budget
- Cutting, Tools, and the Work Itself
- Living With a Paver Patio: Maintenance Reality
- Mistakes That Sink Paver Patios
Choosing a Paver Material for a Patio
Concrete pavers dominate the patio market for good reason: they cost $3 to $10 per square foot for material, come in every shape from 6-inch cobbles to 24-by-24 slabs, and are engineered to a uniform thickness that makes them fast to lay. For a patio — foot traffic only, no vehicles — the standard 2-3/8-inch (60mm) thickness is all you need. Brands like Belgard, Unilock, and Techo-Bloc all offer patio lines with blended colors and textured faces that avoid the flat gray-cement look of older product.
Clay brick pavers run $4 to $10 per square foot and bring a warmth concrete can’t quite fake — the color is fired through the whole unit, so chips and decades of wear never expose a different core. They suit traditional homes and never go out of style. Natural stone is the premium lane: bluestone and flagstone at $6 to $15 per square foot material, travertine similar, granite higher. Stone gives you irregular beauty but also irregular thickness, which means each piece gets individually bedded — figure 30 to 50 percent more labor. Porcelain pavers, the newest entry at $5 to $12, are 3/4-inch dense tiles for pedestal or sand-set installs with dead-flat modern looks and near-zero water absorption, ideal for contemporary designs and around pools.
Laying Patterns and What They Say
Pattern isn’t just aesthetics — it affects cutting waste and visual scale. Running bond (each row offset half a unit, like brickwork) is the simplest and wastes the least, around 5 percent. Laid perpendicular to the house it stretches a shallow patio; parallel, it widens a narrow one. Herringbone, at 45 or 90 degrees, is the classic upgrade: it interlocks in two directions, looks handcrafted, and costs you 10 to 15 percent waste on the diagonal cuts along the edges. For rectangular patios, a 90-degree herringbone framed with a contrasting soldier-course border is the most reliably handsome combination in the trade.
Random or “I” patterns mix two to four paver sizes — say 6×6, 6×9, and 9×9 — following a repeating module the manufacturer prints on the pallet sheet. They hide minor color variation beautifully and read as upscale. Large-format slabs want simple treatment: a stacked grid or third-offset running bond with tight 1/8-inch joints. Whatever pattern you pick, dry-lay a 4-by-4 test section first and pull pavers from three or four pallets at once, because color blends shift pallet to pallet and banding is obvious once it’s set.
Base Prep: The Part That Decides Everything
A patio base is a sandwich, and every layer has a job. Excavate 7 to 9 inches below your finished height — deeper (10 to 12 inches) in clay soil or hard-freeze climates. Lay non-woven geotextile fabric over the subgrade to keep the stone base from migrating into the soil; it costs about $0.30 per square foot and adds years to the patio’s life. Then build 4 to 6 inches of 3/4-inch crushed stone with fines (called ABC, road base, or 21A depending on your region), compacted in 2-inch lifts with a plate compactor. Renting a 5,000-pound-force plate runs about $90 a day and is not optional — hand tamping a patio base is how you get the wavy surface in three years.
Grade the base itself to the finished slope: 1/4 inch per foot falling away from the house, checked with a string line and level, never eyeballed. On top goes exactly 1 inch of concrete sand, screeded flat between 1-inch pipe rails and never compacted or walked on. The pavers bed into that sand layer when you run the compactor over the finished surface. An alternative gaining ground is open-graded base — clean 3/4-inch stone topped with 1/4-inch clear chip instead of sand — which drains freely and shrugs off freeze-thaw, though it demands a proper perimeter drain path.
Edges and Joints: Locking It All Together
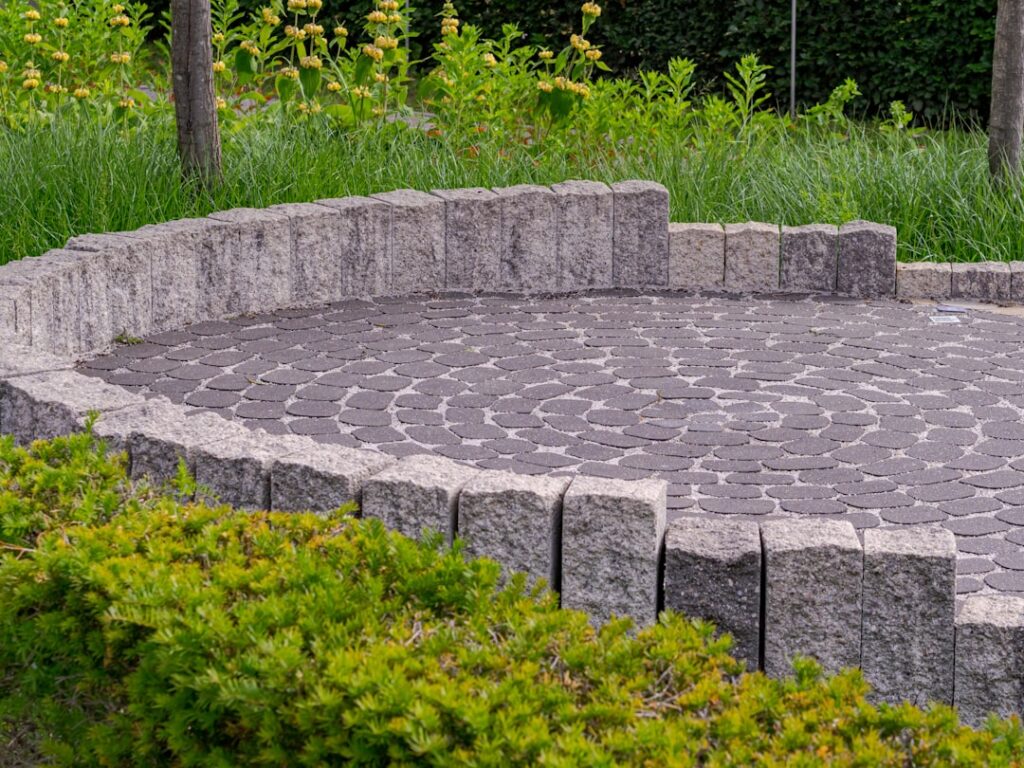
Pavers are a flexible pavement; nothing holds them together but confinement. Without edge restraint, the outer courses creep outward, joints open, and the field unravels from the border in. Snap-Edge and similar rigid PVC restraints spike into the compacted base (not the soil) with 10-inch spikes every 12 inches and disappear under mulch or sod. A concrete toe — a triangular haunch of concrete troweled against the border course — is the old-school alternative and still the strongest for curves.
Joints get swept with polymeric sand — Techniseal or Alliance Gator at $25 to $35 per bag covering 50 to 75 square feet. Sweep it diagonally into the joints, compact again to settle it, sweep the surface absolutely clean, then mist per the bag directions. Polymeric sand hardens to a flexible seal that blocks weeds and ants far better than plain sand, but it will leave a permanent haze if you wet it with residue still on the paver faces. Do this step on a rain-free day above 40°F.
Planning, Quantities, and Budget
Measure your layout and order 5 to 10 percent extra pavers for cuts and future repairs — matching a discontinued color in five years is nearly impossible, so a quarter pallet in the garage is cheap insurance. Materials for a DIY 300-square-foot patio typically run $2,000 to $3,500 all-in: pavers, base stone, sand, fabric, edging, and polymeric sand, plus compactor and saw rental. Professional installation lands at $16 to $28 per square foot depending on region and pattern complexity, so the same patio built by a crew is $5,000 to $8,500. DIY saves real money but budget honest time: a first-timer moving 12 tons of base stone and paver by wheelbarrow should plan on three to four full weekends, not one.
Cutting, Tools, and the Work Itself
Every patio needs cuts, and how you make them shows in the finished edge. Rent a 14-inch wet masonry saw ($60 to $100 a day) for clean straight cuts, or fit an angle grinder with a diamond blade for small notches around posts and downspouts. Cut outside, cut wet or with a dust shroud and vacuum — dry-cutting concrete releases crystalline silica, and OSHA-grade respiratory protection isn’t overkill for a weekend of it. Mark cuts with a soapstone pencil rather than marker, which ghosts through sealer later. Lay the entire field first, then come back and cut the border pieces in one session; batching the cuts is faster and keeps the saw rental to a single day. For the compaction pass over finished pavers, put a urethane pad on the plate compactor or run it over a layer of geotextile so the plate doesn’t scuff textured faces.
Living With a Paver Patio: Maintenance Reality
Annual upkeep is modest but not zero. Sweep and rinse seasonally, top up polymeric sand in any joints that erode (usually near downspouts), and spot-treat weeds that seed into joints from above — they root in the sand, not under the patio, so they pull easily. Sealing is optional: a film-forming sealer deepens color and adds a satin sheen but needs recoating every 3 to 4 years, while a penetrating sealer protects invisibly for longer. If a section ever settles, the repair is the material’s best trick — pry out the affected pavers, re-screed the sand, and relay the same units in an afternoon with no scar.
Mistakes That Sink Paver Patios
The repeat offenders are predictable. Skipping the geotextile in soft soil, so the base slowly disappears into the mud. Screeding sand thicker than 1 inch to fix base low spots — thick sand ruts and the pavers follow. Sloping the patio toward the house, which sends every storm at your foundation. Setting edge restraint on loose soil beyond the excavation instead of on compacted base. And cutting the final border pieces to slivers under 2 inches wide, which pop out no matter what you do — adjust the layout so cuts stay at least a third of a paver. Get the base right, confine the edges, and patio pavers will outlast nearly any other surface you can put in a backyard, one repairable unit at a time.