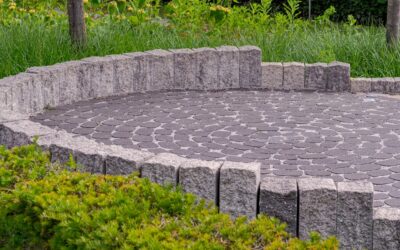
A properly built paver patio outlasts the house it sits next to, holds 80 percent of its installed cost as resale value, and rarely needs more than a pressure wash and sand top-up across 25 years. A poorly built one shifts, weeds erupt through the joints by year two, and the corners sink under furniture loads within a single freeze-thaw cycle. The difference between the two outcomes lives entirely in the base preparation, not the pavers themselves. Learning how to lay a paver patio the right way means committing to 6 to 8 inches of compacted aggregate underneath what you actually see.
Part of our Decks & Outdoor guide — explore the full guide →
Tools and Materials You Need
Skipping any of these tools turns a one-weekend project into a frustrating three-weekend slog. Rent the heavy equipment unless you do hardscape projects more than once a year.
- Plate compactor (rented at $80 per day from Home Depot)
- Mason’s line and stakes
- 4-foot level and 8-foot straightedge
- Rubber mallet
- Diamond-blade circular saw or paver splitter
- Wheelbarrow and pointed shovel
- Crushed stone base aggregate (3/4-inch minus, also called QP)
- Concrete sand (NOT play sand or all-purpose sand)
- Edge restraint and 10-inch landscape spikes
- Polymeric sand for joints
- Geotextile fabric (optional, recommended for clay soils)
Calculating Materials for Your Patio Size
For a 12 by 16 foot patio (192 sq ft), expect to need: 4 cubic yards of crushed stone base, 1 cubic yard of concrete sand bedding, 192 sq ft of pavers (plus 10 percent for cuts and breakage), 56 linear feet of edge restraint, and 50 lb of polymeric joint sand. Most of this comes delivered to the curb on a flatbed truck for $400 to $700 depending on your region.
Excavation and Base Depth
Mark your patio outline with stakes and a mason’s line, then add 6 inches around the perimeter for edge restraint and base extension. Excavate to a total depth of 7 to 9 inches below your finished patio elevation. That breaks down as 6 inches of compacted base, 1 inch of bedding sand, plus the paver thickness (typically 2 3/8 inches for standard 60mm pavers).
Pitch the excavation 1/4 inch per foot away from any structure. Patios that drain toward the house cause foundation moisture problems within a few seasons. Confirm slope with a level and a long straightedge, not by eye.
Building the Base That Actually Lasts
Pour 2 inches of crushed stone, compact with the plate compactor in two passes (one north-south, one east-west), then repeat with another 2-inch lift. Do not try to compact 6 inches at once; the bottom layers will not consolidate and the patio will settle in waves. Each lift gets dampened lightly with a hose before compacting; dry stone does not lock together properly.
Check final base elevation with the straightedge across multiple points. Any variance over 1/4 inch over a 10-foot run translates directly to bumps in the finished surface and needs correction now.
Setting the Sand Bedding Layer
Lay two parallel pieces of 1-inch electrical conduit on the compacted base, spaced about 6 feet apart. Pour concrete sand (never play sand) between them, then drag a 2×4 across the conduit tops to screed a perfectly level 1-inch sand layer. Pull the conduit out and fill the trenches with sand. Do not walk on or compact the sand bed; it stays loose until pavers are laid and the entire patio is compacted as a unit.
Laying the Pavers
Start in a corner against a fixed reference like the house wall. Lay pavers in your chosen pattern (running bond, herringbone, or basketweave), keeping a consistent 1/8 to 1/4 inch joint between every paver. Do not slide pavers into place; lower them straight down to keep the sand bed undisturbed.
Use a string line every fifth row to verify alignment. A patio that drifts 1/2 inch out of square at the start ends up 3 inches out at the far edge.
Cutting Pavers Cleanly
Plan cuts so that no piece smaller than half a paver appears at any patio edge. Tiny slivers crack out within months under foot traffic. Mark cut lines with a wax pencil, score lightly with a diamond blade circular saw at low depth, then cut through in a final pass. Wear safety glasses, hearing protection, and a dust mask; cutting concrete pavers throws silica dust that is genuinely hazardous.
Installing Edge Restraint
Plastic or metal edge restraint stakes through to the compacted base and prevents the perimeter pavers from drifting outward. Without restraint, every freeze-thaw cycle pushes the edges apart and the entire patio loses integrity within a few seasons. Use 10-inch landscape spikes, one every 12 inches along straight runs and every 6 inches around curves.
Compacting and Filling Joints
Before joint sand goes in, run the plate compactor over the entire patio in two passes (perpendicular directions). Use a rubber mat under the compactor or rent a paver-specific compactor to avoid chipping the surface. The compaction settles each paver firmly into the sand bed.
Sweep polymeric sand across the surface, working it into the joints with a stiff broom until joints are filled to 1/8 inch below paver surface. Mist the joints with a fine spray (never a stream) to activate the polymer binder. Polymeric sand outperforms regular sand by preventing weeds, ant tunnels, and washout. A 50 lb bag costs $30 to $40 and covers roughly 80 sq ft of patio.
Sealing and First-Year Maintenance
Wait 90 days after installation before sealing the pavers. Efflorescence (white salt deposits) typically appears in the first month and needs to weather off before sealer goes on. Apply a water-based concrete paver sealer like Eagle Sealer or Foundation Armor at $0.50 to $0.80 per sq ft material cost. Re-seal every 3 to 5 years.
In the first year, top up joint sand once after winter as freeze-thaw settling expels small amounts. Pressure wash gently (under 1,500 PSI) annually to remove organic debris and keep the polymer-bound joints sealed. Done correctly, the patio you build this weekend will look great when the kids you do not yet have are in middle school.