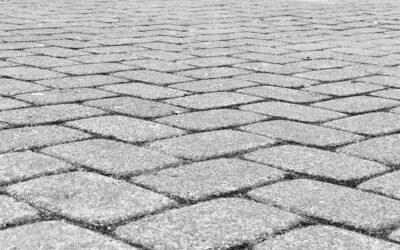
A well-planned path does more than get you from the driveway to the front door; it frames the whole approach to your home and can lift curb appeal instantly. Great paver walkway design balances three things: a width that feels comfortable, a pattern that suits the house, and a base that keeps everything from shifting. The best paver walkway design looks effortless but rests on careful planning of layout, materials, and edging. This guide walks through the design decisions and construction details that separate a walkway that lasts decades from one that heaves and weeds over in a few years.
Getting the Width Right
Width is the first and most consequential design decision, and it is the one homeowners most often get wrong by building too narrow. A path that feels cramped undercuts the whole design no matter how nice the pavers are.
- Primary front walkway: 48 inches wide lets two people walk side by side comfortably. This is the gold standard for a main entry path.
- Secondary or garden path: 36 inches works for a single-file utility path along the side of the house.
- Minimum: Never go below 30 inches for a usable walkway; anything narrower feels like a tightrope.
- Grand entrances: 60 inches or more suits larger homes and creates a generous, welcoming approach.
When in doubt, go wider. A 4-foot path is the single easiest way to make a walkway feel intentional and high-end.
Choosing Your Paver Material
The paver you pick sets the tone for the entire design. Each material carries a different look, cost, and durability profile:
- Concrete pavers: The most popular choice. Affordable at $3 to $6 per square foot for materials, available in countless shapes and colors, and easy to replace individually.
- Clay brick pavers: Timeless, warm color that never fades because it is fired all the way through. Classic for traditional and colonial homes.
- Natural stone (bluestone, travertine, granite): Premium look at $10 to $30 per square foot, with unmatched character and longevity.
- Permeable pavers: Designed with wider joints to let rainwater drain through, helpful for drainage-sensitive sites and some local codes.
Match the material to your home’s architecture. Brick suits traditional facades, sleek large-format concrete or stone suits modern homes, and irregular flagstone fits cottage and rustic settings.
Popular Laying Patterns
The pattern is where a paver walkway design shows its personality. The same paver looks entirely different depending on how you lay it:
- Running bond: Simple offset rows like a brick wall. Clean, easy to install, and works in any style.
- Herringbone: A 45 or 90-degree zigzag that interlocks tightly. The strongest pattern, excellent where the path carries load, and visually rich.
- Basketweave: Pairs of pavers alternating horizontal and vertical for a classic, traditional look.
- Stack bond: Grid-aligned squares for a crisp, modern geometry.
- Random or ashlar: Mixed paver sizes fit together for an organic, natural-stone feel.
Herringbone is worth the extra cutting effort because its interlock resists shifting better than any other pattern, especially on paths that see heavy foot traffic or occasional wheeled loads.
Designing the Layout and Shape
Straight paths read formal and lead the eye directly to the door, ideal for symmetrical facades. Gentle curves feel relaxed and natural, work beautifully in landscaped or cottage settings, and can make a short path feel longer by adding a sense of journey.
Avoid tight, fussy curves that force awkward paver cuts and look busy. A single sweeping curve reads far better than several small wiggles. Consider widening the walkway into a small landing at the front door, at least 5 by 5 feet, so guests have room to stand while the door opens. Flaring the path slightly wider as it meets the driveway or street also creates a welcoming funnel that draws people in.
The Base Is Everything
No design survives a bad foundation. The most beautiful pattern will heave, sink, and separate within a couple of winters if the base is skimped. A proper base is the invisible 80 percent of the job.
- Excavate 7 to 9 inches deep for a walkway, deeper in freeze-thaw climates.
- Add 4 to 6 inches of compacted crushed stone base, laid and tamped in 2-inch lifts with a plate compactor.
- Grade the base to slope away from the house at about 1/4 inch per foot for drainage.
- Screed a 1-inch layer of coarse bedding sand over the compacted base.
- Lay the pavers tight in your chosen pattern, then compact them into the sand.
Skipping the compaction or the drainage slope is the top reason walkways fail. Rent a plate compactor for the day; it is the cheapest insurance you can buy.
Edging and Joint Sand
Edge restraint is what keeps the whole field of pavers from spreading outward over time. Install rigid plastic or aluminum paver edging spiked into the base along both sides, or set a soldier-course border of pavers on end in concrete for a more finished look.
Once the pavers are down and edged, sweep polymeric joint sand into the gaps and mist it to activate the binder. Polymeric sand hardens to lock the pavers together, resists weeds, and stops ants from tunneling out the joints. Refresh it every few years as it wears. This final step is what keeps your paver walkway design looking crisp and weed-free for the long haul.
Planning the Layout Before You Dig
A little planning on paper saves a lot of grief in the yard. Start by staking the walkway route with landscape flags or a garden hose laid on the ground, then live with it for a few days. Walk the path at different times, and watch how people actually cut across the yard, because a walkway that fights natural foot traffic gets ignored while people wear a shortcut in the grass beside it.
Once the route feels right, mark it with marking paint and measure the square footage to order materials. Add 5 to 10 percent extra pavers for cuts, breakage, and future repairs, and buy them all in the same production run so the color matches. Check for underground utilities by calling 811 before any digging, since a front walkway often crosses water, gas, or electric service lines running from the street to the house. This free call takes minutes and prevents a dangerous and expensive mistake.
Drainage and Grading Details
Water is the enemy of every hardscape, and how you handle it determines whether the walkway stays flat or heaves and puddles. The finished surface should slope away from the house at about a 1/4 inch per foot cross-pitch so rain sheds off the path rather than pooling on it or running back toward the foundation.
In freeze-thaw regions, drainage matters even more, because water trapped under the pavers freezes, expands, and lifts the surface unevenly. A deep, well-compacted crushed-stone base gives that water somewhere to drain instead of sitting against the pavers. For low spots or heavy runoff areas, consider a permeable paver system with open joints that let water percolate straight through, or route surface water toward a nearby planting bed or drain. Getting the grade and base drainage right is invisible work, but it is precisely what separates a walkway that looks new in ten years from one that is wavy and cracked in three.
Design Touches That Elevate the Path
Small details turn a functional path into a designed one. A contrasting border course in a darker paver frames the walkway and sharpens its edges. Low-voltage path lighting spaced every 6 to 8 feet adds safety and drama at night. Flanking the walk with planting beds, boxwoods, or ornamental grasses softens the hardscape and ties it into the landscape. Get the width, pattern, and base right first, then layer these finishing touches, and your paver walkway will be both beautiful and built to last.