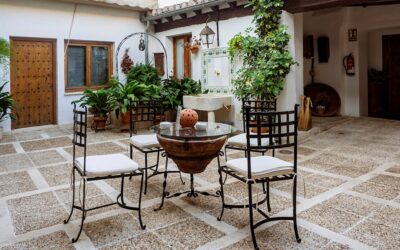
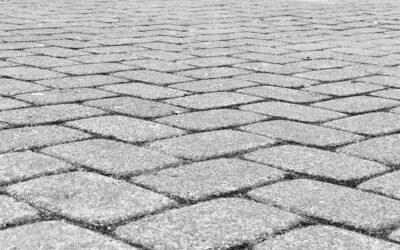
A well-built concrete paver patio outlasts a poured slab three times over and gives you an outdoor floor you can repair piece by piece instead of jackhammering and starting over. Pavers cost more upfront — figure $14-$28 per sq ft installed versus $8-$14 for a stamped concrete slab — but they handle freeze-thaw cycles, settle gracefully when the ground shifts, and look better five years in. The catch is that 90% of paver failures trace back to bad base preparation, not bad pavers. Get the foundation right and your patio lasts 30-40 years with almost no maintenance. Here is what to know before pulling permits or calling contractors.
Part of our Decks & Outdoor guide — explore the full guide →
Cost Breakdown by the Square Foot
A typical 300 sq ft concrete paver patio in the US runs $4,200-$8,400 installed in 2026. The cost varies based on paver style, base depth, and regional labor rates:
- Pavers (material only): $3-$10 per sq ft. Basic Holland stones from Pavestone run $1.50 each (about $3.50/sq ft). Premium tumbled Belgard Mega-Arbel hits $7-$10/sq ft.
- Base materials: $2-$4 per sq ft. Crushed stone (3/4-inch minus), bedding sand, polymeric joint sand.
- Labor: $8-$14 per sq ft. Includes excavation, base prep, paver laying, edge restraints, and joint sanding.
- Site prep extras: Tree removal, grading, drainage tie-ins. Add $500-$3,000 if needed.
DIY brings the cost down to $4-$10 per sq ft for materials, but expect a serious weekend (or two) of physical work — moving 6-9 tons of base material on a small patio is no joke.
Top Paver Brands Worth Considering
Three brands dominate residential paver sales:
- Belgard: Premium product line including Mega-Arbel, Catalina Slate, and Cambridge Cobble. Strong color retention and tumbled finishes that mimic natural stone.
- Pavestone: Owned by Quikrete, sold widely at Home Depot. Plaza Stone and Holland Stone are the workhorse SKUs at budget-friendly pricing.
- Techo-Bloc: Canadian manufacturer with high-end European-style designs. Borealis and Blu Slate are top sellers in the architectural design segment.
Smaller regional brands like Unilock, Cambridge Pavers, and Oaks Concrete also serve specific markets well. Visit local landscape supply yards to see actual pavers in larger panel layouts before committing — small in-store displays do not show pattern variation.
Base Preparation: Where Patios Live or Die
The single most important part of any concrete paver patio is the base. Skimp here and you will be re-leveling sunken pavers in two years. Standard residential base build-up:
- Excavate: Dig 9-12 inches below finished grade for typical residential traffic. Increase to 12-16 inches in clay soils or freeze-prone climates.
- Geotextile fabric: Lay woven landscape fabric (Mirafi 140N) across the bottom to prevent base migration into subgrade soil.
- Compacted gravel base: Add 6-10 inches of 3/4-inch minus crushed stone in 2-3 inch lifts, compacting each lift with a plate compactor.
- Bedding sand: 1 inch of coarse concrete sand (ASTM C33), screeded flat with a 2×4 across pipe rails.
- Pavers: Lay tight, then tap into place with a rubber mallet.
- Edge restraints: Plastic Snapedge or aluminum edging spiked every 12 inches along the perimeter.
- Polymeric sand: Sweep into joints, mist lightly to activate, brush off excess.
Skip the geotextile and the base will sink into clay soils within 5 years. Skip edge restraints and the perimeter pavers will spread outward, opening joints and inviting weeds.
Common Patio Patterns
Pattern choice affects cutting waste, labor time, and visual impact. Common options:
- Running bond: Brick-style stagger. Easiest and fastest. Uses 5-7% waste.
- Herringbone (45 or 90 degree): Strongest pattern for driveways and high-traffic patios. 8-12% waste.
- Basketweave: Pairs of pavers alternating direction. Classic English garden look. 5-8% waste.
- Random ashlar: Multiple paver sizes mixed in a deliberate pattern. 10-15% waste due to layout planning.
- Circular pattern kits: Pre-cut sets from Belgard and Pavestone, designed to fit specific diameters from 8 to 16 feet.
Random ashlar layouts using 3-4 paver sizes look the most natural and are the current trend in upscale backyards. Running bond stays the simplest for first-time DIYers.
Drainage Considerations
A concrete paver patio needs to drain at least 1/8 inch per foot away from the house — about 1 inch over 8 feet. Surface drainage prevents water from pooling at the foundation and freeze-thaw heaving in cold climates.
For patios in clay or poorly drained soils, install a 4-inch perforated drain tile in the base layer connected to a daylight outlet or dry well. Channel drains across the upper edge of the patio (closest to the house) intercept roof and gutter runoff before it crosses the surface.
Permits and Code Requirements
Most US municipalities exempt patios under a certain size (often 200 sq ft) from permits. Larger patios, raised patios, or patios with attached structures (pergolas, outdoor kitchens) typically require permits and inspections.
Check setbacks from property lines (usually 5-10 feet for hardscape), HOA covenants, and easement restrictions before excavating. Call 811 a minimum of 3 business days before digging to mark underground utilities — the call is free and avoids costly damage.
DIY vs Hiring a Pro
A 200-300 sq ft DIY patio is doable for an experienced homeowner with tool rentals (plate compactor at $80/day from Sunbelt or United Rentals, masonry saw at $90/day). Plan for 3-4 full weekends including base prep, laying, and finishing. Tools you will need include a transit level or laser level, screed pipes, rubber mallet, masonry saw with diamond blade, and a leaf blower for joint sand cleanup.
Hire a pro for patios over 400 sq ft, raised patios, or any layout requiring extensive cutting. A reputable installer with ICPI (Interlocking Concrete Pavement Institute) certification will guarantee the job for 1-2 years against settlement and joint failure. Get three quotes — pricing varies wildly between contractors on identical scope.
Maintenance Over the Years
A concrete paver patio is low-maintenance but not zero-maintenance:
- Annual sweep and rinse: Power wash on low pressure (under 1,200 PSI) once a year
- Re-sand joints: Top up polymeric sand every 5-7 years as it weathers out
- Sealer: Apply a penetrating sealer like Techniseal or SEK Surebond every 3-5 years for color retention
- Weed control: Spot-treat with vinegar or boiling water as weeds appear in joints
- Heaving repair: Lift and re-bed individual pavers that settle or heave (one of the great advantages over poured concrete)
Design Ideas Worth Borrowing
A few proven design moves to elevate a basic paver patio:
- Add a single border course of contrasting paver color around the perimeter
- Inset a fire pit area in a circular pattern using a pre-cut kit
- Combine pavers with poured concrete bands to break up large surfaces visually
- Use larger format pavers (24×24 inches) for a more contemporary look
- Integrate planting pockets or a built-in seat wall along one edge
- Run a pergola or shade sail over part of the patio for sun protection
Lifespan and Resale Value
A properly installed concrete paver patio lasts 30-40 years. National Association of Realtors reports outdoor patios deliver an 80-95% return on investment at resale, one of the highest ROI exterior projects you can do. Pavers specifically signal quality construction — buyers consistently rate paver patios above stamped concrete and standard slabs in perceived value.