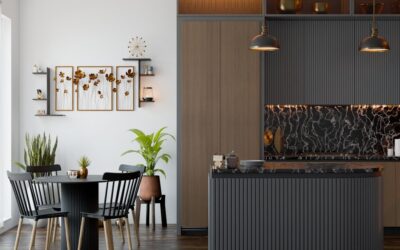
The right pendants over an island do two jobs at once — they light your prep space and give the whole kitchen a focal point. Bronze pendant lights for kitchen island setups hit a sweet spot that stainless and black finishes cannot: they add warmth and a touch of old-world character while still reading modern in the right shape. Bronze flatters wood tones, softens all-white kitchens, and hides fingerprints better than polished metals. This guide covers how to size, space, and hang them so the result looks professionally designed.
Part of our Kitchen Remodeling guide — explore the full guide →
- Why Bronze Works Over an Island
- How Many Pendants Do You Need?
- Getting the Spacing Right
- Correct Hanging Height
- Choosing the Right Size Pendant
- Bronze Pendant Styles to Consider
- Bulbs and Light Quality
- Installation and Safety Notes
- Coordinating Bronze With the Rest of the Kitchen
- Bringing Warmth to Your Kitchen
Why Bronze Works Over an Island
Bronze is a chameleon finish. Its warm brown-and-copper tones bridge traditional and contemporary styles, pairing beautifully with butcher block, navy cabinets, marble-look quartz, and warm wood floors. Unlike chrome, it does not show every water spot and smudge, which matters directly above a busy work surface. Available in oil-rubbed, antique, and satin bronze variations, the finish lets you tune the mood from rustic farmhouse to sleek transitional.
How Many Pendants Do You Need?
The count depends on island length. A simple guideline keeps the look balanced:
- Islands up to 4 feet: one larger statement pendant.
- Islands 4 to 6 feet: two pendants, the most common arrangement.
- Islands 7 to 9 feet: three pendants for even coverage.
- Islands 10 feet and up: three to four pendants or a linear multi-light fixture.
Odd numbers often look more dynamic, but two evenly spaced pendants over a medium island is a timeless, foolproof choice.
Getting the Spacing Right
Even the best fixtures look off if they are spaced carelessly. Center the pendants over the island’s length, not the room, and treat the island as the reference line. For two pendants, place each roughly one-quarter of the way in from the ends so the gap between them equals the gap to each edge. Keep a minimum of 30 inches between the centers of adjacent pendants so they do not crowd each other. Then confirm the whole group is centered on the island front to back, usually right over the middle of the counter.
Correct Hanging Height
Height is the detail people get wrong most often. Hang pendants so the bottom of the fixture sits 30 to 36 inches above the countertop. That range lights the work surface without blocking sightlines across the island or bumping heads. In a room with tall 9- or 10-foot ceilings, you can drop them slightly lower for presence, but never so low that they interfere with someone standing at the counter. Measure from the finished counter surface, not the floor, when you set the height.
Choosing the Right Size Pendant
Scale keeps the fixtures from looking dinky or overwhelming. A quick sizing method: for multiple pendants, each fixture should be roughly 12 to 20 inches in diameter depending on how many you use — smaller when you hang three, larger when you hang one or two. For a single statement pendant over a compact island, a fixture 18 to 24 inches wide anchors the space. Also account for visual weight; an open, airy cage pendant can be larger than a solid drum without feeling heavy.
Bronze Pendant Styles to Consider
The bronze finish spans many silhouettes, so pick the shape that matches your kitchen’s character:
- Caged/lantern: Open metalwork with an industrial-farmhouse feel, great over butcher block.
- Dome/schoolhouse: Classic rounded shades that suit traditional and transitional rooms.
- Cylinder/drum: Clean modern lines for contemporary kitchens.
- Seeded-glass globe: Bronze hardware with a glass shade that softens the light and adds sparkle.
Bulbs and Light Quality
The bulb inside matters as much as the fixture around it. Choose LED bulbs rated at 2700K to 3000K for a warm white that complements the bronze and flatters food and skin tones. For task lighting over prep areas, aim for a combined output of roughly 300 to 400 lumens per pendant, and put the pendants on a dimmer so you can drop the level for dining or entertaining. Exposed-filament Edison-style LEDs look especially handsome inside open cage and globe pendants.
Installation and Safety Notes
If you are replacing existing fixtures over an established junction box, swapping pendants is a manageable DIY job — cut the power, disconnect the old fixture, and wire the new pendants black-to-black, white-to-white, ground-to-ground. Adjusting the cord or rod length to dial in the height is usually the fussiest part. If you are adding new fixtures where none existed, or moving the box to center over the island, hire a licensed electrician to run the wiring and set the box securely into the ceiling framing.
Coordinating Bronze With the Rest of the Kitchen
Pendants rarely live in isolation, so tie the bronze finish into the room’s other metals for a pulled-together look. The easiest path is to repeat the bronze in your cabinet hardware, faucet, or a bronze range hood strap, creating a deliberate thread of the finish across the kitchen. Mixing metals is fashionable and works well when done with intent — bronze pendants pair handsomely with matte black window frames or brushed brass cabinet pulls, as long as one metal reads as dominant and the others as accents. Avoid scattering four different finishes around the room, which looks accidental rather than curated. Consider the ceiling color too: bronze pops against a white ceiling and recedes gracefully against a warm cream or wood-clad one. If your kitchen leans cool and gray, bronze introduces a welcome shot of warmth that keeps the space from feeling clinical, which is exactly why so many designers reach for it over an island.
Bringing Warmth to Your Kitchen
Well-chosen bronze pendant lights for kitchen island deliver more than illumination — they add warmth, texture, and a sense of intention that pulls the whole room together. Match the count to your island length, space them evenly, hang them 30 to 36 inches above the counter, and pair them with warm dimmable LEDs. Get those fundamentals right and your island will glow with the kind of inviting, layered light that makes a kitchen feel finished.