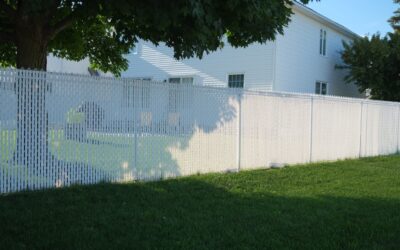
A fence that looks perfect on a flat lot can turn into a mess of triangular gaps and crooked rails the moment the ground starts to fall away. Building a fence on a slope comes down to one early decision: step the panels down the hill like a staircase, or rack them so the rails follow the grade. Stepping keeps every panel square and works on steep ground; racking hugs the terrain and leaves smaller gaps but only suits moderate slopes and certain fence styles.
Part of our Decks & Outdoor guide — explore the full guide →
Once you choose a method, building a fence on a slope becomes a matter of careful measurement. You need to know how much the ground drops over the run, where each post lands, and how you will close the gap under each panel. Posts must be set plumb, rails must stay parallel to each other, and any gate has to sit where it can swing without hitting the rising ground.
- Building a Fence on a Slope: Stepped vs Racked Explained
- Tools and Materials
- Step 1: Call 811, Check Rules and Mark the Line
- Step 2: Measure the Grade
- Step 3: Set Posts Plumb and Deep Enough
- Step 4: Build a Stepped Fence
- Step 5: Build a Racked Fence
- Step 6: Control the Bottom Gap
- Step 7: Place Gates on a Hill
- Common Problems and Fixes
- Cost Ranges
- When to Call a Pro
- Frequently Asked Questions
This guide walks through measuring grade, choosing between stepped and racked construction, setting posts, managing bottom gaps and placing gates on hillsides.
Building a Fence on a Slope: Stepped vs Racked Explained
Stepped Fences
In a stepped fence, every panel stays level and square. Each panel sits lower (or higher) than the one before it, so the top line forms a series of steps. Stepping works with nearly any material: pre-built wood panels, vinyl, aluminum, and ornamental steel. It also handles steep slopes that racked panels cannot. The trade-off is the triangular gap under the downhill side of each panel, which you have to fill or accept.
Racked Fences
A racked fence, also called a contoured or raked fence, keeps the pickets vertical but lets the rails run parallel to the ground. The top line flows smoothly downhill, and gaps under the fence stay small and uniform. Stick-built wood fences rack easily because you attach rails at an angle and cut pickets to follow the grade. Many aluminum and some steel panels are “rackable” up to a stated limit, often around 12 to 30 inches of drop per 6- or 8-foot section depending on the product. Rigid vinyl privacy panels and pre-assembled wood panels generally cannot rack.
Which One Should You Choose?
- Gentle, steady slope: racking looks cleanest and minimizes gaps.
- Steep slope or uneven, lumpy grade: stepping is easier and more forgiving.
- Pre-made vinyl or wood privacy panels: stepping is usually the only option.
- Pet or pool containment: racking or stick-built stepping with a filled bottom, since gaps must stay small. Check local pool barrier rules for maximum gap and height.
Tools and Materials
- String line, line level or laser level, and stakes
- Tape measure and a 4-foot level, plus a post level for plumbing posts
- Post-hole digger or a rented power auger
- Posts sized for the fence height (commonly 4×4 or 4×6 wood, or manufacturer posts for vinyl and metal)
- Concrete mix or gravel for setting posts, plus bracing stakes
- Rails, pickets or panels, galvanized or stainless fasteners
- Circular saw, miter saw, drill/driver and a sliding bevel for transferring angles
- Pressure-treated rot board or landscape timbers for closing gaps
Step 1: Call 811, Check Rules and Mark the Line
Call 811 before you dig so utilities are marked. Confirm your property line from a survey, and check local permit rules and HOA covenants for height, setbacks and style. Many towns measure fence height from grade on the uphill side of each panel, which matters on a slope because a stepped panel can end up taller than allowed on its downhill end.
Stake both ends of the run and stretch a string line between them. Mark post locations along the string at your panel spacing, typically 6 or 8 feet on center.
Step 2: Measure the Grade
To measure the slope, tie a string to the base of the uphill stake, run it to a tall stake at the downhill end, and use a line level to make it level. Measure from the string down to the ground at the downhill stake. That number is the total drop, or “rise,” across the run. Divide it by the run length to get the slope per foot.
For example, if the ground drops 36 inches over 48 feet, you have a drop of 0.75 inch per foot, or about 6 inches per 8-foot panel. That is moderate: a racked fence handles it well, and a stepped fence would need 6-inch steps between panels.
If the slope changes along the run, measure each post-to-post section separately. Uneven hillsides often work best with a hybrid: rack through the gentle stretch and step where it steepens.
Step 3: Set Posts Plumb and Deep Enough
Posts go in perfectly plumb regardless of method; never lean posts to follow the hill. Dig holes roughly three times the post width and about one-third of the above-ground post height deep, and always below your local frost line. For a 6-foot fence, that often means 2 to 3 feet deep or more in cold climates. Put a few inches of gravel in the bottom for drainage.
On a stepped fence, the downhill post of each panel is exposed more than the uphill post, so buy posts long enough to reach the step height plus the embedment depth. Set the uphill end post first, then the downhill end post, and run a string between their faces to keep line posts in alignment. Brace each post in two directions and let concrete cure per the bag directions before hanging heavy panels.
Tall fences on hillsides catch wind from below, so solid privacy fences in open or exposed locations benefit from larger posts, deeper footings and shorter spans. In snowy regions, drifting against the uphill side adds load as well.
Step 4: Build a Stepped Fence
- Decide the step height for each panel from your grade measurements. Keep steps equal where you can for a tidy look.
- Mark the rail height on the uphill post of the first panel. Use a level to transfer that height straight across to the next post.
- Attach the panel or rails level, then drop down by the step height on the next post and repeat.
- Trim post tops to a consistent height above the panel tops, and cap them to shed water.
Stepping is also the approach most people use when installing a fence on a slope with vinyl panels, since the brackets stay square.
Step 5: Build a Racked Fence
- Mark the bottom rail height on each post at the same distance above grade, typically 4 to 6 inches.
- Snap or string a line between marks so the rail follows the slope. Transfer the angle to the rail ends with a sliding bevel and cut them to fit tight against the posts.
- Mark the top rail the same distance above the bottom rail at each post so rails stay parallel.
- Attach pickets plumb, not perpendicular to the rails. Check every few pickets with a level.
- Trim picket tops to a consistent height above the grade line, or leave them following the rail for a smooth contour.
For rackable metal panels, slide the panel into the post brackets and let the rails tilt to match the grade, staying within the manufacturer’s rack limit.
Step 6: Control the Bottom Gap
Gaps under the fence let pets escape and wildlife wander in. On stepped fences, you have a few options:
- Rot board or kickboard: a pressure-treated 2×6 or 2×8 attached along the bottom and cut to follow the grade.
- Retaining timbers or blocks: build small stepped retaining walls so each panel sits on a level pad.
- Regrading: fill with soil and plant groundcover, or add gravel along the base.
- Welded wire mesh: fasten galvanized mesh inside the fence and bury a few inches below grade to stop digging dogs.
Leave about 2 inches of clearance between wood pickets and soil so they do not wick moisture and rot.
Step 7: Place Gates on a Hill
A gate on a slope has to swing without dragging on the rising ground. The best option is to place the gate on the flattest section of the run. If that is not possible, hang the gate so it swings downhill, or level out a small pad at the opening. For uphill swings, raise the gate enough to clear the ground at the full arc, then close the gap underneath with a short hinged kickboard. Rising butt hinges, which lift the gate as it opens, also help on modest slopes. Set gate posts deeper and in more concrete than line posts, since they carry the gate’s weight and leverage.
Common Problems and Fixes
- Top line looks wavy: uneven step heights or inconsistent rail marks. Pull a string and re-mark before fastening.
- Pickets lean downhill: they were set square to the racked rail rather than plumb. Check each with a level.
- Posts heave or lean: footings too shallow or above the frost line. Reset deeper with gravel drainage.
- Gate drags: hang it higher, reverse the swing, or add a drop rod and kickboard.
- Erosion under panels: add a gravel trench, landscape timbers or plantings to hold soil.
Cost Ranges
Expect building a fence on a slope to cost somewhat more than the same fence on flat ground. Longer posts, extra concrete, rot boards, retaining timbers and extra labor to cut racked rails all add up. As a general guide, DIY wood fencing often runs in the tens of dollars per linear foot for materials, while professionally installed wood, vinyl or aluminum commonly runs from the mid-twenties to well over fifty dollars per linear foot, and steep or rocky sites add a premium on top.
When to Call a Pro
Bring in a fence contractor when the slope is steep enough that you cannot stand comfortably while digging, when retaining walls over a couple of feet are needed, when the fence also serves as a pool barrier, or when rock and roots make hole digging impractical. Any retaining wall that holds back significant soil may need engineering and a permit. A pro also helps with long spans in windy locations where footing size really matters.
Frequently Asked Questions
Is it better to step or rack a fence on a slope?
Rack the fence on gentle, consistent slopes for a smooth look and small gaps. Step it on steep or uneven ground, or when you are using pre-built panels that cannot tilt.
How do you measure the slope for a fence?
Run a level string from the uphill end to a stake at the downhill end and measure the distance from the string to the ground. That total drop divided by the run length gives you the slope per foot.
Can vinyl fence panels be installed on a slope?
Yes, but most vinyl privacy panels must be stepped because they cannot rack. Some picket-style vinyl and rackable models tilt a limited amount, so check the manufacturer’s rack limit first.
How do you fill the gap under a stepped fence?
Add a pressure-treated rot board cut to the grade, build small stepped retaining pads, add soil and plantings, or attach buried wire mesh along the bottom to keep pets in.
Should fence posts be plumb on a hill?
Yes. Posts should always be plumb, even on a steep hill. Only the rails follow the grade on a racked fence, and pickets stay vertical too.