A slope that’s slowly sliding toward your foundation, a hillside that erodes every time it rains, a backyard too steep to use — these are the problems a retaining wall solves. But building a retaining wall on a slope is a different animal than building one on flat ground. You’re fighting gravity and hydrostatic pressure at the same time, and the techniques that keep a hillside wall standing for 30 years — proper base preparation, terracing, drainage, and wall batter — are exactly the ones weekend builders skip. This guide walks through doing it right so your wall holds instead of bulging, cracking, and toppling a few winters later.
- Understand the Forces You're Fighting
- Terracing vs. One Tall Wall
- Check Codes and Call Before You Dig
- Base Preparation: Where Walls Live or Die
- Stepping the Base Up the Slope
- Drainage: The Non-Negotiable
- Batter and Building the Courses
- Final Grading and Longevity
- Choosing the Right Block or Material
- Frequently Asked Questions
Understand the Forces You’re Fighting
A retaining wall on a slope resists two things: the weight of the soil pushing horizontally against the wall, and water pressure building up behind it. That second force is the silent killer. Saturated soil weighs far more than dry soil and pushes with enormous hydrostatic pressure. The vast majority of failed retaining walls didn’t fail because the blocks were weak — they failed because water had nowhere to go and shoved the wall over.
On a slope, both forces intensify because the soil above the wall wants to keep moving downhill and rainwater naturally flows toward and behind your structure. Every design decision that follows exists to manage those two forces. Get drainage and base prep right, and the rest is straightforward stacking.
Terracing vs. One Tall Wall
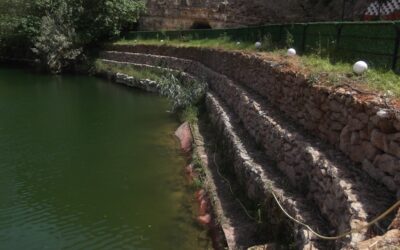
The first big decision on a steep slope is whether to build one tall wall or a series of shorter terraced walls. For most homeowners, terracing wins. A single wall over 3 to 4 feet tall carries enormous load and, in most jurisdictions, requires an engineer’s design and a permit. Two or three shorter walls stepping up the hillside spread the load, are safer to build yourself, and create usable planting shelves along the way.
When terracing, space the walls so each shorter wall retains only its own manageable section of slope rather than stacking all the pressure onto the bottom wall. A common rule of thumb: separate terraces horizontally by at least twice the height of the lower wall so the upper wall’s load doesn’t bear directly on the one below. The result is a stable, garden-friendly hillside instead of one overloaded barrier.
Check Codes and Call Before You Dig
Before moving any dirt, two calls save you grief. First, call 811 to have underground utilities located and marked — free, and required by law in most states. Hitting a gas or electrical line on a slope excavation is catastrophic. Second, check your local building department. Many require a permit and engineered plans for walls over 3 or 4 feet (measured from the bottom of the buried base to the top), and some regulate walls near property lines or drainage easements regardless of height.
Base Preparation: Where Walls Live or Die
The base is the single most important part of the wall, and on a slope it’s non-negotiable. A wall built on soft, unlevel, or poorly compacted ground will settle unevenly and fail. Here’s the sequence:
- Excavate a level trench for the first course. On a slope, you’ll dig the trench in stepped level sections rather than following the grade. The trench should be about twice the block width and deep enough to bury the base course.
- Bury the first course. Set the bottom row so at least the first block — roughly 10 percent of the wall height, minimum one course — sits below finished grade. This anchors the wall against sliding.
- Add and compact the base material. Lay 4 to 6 inches of compactable gravel (¾-inch crushed stone or road base), then compact it in 2-inch lifts with a plate compactor. Loose gravel is not a base; compacted gravel is.
- Level meticulously. Check the base course front-to-back and side-to-side with a long level. Every block above depends on this row being dead level. Time spent here is repaid tenfold.
Stepping the Base Up the Slope
Because the ground rises, your level base trench will eventually run out of depth as you move uphill. That’s where you step up. Excavate the first level section, lay the base course, then dig the next section one block-height higher and start a new level base course that sits on top of the buried back edge of the lower course — like stairs. This stepped foundation keeps every block on level, compacted footing while following the hillside. Never let a base course ramp up the slope; stepping is what keeps the wall from sliding.
Drainage: The Non-Negotiable
Every retaining wall on a slope needs a drainage system, and this is where you must not cut corners. Water collecting behind the wall is the number-one cause of failure, so give it a path out:
- Perforated drain pipe: Lay a 4-inch perforated pipe (holes down) along the base behind the wall, sloped to daylight at one or both ends so collected water flows out and away.
- Gravel backfill: Fill the space directly behind the blocks with ¾-inch clean crushed stone — at least 12 inches deep back from the wall face — for the full height. This lets water drain down to the pipe instead of building pressure.
- Filter fabric: Wrap the gravel-and-pipe zone in landscape filter fabric to keep fine soil from clogging the drainage stone over time.
- Weep holes: On solid concrete walls, add weep holes so trapped water can escape through the face.
Compact structural backfill soil behind the drainage gravel in lifts as you build up, but keep that clean-stone drainage chimney between the soil and the wall the whole way up.
Batter and Building the Courses
A retaining wall should lean slightly back into the hill — this is called batter, typically about 1 inch of setback for every 8 inches of height. Most manufactured segmental blocks build in this batter automatically with a lip or pin system that sets each course back from the one below. That backward lean uses the hillside’s own weight to help hold the wall rather than fighting it head-on.
As you stack, stagger the vertical joints like brickwork so seams don’t line up, sweep debris off each course before laying the next, and check level frequently. Add capstones at the top, glued down with masonry adhesive, to finish the wall and shed water off the front.
Final Grading and Longevity
Once the wall is up, grade the soil above it to slope gently away from the top of the wall so surface runoff sheds toward a swale or drain rather than pouring over the back. Plant ground cover on the slope above to bind the soil and reduce erosion. Inspect the wall after the first few heavy rains for any bulging or settling, and confirm the drain outlets are running clear.
Building a retaining wall on a slope rewards patience with the boring fundamentals — a buried, level, compacted base, stepped up the hill, backed by a real drainage system, and battered into the slope. Nail those, and your wall will hold back the hillside quietly for decades while giving you flat, usable terraces to actually enjoy.
Choosing the Right Block or Material
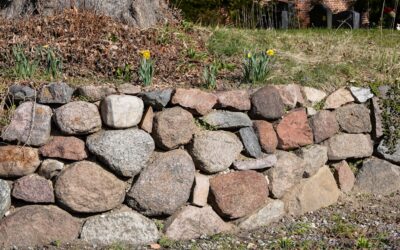
The material you build with shapes both the look and the height you can safely reach. Segmental concrete blocks — the interlocking units sold at every home center — are the DIY favorite because their built-in setback pins or lips create the batter automatically and they stack without mortar. They handle walls up to about 3 to 4 feet on a slope before engineering is required, and they come in a range of colors and textures. Natural stone gives a timeless look but demands more skill to fit and level. Poured concrete and large boulders are options for bigger jobs, but both typically call for equipment and professional help.
Whatever you choose, buy blocks rated for retaining walls specifically — ordinary garden-edging blocks aren’t engineered to hold back a slope and will fail. Estimate quantity by calculating the wall’s face area (length times height) and adding 5 to 10 percent for cuts and breakage, plus separate figures for base gravel, drainage stone, drain pipe, and filter fabric. Buying the drainage materials up front prevents the temptation to skip them mid-project.
Frequently Asked Questions
How tall can I build a retaining wall myself? Most jurisdictions and manufacturers cap DIY segmental-block walls at around 3 to 4 feet before requiring an engineer’s design and a permit. On a slope, terracing into two shorter walls is safer and often easier than one tall wall.
What happens if I skip the gravel base or drainage? The wall fails — usually within a few years. A poorly compacted base lets the wall settle and lean, and missing drainage lets water build hydrostatic pressure behind the blocks until it bulges or topples the wall. These two steps are non-negotiable.
Do I really need to bury the first course? Yes. Burying the bottom course — roughly the first block, or about 10 percent of the wall height — anchors the wall against sliding forward under the soil’s push. A wall built entirely above grade has nothing holding its base in place.