The most common reason a retaining wall bulges and topples has nothing to do with the stones and everything to do with what is behind and beneath them. A properly built dry stack retaining wall holds back tons of soil for decades without a drop of mortar, relying instead on gravity, careful stacking, and drainage. Skip the fundamentals and even the prettiest wall fails in a few seasons. This guide walks through the materials, the all-important base and drainage, and the stacking technique that keeps a mortar-free wall standing straight and strong.
What Makes a Dry Stack Wall Work
A dry stack wall uses no mortar; the blocks or stones hold together through weight, friction, and interlocking geometry. This gravity-based design has real advantages. Because water can weep through the joints, a dry stack wall relieves the hydrostatic pressure that destroys rigid mortared walls. The flexibility also lets it shift slightly with freeze-thaw cycles and settling rather than cracking. The trade-off is that dry stacking demands more attention to the base, the backfill, and the way each course leans back into the hillside. Do those right and physics does the rest.
Choosing Your Materials
You have two broad material choices, and each builds a very different wall.
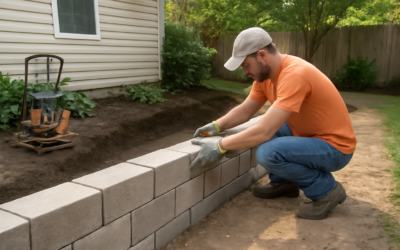
- Manufactured interlocking blocks: Concrete units with a built-in lip or pin system that automatically sets the correct backward lean. They are uniform, easy to stack level, and the most forgiving choice for a first-time builder. Ideal for walls up to a few feet tall.
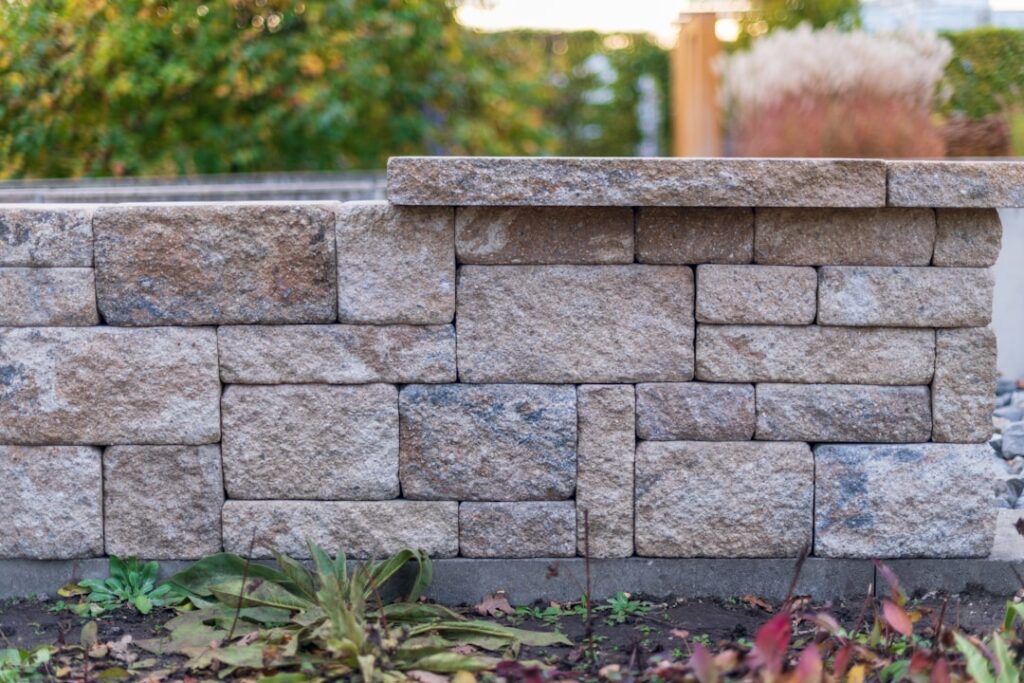
- Natural stone: Fieldstone or quarried flat stone gives an organic, timeless look but requires skill to fit irregular shapes tightly. Best for shorter walls and builders with patience.
For most homeowners tackling a first project, interlocking concrete blocks deliver the best mix of durability, ease, and appearance. Plan on capping the top with finished cap units for a clean edge.
Know the Height Limit
Before you buy a single block, understand that dry stack walls have a safe height ceiling for DIY work. Most manufacturers and building codes treat walls up to about 3 to 4 feet as gravity walls a homeowner can build. Anything taller must resist dramatically more soil pressure and typically requires engineering, geogrid soil reinforcement buried in the hillside, and often a permit. If your slope needs more than roughly 4 feet of retention, build it as two shorter terraced walls or bring in a professional. Trying to stack a tall wall without reinforcement is the classic recipe for a slow-motion collapse.
The Base: Where Success Is Won or Lost
Nearly every dry stack failure starts at the bottom. The base must be level, compacted, and made of the right material, because everything above it depends on that foundation. Dig a trench several inches deep and wide enough for your block plus backfill room. Fill it with a few inches of compacted crushed gravel, not sand or dirt, and tamp it firm. Then level the first course of blocks obsessively, checking front to back and side to side, because any error in the base row multiplies as the wall rises. Builders who rush this step and set that first course crooked pay for it all the way up.
Base Preparation Steps
- Excavate a trench, burying the first course by about 10 percent of the wall height for stability.
- Add and compact 4 to 6 inches of crushed gravel base.
- Level the gravel meticulously in both directions.
- Set and level the first course, adjusting gravel under each block until perfect.
Drainage and Backfill
Water is the enemy of every retaining wall, and drainage is what sets a lasting dry stack retaining wall apart from a failing one. As you build, place a column of clean crushed stone behind the blocks rather than backfilling with soil right against the wall. This gravel column lets water drain down instead of pushing against the wall. At the base, lay a perforated drain pipe wrapped in filter fabric, sloped to daylight or a drainage outlet, so collected water escapes. Line the boundary between the gravel and the native soil with landscape fabric to keep dirt from clogging the drainage stone. These steps cost little and prevent the pressure buildup that bows walls outward.
Building With Batter and Overlap
Two techniques give a dry stack wall its strength: batter and staggered joints. Batter is the slight backward lean of the wall into the hillside, typically about one inch of setback per foot of height. Interlocking blocks build this in automatically; with natural stone you create it by hand. This lean uses the soil’s own weight to help hold the wall in place. Stagger the vertical joints so each block bridges the seam between the two below it, just like brickwork. Never let joints line up in a continuous vertical seam, because that creates a weak fault line the wall can split along. Compact the backfill in layers as you rise, and the wall grows stable course by course.
Finishing and Capping
Once you reach your final height, cap the wall for a clean, finished look and to lock the top course in place. Cap units are usually secured with a bead of concrete adhesive since there is no interlocking lip on the top. Grade the soil behind the wall to slope away, directing surface runoff around rather than over the wall. A layer of topsoil and plantings behind the cap softens the look and helps stabilize the slope with roots. Inspect the finished wall after the first heavy rain to confirm the drain pipe is flowing and no settling has occurred.
Tools and Materials Checklist
Gathering everything before you start turns a chaotic weekend into a smooth one. A dry stack wall does not require exotic equipment, but a few key tools make the difference between a level, professional result and a frustrating slog. Renting a plate compactor for the base is the single best investment you can make, since hand-tamping rarely achieves the density a lasting wall needs.
- Excavation tools: A shovel, mattock, and wheelbarrow for digging the trench and moving soil.
- Plate compactor: Rented by the day, essential for compacting the gravel base and backfill.
- Level and string line: A four-foot level plus a torpedo level, and string to keep courses straight.
- Rubber mallet: For seating blocks without cracking them.
- Materials: Interlocking blocks or stone, crushed gravel base, clean drainage stone, perforated drain pipe, filter fabric, and cap adhesive.
Order about 10 percent more block than your measurements call for to cover cuts, breakage, and miscalculations. Having extra material on hand keeps you from stopping mid-project for a supply run, and the leftovers are useful for repairs down the road.
Terracing for Taller Slopes
When a single wall would exceed the safe DIY height, terracing is the elegant solution that keeps the project within reach. Instead of one tall, heavily engineered wall, you build two or more shorter walls stepped up the slope, each retaining a manageable amount of soil. This approach reduces the pressure on any single wall, often keeping each one under the height that would trigger engineering requirements, and it creates attractive planting shelves between the levels.
The key rule with terraces is spacing. The walls must be set far enough apart that the upper wall does not add its soil load onto the lower one; a common guideline is to separate them horizontally by at least twice the height of the lower wall. Placed too close, an upper terrace effectively makes the lower wall carry both loads, defeating the purpose. Each terrace still needs its own proper base, drainage, and batter, just like a standalone dry stack retaining wall. Done right, terracing transforms a steep, unusable bank into a series of gentle, planted steps that are both stable and beautiful, and it keeps a big project achievable for a determined homeowner. Check local codes, since some jurisdictions regulate terraced walls as a combined system.
Building It to Last
A dry stack retaining wall is one of the most satisfying landscaping projects a homeowner can take on, and it can hold firm for generations when built correctly. Respect the height limit, obsess over a level compacted base, install real drainage with a pipe and gravel column, and stack with proper batter and staggered joints. Cut corners on the hidden work and the wall fails; honor those fundamentals and you get a strong, handsome, mortar-free wall that quietly does its job through every freeze, thaw, and downpour for decades.