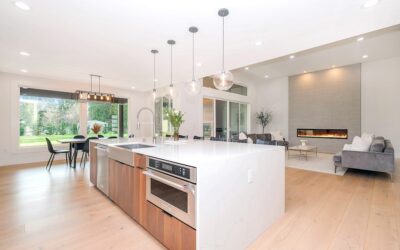
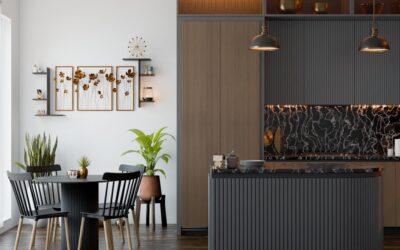
Most homeowners assume wood counters are too high-maintenance for a busy kitchen, then they touch a well-oiled slab and change their minds. A butcher board countertop brings genuine warmth that quartz and granite simply can’t fake, and it doubles as a working surface you can chop on, knead dough across, and refinish for decades. The catch is that it rewards people who follow a simple routine and punishes those who treat it like stone. Get the wood species and finish right and you’ll have a surface that looks better at year ten than the day it was installed.
Part of our Countertops guide — explore the full guide →
What Exactly Is a Butcher Board Countertop?
People use “butcher block” and “butcher board” interchangeably, but there are real construction differences worth knowing before you buy. A countertop is built from strips of hardwood glued together under pressure, and the way those strips are oriented changes both the look and the durability.
- Edge grain: Long boards laid on their sides, showing the narrow edge. This is the most common and affordable style, with a clean linear look.
- End grain: Square blocks standing on end, creating the classic checkerboard “butcher block” pattern. It’s the most knife-friendly because the blade slips between fibers, but it costs significantly more.
- Face grain (plank): Wide boards showing the flat face. Beautiful grain figure, but the softest and most prone to scratches and dents.
For a perimeter counter you cook on occasionally, edge grain is the practical choice. Reserve end grain for a dedicated island chopping zone where you’ll genuinely use a knife.
Choosing the Right Wood Species
Hardness matters here more than appearance. The Janka hardness scale measures how well a wood resists denting, and your daily habits should steer the decision.
- Hard maple (Janka ~1,450): The industry standard. Tight grain, pale color, excellent durability, and reasonably priced around $20 to $40 per square foot.
- Walnut (Janka ~1,010): Rich chocolate tones that designers love. Softer than maple but stunning. Expect $30 to $60 per square foot.
- Oak (Janka ~1,290): Strong and affordable, though its open grain traps crumbs unless sealed well.
- Cherry (Janka ~950): Warms to a deep red over time. Gorgeous, but soft enough that it scratches easily.
- Teak (Janka ~1,070): Naturally oily and water-resistant, which makes it forgiving near sinks, but it’s pricey at $40 to $70 per square foot.
If you want a single recommendation that balances cost, looks, and resilience, hard maple is hard to beat for a primary kitchen surface.
What It Costs Installed
Budget separately for materials and labor. Prefabricated maple counters from a big-box store run $200 to $400 for a standard 25-by-72-inch section, while custom shop-built walnut tops can reach $1,500 or more for the same footprint. Add $300 to $800 for professional fabrication if you need a sink cutout, edge profiling, or precise miters at corners.
A realistic all-in figure for a mid-size kitchen with maple counters lands between $2,000 and $5,000. That undercuts most quartz quotes, which is part of the appeal.
Finish Options: Oil vs. Film
Your finish decision shapes everything about maintenance, and there’s no universally correct answer.
Penetrating Oil (Food-Safe)
Mineral oil or a blend of oil and beeswax soaks into the fibers and leaves a matte, touchable surface. You can chop directly on it, and scratches buff out with more oil. The downside is upkeep: re-oil monthly at first, then quarterly. Plan on a $12 bottle of food-grade mineral oil lasting several applications.
Hard Film Finish
A waterproof polyurethane or a product like Waterlox creates a protective shell that resists water and stains far better. The trade-off is that you should not cut directly on it, because knife marks slice through the coating, and repairs mean sanding and recoating a whole section. Many homeowners use film finish on perimeter counters and leave one small oiled area for actual cutting.
Sealing and Installation Tips
Wood moves with humidity, and ignoring that fact causes most failures. Let new tops acclimate in your home for at least 72 hours before installation so the moisture content stabilizes. Seal every surface, including the underside and the sink cutout edges, because an unsealed bottom absorbs moisture unevenly and cups the board.
When fastening to cabinets, use slotted screw holes or figure-eight fasteners that let the wood expand and contract. Drive a rigid screw straight through a wide top and you’ll eventually crack it. Around a sink, run a generous bead of clear silicone and keep a folded towel handy, because standing water at a seam is the single biggest enemy of any wood counter.
Daily Care and Sanitation
Wood is more hygienic than people fear. Studies have found that bacteria struggle to survive on wood surfaces, but smart habits still matter.
- Wipe spills promptly, especially anything acidic like lemon juice or wine.
- Never let water pool, and never put a butcher board countertop through a flood-and-soak cleaning.
- Sanitize occasionally with a 1:5 solution of white vinegar and water, or rub with half a lemon and coarse salt to lift stains.
- Skip the dishwasher detergent and harsh bleach, which dry out and gray the wood.
For deeper scratches or water rings, a light sanding with 220-grit followed by fresh oil restores the surface. That refinishing ability is the quiet superpower of wood. You can’t sand a scratch out of granite.
Common Mistakes to Avoid
Most wood counter regrets trace back to a handful of avoidable errors. The biggest is letting standing water sit, especially at the back edge near a wall or along a sink seam, where it soaks into end grain and causes dark stains, swelling, and eventually splits. Another frequent mistake is treating an oiled finish like a film finish, or vice versa: people coat an oiled top with polyurethane without sanding off the oil first, and the new finish won’t bond, peeling within weeks. Setting hot pans directly on the surface scorches the wood and burns through any finish, so keep trivets within reach. Finally, skipping the underside seal during installation invites uneven moisture absorption that cups the board, a problem that’s frustrating to reverse once it starts.
One more habit worth building: address small problems early. A faint water ring or light scratch is a five-minute fix with 220-grit and fresh oil if you catch it, but ignore it for a year and it deepens into something that needs a full sanding. Wood is forgiving precisely because it’s repairable, but only if you stay ahead of the wear.
Is a Butcher Board Countertop Right for You?
Choose it if you cook often, value a warm tactile kitchen, and don’t mind a five-minute oiling now and then. Skip it if you leave dishes soaking on the counter, want a zero-maintenance surface, or plan to set hot pans down without a trivet, because heat scorches wood. For many homeowners, the sweet spot is a hybrid layout: durable stone or quartz around the sink and stove, with a butcher block island as the heart of the room. That combination delivers the look people love without asking the wood to do jobs it isn’t suited for.