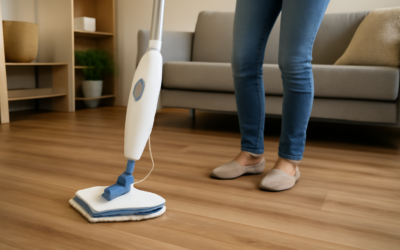
Steam mops are marketed as the chemical-free answer to every hard floor, but linoleum is one of the surfaces where that promise falls apart. If you are wondering whether to steam mop linoleum, the cautious answer is: avoid it on true linoleum and older sheet goods, and only use the lowest setting briefly if your flooring maker explicitly allows it. Steam pushes heat and moisture into seams and edges, where it can soften adhesive, cause curling and dull the protective finish.
Real linoleum is made from linseed oil, cork or wood flour, pine resin and limestone on a jute backing. It is durable and naturally antimicrobial, yet it is also porous at the edges and sensitive to high pH and excess water. Many older kitchens also have vinyl sheet flooring that homeowners call “linoleum,” and that material has its own weak points: glued-down perimeters and seams that were never designed for repeated blasts of hot vapor.
- Should You Steam Mop Linoleum at All?
- Is It Linoleum or Vinyl? How to Tell
- Tools and Materials for Safer Cleaning
- Step-by-Step Damp-Mop Routine
- If You Must Use a Steam Mop: Low-Setting Rules
- Troubleshooting Common Linoleum Problems
- Cost Ranges: DIY Care Versus Repairs
- When to Call a Pro
- Frequently Asked Questions
The good news is that a well-kept linoleum floor rarely needs steam. A dry dust mop and a barely damp microfiber flat mop with a pH-neutral cleaner will handle daily grime, sticky spots and even light sanitizing without risking your seams. Here is how to tell what you have, why steam is risky, and the routine that keeps these floors looking good for decades.
Should You Steam Mop Linoleum at All?
Most linoleum manufacturers recommend damp mopping only and caution against flooding, harsh chemicals and high heat. A steam mop produces vapor well above the boiling point of water at the plate, and even though the pad cools quickly, the combination of heat and moisture concentrates at exactly the places linoleum is weakest. The more often you steam mop linoleum, the more those small effects add up.
Here is what can go wrong:
- Seam failure: Sheet linoleum is installed in wide rolls joined by seams that are often heat-welded or sealed. Repeated heat and moisture can open those joints, letting water wick underneath.
- Adhesive softening: Water-based flooring adhesives can re-emulsify with heat and moisture, leading to bubbles, soft spots and lifting.
- Edge curling: Perimeters near cabinets and doorways absorb moisture first and can curl or shrink as they dry.
- Finish damage: Many modern linoleum products have a factory coating. Heat can haze or dull it, and older floors with polish or wax may turn cloudy or streaky.
- Discoloration: Linoleum naturally develops a yellowish “drying room film” that fades with light. Heat and moisture can cause uneven blotching.
Vinyl sheet goods called linoleum face similar risks, especially older installations with worn wear layers and aged glue. Some vinyl makers do permit steam, many do not, so the only reliable answer comes from your specific product’s care guide.
Is It Linoleum or Vinyl? How to Tell
Before choosing a cleaning method, identify your floor. The two materials look alike but behave differently.
- Check the pattern: True linoleum has color that runs through its full thickness, often in marbled or speckled designs. Vinyl has a printed image under a clear wear layer.
- Look at a cut edge: Under a threshold or at a floor vent, linoleum shows a uniform color and a fibrous jute backing. Vinyl shows a thin printed layer over a white or gray core, sometimes with a felt backing.
- Smell and feel: New linoleum has a faint linseed-oil scent and feels slightly warm and firm. Vinyl feels more rubbery.
- Consider age: Floors installed before the 1980s may be either, and some older sheet or tile products can contain asbestos in the backing or adhesive. Never sand, scrape or cut them without testing.
Tools and Materials for Safer Cleaning
A gentle routine needs only a few tools, and most of them cost less than a steam mop:
- Microfiber dust mop or a soft-bristle broom
- Microfiber flat mop with washable pads (several pads so you can rotate clean ones)
- Vacuum with a hard-floor setting and the beater bar turned off
- pH-neutral floor cleaner labeled safe for linoleum or resilient flooring
- Spray bottle for mixing cleaner
- Soft nylon scrub pad and a plastic putty knife for stuck-on spots
- Clean, dry microfiber towels
- Felt pads for chair and table legs, plus walk-off mats at entrances
Skip ammonia, bleach at full strength, vinegar-heavy mixtures and alkaline degreasers. Linoleum is especially sensitive to high-pH cleaners, which can dry out the linseed binder and cause brittleness over time.
Step-by-Step Damp-Mop Routine
- Remove grit first. Dust mop or vacuum the whole floor. Sand and crumbs act like sandpaper under a mop and scratch the finish.
- Mix a mild solution. Dilute a pH-neutral cleaner in the spray bottle according to the label. More is not better; excess cleaner leaves residue that attracts dirt.
- Mist, don’t pour. Lightly spray a 4 x 4 ft section. The floor should look damp, never wet or puddled.
- Mop with the grain of the room. Push the microfiber flat mop in overlapping figure-eight strokes. Flip or swap pads when one looks dirty.
- Treat spots gently. For dried food, lay a damp cloth on the spot for a minute, then lift with a plastic putty knife or nylon pad.
- Dry the edges. Wipe along cabinets, seams and thresholds with a dry towel so no moisture lingers where water could wick in.
- Allow to air dry. Keep foot traffic off for 10 to 15 minutes, and open a window or run a fan in humid weather.
For most kitchens, that routine takes 15 minutes once or twice a week. Daily sweeping in high-traffic zones will do more for the floor’s lifespan than any deep-cleaning gadget.
If You Must Use a Steam Mop: Low-Setting Rules
Some people want steam for sanitizing after illness or pet accidents. If your flooring maker does not prohibit it, follow strict limits:
- Use the lowest steam setting and a thick, dry microfiber pad.
- Keep the mop moving; never let it sit in one spot, even for a few seconds.
- Stay away from seams, edges, and any area where the floor is already lifting or cracked.
- Limit steam to occasional spot use, not a weekly routine.
- Follow with a dry towel to remove condensation right away.
If you notice haze, softness, bubbling or seams opening, stop immediately. Those are signs the heat and moisture are reaching the adhesive. For disinfecting without steam, a product labeled safe for resilient flooring, used per its directions and then rinsed with a damp mop, is a safer route.
Troubleshooting Common Linoleum Problems
- Dull or cloudy surface: Often residue from too much cleaner or old polish. Damp mop with plain water, then dry. Heavily worn floors may need professional stripping and a fresh maintenance coating.
- Seams lifting: Keep the area dry and have a flooring pro reseal or reweld the seam before water gets under the sheet.
- Bubbles or soft spots: Usually adhesive failure from moisture. A pro can inject adhesive or patch the area; waiting lets it spread.
- Yellow patches: On new linoleum, this is the normal drying room film that fades with light exposure. On older floors, it can indicate wax buildup.
- Scuffs: Rub lightly with a clean tennis ball or a soft eraser pad; avoid abrasive powders.
- Stains from rubber mats: Some rubber-backed rugs stain resilient floors permanently. Use mats with a non-staining backing.
Cost Ranges: DIY Care Versus Repairs
A microfiber flat mop, extra pads and a bottle of pH-neutral cleaner usually cost less than a mid-range steam mop, and the pads last for many washes. That makes gentle cleaning both the cheapest and the lowest-risk option.
Repairs are where steam damage gets expensive. Professional seam resealing or small patch repairs typically run from a modest service call into the low hundreds of dollars. Stripping and refinishing a large linoleum floor costs more, and a full sheet replacement is a substantial project once you include removal, subfloor prep and new material. Spending a little time on the right routine protects that investment.
When to Call a Pro
Contact a flooring professional if seams are open, edges are curling, or you see bubbles and soft areas, because moisture may already be under the sheet and could damage the subfloor. A pro can also strip old wax and apply a manufacturer-approved maintenance finish that restores sheen without guesswork.
Call for testing before any repair on floors installed decades ago, since older resilient flooring and adhesives may contain asbestos. And if you are not sure whether you have true linoleum or vinyl, a flooring installer can identify it quickly and point you to the right care guide, which is the only reliable authority on whether to steam mop linoleum in your home.
Frequently Asked Questions
Can a steam mop ruin linoleum floors?
It can. Repeated heat and moisture may open seams, soften adhesive, curl edges and dull the finish. The damage is often gradual, so a floor may look fine after the first few uses and then start lifting months later.
What is the best way to clean linoleum?
Dry dust mop or vacuum first, then use a barely damp microfiber flat mop with a pH-neutral cleaner made for resilient floors. Dry the edges and seams afterward so moisture never lingers.
Is it safe to steam mop linoleum on the lowest setting?
Only if your flooring maker allows it. Even then, keep the mop moving, avoid seams and edges, and limit it to occasional spot sanitizing rather than routine cleaning.
Can I use vinegar on linoleum?
Small amounts are sometimes used, but acidic solutions can dull some finishes, and many linoleum makers recommend a pH-neutral cleaner instead. Stick to products labeled safe for your floor.
How often should linoleum be mopped?
Sweep or dust mop high-traffic areas daily and damp mop once or twice a week. Over-mopping with too much water causes more harm than infrequent cleaning.