Hardwood stairs look stunning until someone in socks takes a bad step. A carpet staircase runner solves that in one move, cutting slips dramatically while muffling the thud of foot traffic and adding a strip of color down an otherwise plain staircase. It is one of the highest-impact upgrades you can make for the money, and it protects the treads underneath from decades of wear. This guide covers materials, sizing, installation methods, and what the project actually costs.
Part of our Stairs & Stair Flooring guide — explore the full guide →
- Why Install a Runner Instead of Full Carpet
- Choosing the Right Material and Weave
- Measuring and Sizing Your Runner
- Installation Methods That Hold Up
- Tools, Tackless, and Staples
- What a Runner Project Costs
- Adding Stair Rods for a Finished Look
- Handling Landings and Winder Stairs
- Maintenance and Longevity
- Design and Color Choices That Age Well
Why Install a Runner Instead of Full Carpet
A runner gives you the best of both worlds: the traction and quiet of carpet where you walk, and the beauty of exposed wood on the sides. Full stair carpet hides the treads entirely and shows wear in a single traffic lane. A carpet staircase runner leaves 3 to 6 inches of finished wood revealed on each side, framing the runner like a piece of art.
Safety is the headline benefit. Bare wood stairs are a leading cause of household falls, especially for kids, seniors, and pets whose nails cannot grip. A runner with a quality pad underneath turns a slick descent into a sure-footed one.
Choosing the Right Material and Weave
Stairs are the hardest-working flooring in the house, taking concentrated pressure on the tread nose. Pick fiber accordingly:
- Wool: the gold standard, resilient and naturally crush-resistant, $20 to $50 per linear foot
- Nylon: durable and stain-treatable synthetic, $10 to $30 per linear foot
- Polypropylene: budget-friendly and fade-resistant, best for low-traffic stairs
- Wool-nylon blend: a popular compromise of longevity and value
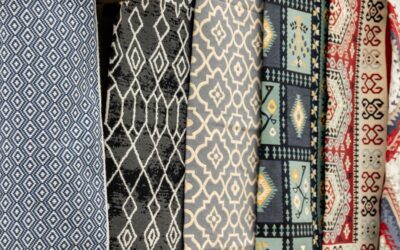
Favor a low-pile, tight loop or flat weave over deep plush. Loop and flatweave constructions hold their shape on the tread edge, while thick cut pile crushes and shows a worn path within a couple of years. Patterned runners hide dirt and footprints far better than solids, which is why you see stripes and geometrics on so many staircases.
Measuring and Sizing Your Runner
Getting the width and length right is the make-or-break step. Standard runners come in 27-inch and 32-inch widths; a 27-inch runner on a 36-inch stair leaves a balanced 4.5 inches of wood on each side. Measure your tread width first and subtract your desired reveal to pick the runner width.
For length, measure one step by running your tape down the face of the riser, across the tread, and add for the nosing curve. A typical step consumes about 18 inches of runner. Multiply by your number of steps, then add 10 to 15 percent for the nosing wrap and a small tuck at top and bottom. A 14-step staircase usually needs 21 to 24 feet of runner.
Installation Methods That Hold Up
There are two proven approaches, and both start with a quality pad. Pad cut 3 inches narrower than the runner and 1 inch short of the nosing gives cushion without bulging at the edges.
Waterfall Method
The runner flows straight off the nosing and drops vertically to the next tread without being pushed into the corner. It is faster, forgiving, and common in casual homes. Staple along the back of each tread and just under the nosing.
Hollywood or Cap-and-Band Method
Here the runner is pushed tightly into the crotch where tread meets riser, hugging every contour. It looks tailored and upscale but takes more time and staples. This is the method most pro installers use for a custom look.
Tools, Tackless, and Staples
You do not need a full carpet crew for a runner, but the right tools matter. Assemble a heavy-duty staple gun or a pneumatic stapler with 9/16-inch staples, a knee kicker to tension each step, tackless strips, a stair tool, and sharp shears. Tackless strips installed in the tread-riser crotch grip the backing so the runner stays taut.
Work from the top down. Tension each tread with the knee kicker before stapling so the runner cannot loosen and buckle over time. A runner that sags on the nosing is both ugly and dangerous, so do not skip the tensioning step to save minutes.
What a Runner Project Costs
Budget-wise, a runner is refreshingly affordable compared with carpeting a whole staircase in premium material. Expect these ranges for a standard 14-step staircase:
- DIY materials only: $150 to $600 depending on fiber
- Runner plus pad plus supplies: add $40 to $100 for pad and tackless
- Professional installation: $400 to $1,200 installed
Wool runners drive the top of that range, while a nylon runner keeps a full staircase under $500 for a capable DIYer. Custom-bound runners with a decorative border cost more but let you match any width and color precisely.
Adding Stair Rods for a Finished Look
Decorative stair rods are the detail that pushes a runner from good to custom. These metal bars sit in the crotch of each step, held by brackets, and traditionally clamped the runner in place before staples existed. Today they are mostly ornamental, but they add a tailored, hotel-lobby polish for about $8 to $25 per rod in brass, nickel, or matte black.
If you install rods, mount the brackets first and thread the rod after the runner is stapled so the fabric still carries the load. Space them consistently, one per step, and align the finials so the eye reads a clean vertical line down the staircase. On a straight 14-step run, a full set of rods runs $120 to $350 and transforms the whole stairwell.
Handling Landings and Winder Stairs
Straight staircases are the easy case. Landings and pie-shaped winder steps demand extra planning because the runner has to turn a corner without bunching. On a landing, run the runner across in the same width and either seam it neatly or wrap it, keeping the pattern aligned so the turn does not look accidental.
Winders are the toughest challenge and honestly the point where many homeowners call a pro. Each wedge-shaped tread needs the runner cut and folded to follow the taper, which is fussy work that shows every mistake. If your staircase curves, budget for professional installation or accept that the winder section will take three times as long as a straight run.
Maintenance and Longevity
Vacuum the runner weekly using the upholstery or crevice tool so the beater bar does not fray the bound edges. Rotate nothing here, obviously, but do blot spills immediately since stairs sit in high-traffic hallways where spills spread fast. A quality wool or nylon runner properly installed lasts 10 to 15 years.
Watch the nosing, which absorbs the most wear. If a single step frays after years of use, a good installer can sometimes re-stretch and re-staple that section rather than replacing the whole run. Treated well, a carpet staircase runner pays back its modest cost in years of quiet, safe, and handsome stairs.
Design and Color Choices That Age Well
Pattern and color decide how the runner reads years down the road. Busy geometrics and multi-tone stripes are practical because they camouflage the inevitable dirt from shoes and paws, which is why designers lean on them for high-traffic stairwells. A solid cream runner photographs beautifully but shows every scuff within a season.
Coordinate the runner with the wood species and the wall color, not just the flooring at the top and bottom. A warm oak stair pairs naturally with taupe, rust, or navy runners, while a dark walnut staircase can carry a lighter or bolder pattern without feeling heavy. If your entry and upstairs hallway have their own flooring, choose a runner that bridges both spaces so the transitions feel intentional rather than abrupt. When in doubt, a classic striped or diamond-patterned wool in neutral tones is the safe choice that rarely looks dated.