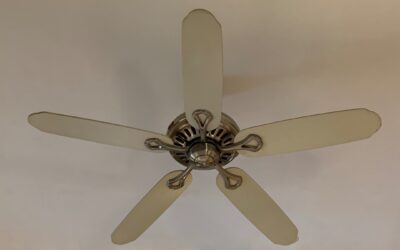
Hang a fan from the wrong box and it is only a matter of time before it wobbles loose. A ceiling fan electrical box is not the same as a standard lighting box, and swapping one for the other is the mistake that ends with a 40-pound fixture on the floor. Standard boxes are built to hold a light fixture of a few pounds that sits perfectly still. A fan adds weight, constant vibration, and torque every time the motor spins up, and only a listed fan-rated box is engineered to handle all three at once.
Why a Fan-Rated Box Is Non-Negotiable
The National Electrical Code is explicit here. Article 314.27(C) requires that any outlet box used to support a ceiling fan be listed and marked for that purpose. A fan-rated box carries a stamp indicating it is “acceptable for fan support,” and by code it must support at least 35 pounds, with many rated to 70 pounds for heavier or larger fans. A regular light box, by contrast, is typically rated for only 6 to 10 pounds of dead weight and is not designed for the rotational stress a motor produces.
The danger is not just the static load. A spinning fan generates dynamic force that works fasteners loose over months and years. A box that seems fine on installation day can pull free long after the electrician has gone. That is why the rating, the mounting method, and the fasteners all matter together, not in isolation.
Types of Fan-Rated Boxes
You have a few solid options depending on whether you can access the space above the ceiling and what the ceiling is framed with.
- Pancake boxes: Shallow metal boxes about 1/2 inch deep, mounted directly to a joist or a solid backing. They work well when a joist sits exactly where you want the fan and there is limited depth.
- New-construction braced boxes: A box attached to an adjustable bar that nails or screws to two joists before drywall goes up. These offer the most secure mounting and let you place the fan anywhere between the joists.
- Old-work (retrofit) braced boxes: Designed to install through an existing hole with no attic access. An expanding bar feeds through the opening and ratchets tight against the joists, spreading load across the framing.
- Saddle-mount boxes: Fasten to the side of a single joist, useful when the fan location aligns with existing framing.
For most retrofits where you are replacing a light with a fan, the old-work braced box is the go-to because it needs no drywall demolition.
Reading the Weight Rating
Every listed box states a maximum fan weight, and you should match it to your fixture with margin to spare. Standard 42- to 52-inch fans usually weigh 15 to 25 pounds, well within a 35-pound box. Large-diameter fans, fans with heavy light kits, and industrial or damp-rated outdoor models can top 50 pounds, so read the fan’s spec sheet before buying the box. When a box lists 35 pounds for a fan versus a higher static number for a fixed light, always use the fan figure.
If you plan to run a fan with an oversized glass light kit or a downrod extension for a vaulted ceiling, size up to a 70-pound-rated brace. The extra capacity costs only a few dollars and eliminates any question about margin.
Installing an Old-Work Braced Box
This is the most common retrofit and it is achievable for a confident DIYer, though electrical connections should follow local code and permitting rules. Turn off the circuit at the breaker and verify with a non-contact voltage tester before touching any wires.
- Remove the existing light and its old box. If the old box is nailed to a joist, pry it free or unscrew it.
- Feed the expanding support bar up through the ceiling hole and position it perpendicular to the joists.
- Rotate the bar by hand until the ends bite into the joists, then use a wrench to ratchet it snug so the feet dig in firmly.
- Attach the fan-rated box to the bar’s saddle using the included bolts, pulling the circuit cable through the box’s knockout as you seat it.
- Confirm the box sits flush with the finished ceiling surface so the fan canopy will cover it cleanly.
Once the box is solid, you can mount the fan bracket, make the wiring connections, and hang the motor. A properly braced box should not flex or shift when you tug on it with real force.
Common Mistakes That Cause Wobble and Failure
The number one error is reusing a standard light box and trusting it to hold a fan. Even if it survives the first year, vibration eventually wins. A close second is using drywall anchors or plastic wall plugs as the primary support, which have no business bearing a moving load. The fan must anchor to framing or a rated brace that spans framing, never to the ceiling material alone.
Wobble often traces back to the box rather than the fan itself. If a new fan shakes, check that the box is tight to the structure before you blame unbalanced blades. Loose downrod set screws, missing rubber isolation grommets, and a box that was never fully ratcheted are the usual suspects. Skipping the ground connection is another frequent oversight, and every metal fan box and fan should be bonded to the circuit ground for safety.
Special Cases: Sloped and High Ceilings
Not every ceiling is a flat 8-footer, and the box requirements shift when yours is not. On a vaulted or sloped ceiling, you need a fan-rated box that either sits in a compatible pan or works with a sloped-ceiling adapter, plus a downrod long enough to bring the blades to a safe height. The blades should hang at least 7 feet above the floor for safety and 8 to 9 feet for best air movement, so measure and choose the downrod accordingly.
Very high ceilings call for a long downrod, sometimes several feet, which multiplies any imbalance and puts extra leverage on the box. In that situation, step up to a 70-pound-rated brace even for a moderate fan, because the long rod amplifies the dynamic load the box must resist. Outdoor and covered-porch installations add another requirement: the box, fan, and any wiring must be rated for damp or wet locations, and the box must still be a listed fan-support box, not a standard exterior junction box.
Wiring the Fan Correctly
Once the box is solid, the wiring connections determine whether the fan works safely and as intended. Standard fans use color-coded conductors: black for the fan motor, blue for a light kit, white for neutral, and green or bare copper for ground. If you want separate switch control of the fan and light, you need a three-conductor-plus-ground cable running to the switch so the black and blue legs are controlled independently.
Always bond the ground. Connect the fan’s green lead and the metal box to the circuit ground so a fault trips the breaker instead of energizing the fixture. Use the correct wire connectors, tuck the connections neatly into the box without straining them, and confirm the canopy screws thread into the mounting bracket, not just the box edge. If your existing switch is a single switch and you want dual control or a remote, many fans include a receiver that fits in the canopy, letting you add remote or wall-control operation without running new cable. When any of this exceeds your comfort level, that is the signal to bring in a pro.
When to Call an Electrician
Replacing a like-for-like fan on an existing fan-rated box is well within DIY territory. The moment you are running a new circuit, adding a switch leg for separate light and fan control, or dealing with aluminum wiring or an ungrounded system, bring in a licensed electrician. Many jurisdictions also require a permit for new fan circuits. The cost of a professional install, often $150 to $350 for labor when the box and fan are supplied, is modest against the risk of a fixture that fails overhead.
Choosing the right ceiling fan electrical box is the foundation of a safe, quiet, long-lasting installation. Match the rating to your fan, mount it to real framing, and torque every fastener, and the box will outlast the fan hanging from it. Cut corners on the box and no amount of blade balancing will keep that fan steady on the ceiling.