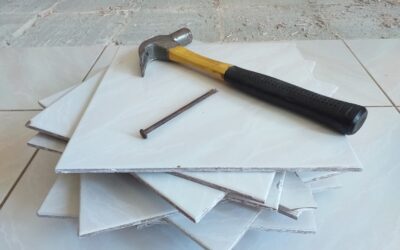
Dated, stained, or discolored tile can drag down an entire room, but tearing it out is messy, expensive, and disruptive. Ceramic tile refinishing offers a faster, cheaper alternative that resurfaces your existing tile with a fresh, durable coating instead of replacing it. Done well, the result looks like new tile at a fraction of the cost and effort.
Part of our Tile & Grout guide — explore the full guide →
Knowing what ceramic tile refinishing can and cannot do helps you decide whether it fits your project. This guide explains how the process works, when it makes sense, and how to get a finish that holds up.
What Refinishing Actually Means
Refinishing, sometimes called reglazing or resurfacing, applies a new bonded coating over the surface of existing tile and grout. The process involves deep cleaning, etching or priming the surface, and spraying or rolling on a specialized coating that cures into a hard, smooth shell. The original tile stays exactly where it is.
The appeal is obvious. You skip demolition, debris removal, new tile, and the labor of a full installation. A room that would take days and thousands of dollars to retile can be refinished in a day or two for a fraction of the price, and you change the color completely if you want.
When Refinishing Is the Right Call
This approach works best when the tile itself is sound but the surface looks tired. Good candidates include:
- Outdated colors you want to modernize, such as pink or avocado bathroom tile
- Surface stains, etching, or dullness that cleaning will not fix
- Discolored or hard-to-clean grout lines
- Minor surface scratches and wear
It is not a fix for structural problems. Loose tiles, water damage behind the wall, crumbling substrate, or widespread cracking need real repair first. Coating over a failing surface only hides a problem that will return.
Surface Preparation Is Everything
The durability of a refinished surface depends almost entirely on prep. Ceramic glaze is smooth and nonporous, which is exactly why coatings struggle to stick unless the surface is properly cleaned and abraded. Skipping prep is the number-one reason a refinishing job peels within months.
Proper preparation includes degreasing to remove soap scum and body oils, repairing chips and cracks, and either acid etching or sanding to create a profile the coating can grip. Bathrooms also need any caulk and silicone removed, since coatings will not bond to it. Every trace of soap, mildew, and moisture must be gone before the first coat goes on.
The Refinishing Process Step by Step
- Clean the tile and grout thoroughly to strip grease, soap film, and mildew.
- Repair chips, cracks, and missing grout so the surface is even.
- Etch or sand the glaze to create adhesion, then wipe clean.
- Mask off fixtures, trim, and surrounding surfaces.
- Apply a bonding primer rated for the coating system.
- Spray or roll on the topcoat in thin, even layers, allowing cure time between coats.
- Let the surface cure fully before exposing it to water or use.
Curing time matters more than people expect. A shower or floor that gets wet before the coating hardens can blister or peel, so follow the product’s cure schedule even if the surface feels dry to the touch.
DIY Versus Hiring a Professional
DIY refinishing kits exist and can produce decent results on small areas like a single backsplash or a section of countertop. They typically cost $25 to $100 and reward patience and careful prep. The downside is that consumer coatings are usually less durable than professional systems, and brushwork can show.
Professionals bring industrial coatings, spray equipment for a smooth factory-like finish, and experience with prep and ventilation. For a full bathroom, shower surround, or floor, the smoother, longer-lasting result often justifies the higher price. Pros also handle the strong fumes safely.
Safety and Ventilation
Many refinishing coatings give off strong fumes during application and curing. Work in a well-ventilated space, open windows, run fans, and wear a respirator rated for the product along with gloves and eye protection. Keep the area off-limits to children and pets until it fully cures. Always follow the manufacturer’s instructions for mixing, application, and ventilation. These are general handling guidelines, not medical advice.
Choosing Colors and Finishes
One of the underrated perks of refinishing is the chance to completely change the color. A coating can take a dated pink or avocado bathroom to crisp white, soft gray, or a custom shade in a single day. Most professional systems offer a range of colors, and some can even replicate a subtle stone or speckled look.
Finish matters too. A glossy finish reads bright and clean and is easy to wipe down, while a satin or matte finish hides minor surface imperfections and gives a more contemporary feel. Consider the room: a high-gloss shower surround sparkles, while a matte floor coating can disguise small flaws and offer a touch more traction. Discuss slip resistance with your installer for any floor or tub surface, since smooth coatings can be slick when wet.
Common Mistakes to Avoid
The mistakes that ruin refinishing jobs almost always come down to prep and patience. Coating over soap scum, silicone caulk, or a glossy unsanded surface guarantees peeling, no matter how good the product is. Removing every trace of caulk and properly etching the glaze are non-negotiable steps.
The other classic error is using the surface too soon. A shower that gets wet before the coating fully cures will blister, and a floor walked on prematurely shows scuffs and marks. Respect the cure schedule even when the surface feels dry, and resist the urge to rush a bathroom back into service. A day or two of patience protects weeks of work.
Durability, Cost, and Expectations
A well-prepped, professionally refinished surface can last several years, often 5 to 10 or more with gentle care, before it shows wear. Use non-abrasive cleaners, avoid harsh scrubbing pads, and wipe up standing water to extend the life of the finish.
Cost-wise, professional ceramic tile refinishing commonly runs a few hundred to over a thousand dollars depending on the size and condition of the area, still far below full replacement. Weigh that against the look you want and how long you plan to stay, and refinishing often comes out as the smart, budget-friendly choice for a quick, dramatic update.
Prefer to explore on your own?
See how new flooring looks in your actual room in seconds — free, no signup.
Try the free Floor Studio →