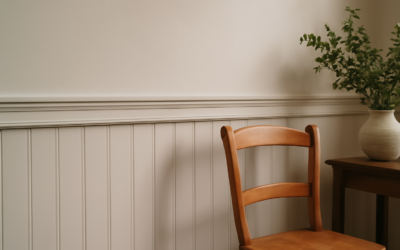
A clean horizontal line running across a tiled wall can transform a plain bathroom or kitchen into something that looks designed rather than merely finished. Chair rail tile is the slim decorative border that creates that line, capping a wainscot, dividing two tile fields, or simply giving a backsplash a polished top edge.
Part of our Tile & Grout guide — explore the full guide →
If you’re planning a tile project and want a professional, custom look, understanding how chair rail tile works will help you choose the right profile, set it at the correct height, and install it so the transitions look seamless.
What Is Chair Rail Tile
Borrowed from traditional millwork, a chair rail was originally a wooden molding installed at the height where chair backs would otherwise scuff the wall. In tile, the concept becomes a narrow trim piece, often one to three inches tall, that runs horizontally to separate or finish a tiled surface.
The trim typically features a sculpted or rounded profile, giving it dimension and a shadow line that distinguishes it from the flat field tile above and below. It serves both decoration and function, creating a clean visual break and a finished edge where two materials or two tile sizes meet.
Common Materials and Profiles
Chair rail trim comes in a range of materials to match nearly any tile installation.
- Ceramic and porcelain: The most common and budget-friendly choice, available glazed in countless colors and finishes.
- Natural stone: Marble, travertine, and granite rails bring an upscale, organic look but require sealing.
- Glass: Reflective and modern, glass rails add subtle sparkle and work beautifully in contemporary baths.
- Metal: Brushed nickel, bronze, and stainless profiles deliver a sleek, transitional accent.
Profiles vary too. Popular shapes include the rounded bullnose, the ogee with its graceful S-curve, the pencil rail for a thin minimal line, and bolder embossed or rope-pattern designs for traditional rooms.
Where to Use Chair Rail Tile
The most familiar placement is in a bathroom, where it caps a tile wainscot that rises partway up the wall. The rail finishes the top of the lower tile field and meets paint or a different tile above it.
Beyond the bath, you’ll find chair rail trim defining the top of a kitchen backsplash, framing a shower niche, bordering a fireplace surround, or separating two contrasting tile patterns on the same wall. It can also wrap a room as a continuous accent line, tying the whole space together.
Choosing the Right Height
Placement height is where many homeowners hesitate, and there’s no single rule, only sensible conventions. Traditional chair rail sits around 32 to 36 inches above the floor, roughly one-third of the wall height in a standard eight-foot room.
For tiled wainscoting in a bathroom, many installers run the field tile to a height of about 36 to 48 inches and cap it with the rail. When the rail tops a backsplash, its position is dictated by the counter and upper cabinets rather than a fixed measurement. The key is consistency: snap a level chalk line all the way around so the rail stays perfectly horizontal, even if your floor or counter is slightly out of level.
How to Install Chair Rail Tile
Installing the trim follows the same principles as setting field tile, with extra attention to the level line and clean grout joints.
- Set and let your field tile cure if the rail caps an existing run, or plan the rail position before you start.
- Measure up from the floor or counter and mark your height at several points, then connect them with a chalk line checked against a long level.
- Dry-lay the rail pieces along the line to plan your cuts and spacing, centering the layout so end cuts on both walls look balanced.
- Spread thinset mortar with a notched trowel, back-buttering each piece for full coverage, and press the rail firmly against the line.
- Use tile spacers to keep grout joints even, then check each section with a level as you go.
- Let the mortar cure, then grout the joints, wipe the haze, and seal the grout and any natural stone once everything is dry.
Cutting the trim cleanly is easier with a wet saw fitted with a quality blade, especially for stone, glass, or mitered corners.
Design Tips for a Polished Look
Coordinate the rail’s finish and undertone with your field tile rather than matching it exactly, since a slight contrast reads as intentional design. A glossy rail against a matte field, or a metallic accent against soft neutrals, draws the eye to that crisp line.
Plan your corners before you buy. Outside corners often need mitered cuts or specialized corner pieces, and some collections sell matching inside and outside corner trims that save you the precise miter work. Buying a few extra rail pieces protects you against breakage during cutting and gives you spares for future repairs.
Maintenance and Longevity
Tile trim is durable and easy to live with. Wipe it down with a mild, non-abrasive cleaner and avoid harsh acids on natural stone rails, which can etch the surface. Reseal stone and grout periodically, especially in wet areas like showers and tub surrounds.
Because the rail sits at a height where it’s frequently touched and bumped, inspect the grout joints occasionally for cracks or gaps and repair them promptly to keep moisture out of the wall. Done well, chair rail tile lasts for decades and remains one of the most reliable ways to give a tiled room a custom, finished character.
Budgeting and Buying Tips
Trim pieces cost more per linear foot than field tile because they’re specialized shapes produced in smaller runs, so factor that into your budget early. Prices vary widely by material, with basic ceramic profiles at the affordable end and natural stone, glass, and metal commanding a premium. Treat any figure you see as a general estimate and confirm current pricing with your supplier.
Measure the full run you need, then add roughly 10 percent for cuts, corners, and breakage. Buying from the same product line as your field tile, or a coordinating collection, helps ensure the colors and finishes work together rather than clashing.
- Confirm the rail’s height and projection so it sits proud of the field tile as intended.
- Order matching corner pieces if the collection offers them, to avoid difficult miters.
- Buy a few spares from the same dye lot for future repairs, since colors shift between batches.
A modest investment in the right trim pays off in a finished edge that looks deliberate and professional rather than cut short.
Prefer to explore on your own?
See how new flooring looks in your actual room in seconds — free, no signup.
Try the free Floor Studio →