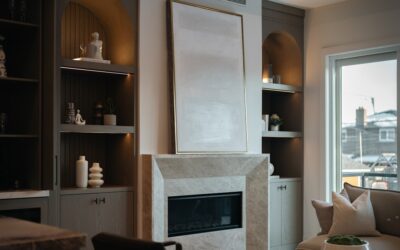
Adding architectural detail to plain walls is one of the highest-impact, lowest-cost upgrades a homeowner can make, and chair rail wainscoting is a time-tested way to do it. The combination of a horizontal chair rail molding with paneling below adds depth, protects walls from scuffs, and lends a room the kind of finished, custom character that flat drywall never has. Whether you want traditional raised panels or clean board and batten, understanding heights, styles, and installation will help you get a result that looks built-in rather than tacked on.
- What Chair Rail Wainscoting Is
- Popular Styles of Wainscoting
- The Right Height for Chair Rail Wainscoting
- What It Costs
- Choosing Materials
- Step-by-Step Installation Overview
- Caulking Is the Secret to a Professional Finish
- Common Mistakes to Avoid
- Tools You Will Need
- Coordinating Wainscoting With the Rest of the Room
- Where Chair Rail Wainscoting Works Best
What Chair Rail Wainscoting Is
Wainscoting is decorative paneling applied to the lower portion of a wall. A chair rail is the horizontal molding that caps that paneling, historically placed at the height where chair backs would hit the wall to prevent damage. Together, chair rail wainscoting refers to the whole lower-wall treatment: the paneling below and the rail on top. The chair rail can also be used alone as a simple horizontal band, but paired with wainscoting it creates a much richer look.
Popular Styles of Wainscoting
Several wainscoting styles pair with a chair rail, each with a distinct feel.
- Raised panel: The most traditional and formal, with beveled panels that project slightly. Common in dining rooms and studies.
- Flat (recessed) panel: Panels set back within a frame; cleaner and more transitional than raised panel.
- Beadboard: Narrow vertical planks with rounded grooves; casual, cottage, and coastal in character. Popular in bathrooms and mudrooms.
- Board and batten: Wide flat panels divided by vertical battens; versatile from farmhouse to modern.
- Shaker: Simple square-edged frames creating clean rectangles; a favorite in contemporary homes.
The Right Height for Chair Rail Wainscoting
Height is where many DIY jobs go wrong. The traditional rule places the chair rail at about one-third the wall height, not simply at 36 inches out of habit. In a standard 8-foot room, that puts the rail around 32 to 36 inches from the floor. In rooms with 9- or 10-foot ceilings, raise it proportionally to roughly 36 to 40 inches so it stays balanced.
Avoid placing the rail at exactly half the wall height; splitting the wall in two equal parts looks static and awkward. The one-third guideline keeps the proportions pleasing. For a taller, more dramatic look sometimes called high wainscoting, the paneling and rail can rise to two-thirds of the wall, common in entryways and dining rooms.
What It Costs
Chair rail wainscoting is budget-friendly compared to most millwork, especially as a DIY project.
- DIY materials: $3 to $10 per linear foot for MDF or pine molding and panel stock.
- Beadboard panels or planks: $1 to $3 per square foot.
- Professional installation: $8 to $20 per linear foot depending on style complexity.
A typical 12-by-12-foot room with wainscoting on all walls runs roughly $200 to $600 in DIY materials, or $1,000 to $2,500 professionally installed. Raised panel and intricate frame-and-panel designs cost the most; simple board and batten or a chair rail with picture-frame molding is the most economical.
Choosing Materials
MDF is the most popular material for painted wainscoting because it is smooth, dimensionally stable, affordable, and takes paint beautifully with no grain to fill. Avoid MDF in high-moisture areas like showers, though it is fine in most bathrooms with good ventilation. Solid wood such as pine or poplar is used when you want to stain rather than paint, or for durability in high-traffic areas. PVC and moisture-resistant boards are the choice for bathrooms, laundry rooms, and mudrooms where humidity is a concern.
Step-by-Step Installation Overview
Board-and-batten and picture-frame styles are the most DIY-friendly. Here is the general workflow.
- Plan and measure. Decide the height, then map panel spacing so the layout is symmetrical on each wall. Mark stud locations.
- Prep the wall. Remove or plan to reinstall baseboard, fill holes, and lightly sand glossy paint.
- Install the base and rails. Attach any base cap, then the vertical battens or panel frames, using construction adhesive plus finish nails into studs.
- Add the chair rail. Run the top rail level across the wall, mitering outside corners and coping or butting inside corners.
- Fill and caulk. Fill nail holes with wood filler, caulk all seams and edges where the trim meets the wall for a seamless look.
- Prime and paint. Prime bare MDF or wood, then paint, typically in a semi-gloss or satin for durability and wipeability.
Caulking Is the Secret to a Professional Finish
The single detail that separates amateur wainscoting from professional work is caulk. Every joint where molding meets molding or the wall should be caulked with a paintable latex caulk and smoothed with a wet finger. This eliminates the tiny gaps and shadow lines that reveal DIY work. Combined with filled and sanded nail holes, thorough caulking makes the whole treatment read as a single, built-in piece rather than assembled parts.
Common Mistakes to Avoid
- Placing the rail at half-wall height. It looks unbalanced; aim for one-third or two-thirds.
- Uneven panel spacing. Plan the layout so panels are symmetrical rather than crammed at the corners.
- Skipping the level check. Floors are rarely level; scribe or shim so the chair rail runs truly horizontal.
- Nailing into drywall only. Hit studs or use adhesive; molding nailed into drywall alone works loose.
- Forgetting to caulk. Uncaulked seams telegraph every gap once painted.
Tools You Will Need
Part of what makes chair rail wainscoting so accessible is that it requires only modest tools, most of which a homeowner already owns or can rent inexpensively. Having the right kit on hand makes the job go smoothly and the result look sharp.
- Miter saw: For clean, accurate angle cuts on the chair rail and battens; the single most useful tool for trim work.
- Brad nailer or finish nailer: Speeds installation dramatically over hand-nailing and leaves tiny holes.
- Level and stud finder: Essential for keeping rails horizontal and hitting framing.
- Caulk gun, wood filler, and putty knife: For the finishing steps that hide seams and holes.
- Tape measure and pencil: For laying out even, symmetrical panel spacing.
If you do not own a nailer or miter saw, both rent affordably by the day, and the investment pays off in a much faster, cleaner job than construction adhesive and hand tools alone.
Coordinating Wainscoting With the Rest of the Room
Chair rail wainscoting looks best when it relates to the room’s other trim rather than appearing in isolation. Ideally, the chair rail profile complements your existing baseboards and door and window casings, tying the millwork together into a cohesive whole. If your baseboards are tall and substantial, a heftier chair rail balances them; with slim modern trim, keep the rail proportional and simple.
Color coordination matters too. The most classic approach paints the wainscoting and trim in a crisp white or off-white while the wall above wears a color, creating contrast that highlights the paneling. A more contemporary look paints the wainscoting and the wall above in the same color for a subtle, monochromatic, architectural effect. In either case, using a durable satin or semi-gloss finish on the wainscoting makes it easy to wipe clean, which is important given that this lower portion of the wall takes the most abuse from furniture, shoes, and hands.
Where Chair Rail Wainscoting Works Best
Dining rooms are the classic home for chair rail wainscoting, where it adds formality and protects walls from chairs. Entryways and hallways benefit from the durability and welcome. Bathrooms suit moisture-resistant beadboard, and staircases look striking with wainscoting that follows the rake of the stairs. Bedrooms and offices gain instant character from a simple board-and-batten treatment.
Done with attention to height, symmetry, and caulking, chair rail wainscoting delivers a dramatic upgrade in curb appeal for a modest investment. It is one of the few projects where a patient weekend warrior can achieve results that look like custom carpentry, adding warmth, protection, and lasting value to nearly any room in the house.